Uncategorized

Landscaping project showing river rocks spread with wheelbarrows, explaining how much is a yard of river rock

How Much Is a Yard of River Rock? (2026 Pricing Guide)

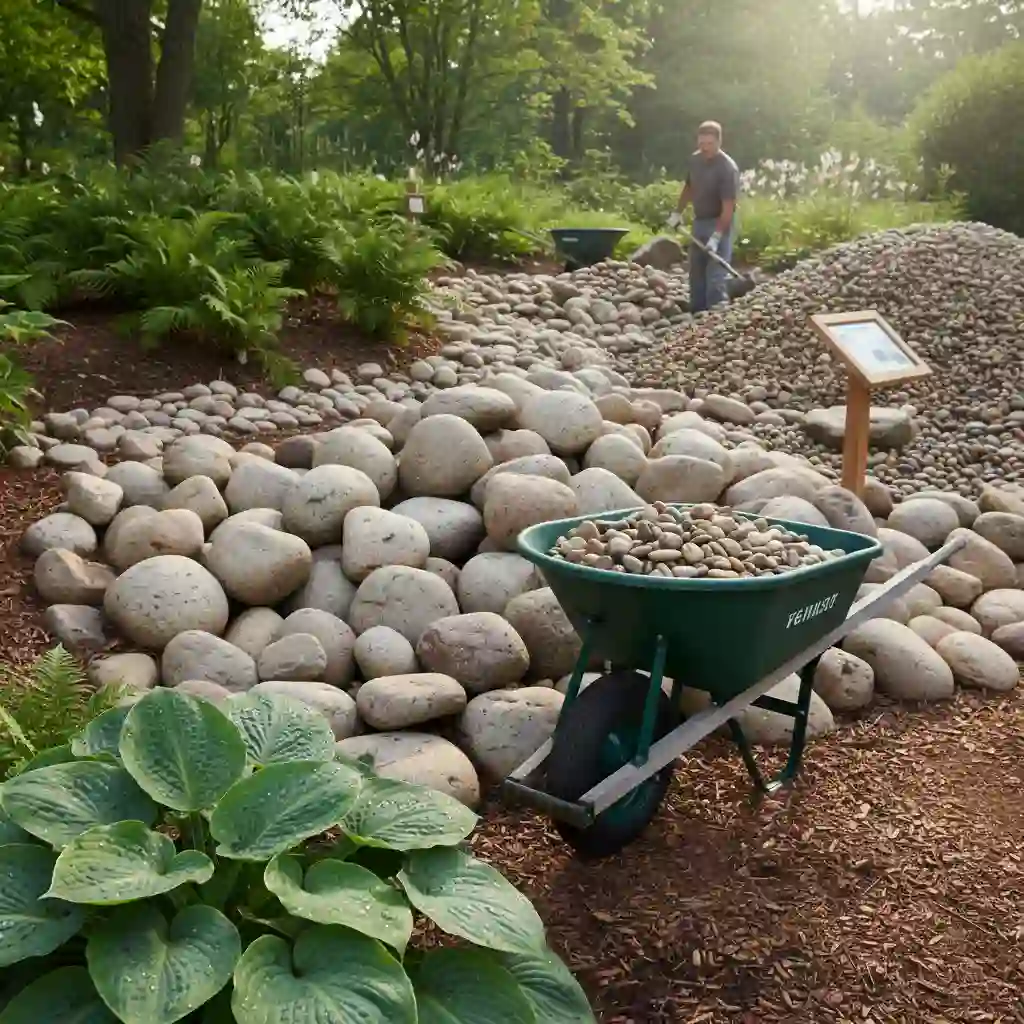
You’re not alone if you’ve ever stood in your yard wondering how much is a yard of river rock and whether it’s really worth the cost.  Most people who own homes agree on one thing: landscaping rocks look great, but the prices can be hard to understand. The right choice for your home isn’t just the sticker price; it’s also how you plan to use it, how much coverage you need, and how much value it will have in the long run. I promise to explain river rock prices in simple terms and give you real numbers you can trust in this guide. You’ll find out how much a yard of river rock costs on average, how much coverage you get, how much it costs to deliver and install it, and how to save money. At the end, you’ll know exactly how much river rock you need for your yard and how to plan for it with confidence. Average Cost of River Rock Per Cubic Yard in 2026 On average, river rock costs $45 to $130 per cubic yard in bulk. The price range depends on rock size, color, type, and your location. Price by Rock Type Rock Type Cost Per Cubic Yard Pea Gravel (3/8″) $35 – $55 Standard River Rock (1–3″) $50 – $80 Large River Rock (3–5″) $65 – $110 Decorative Polished Rock $80 – $130 Mexican Beach Pebbles $100 – $200+ For small garden borders, a few bags may be enough. But for anything larger, a dry creek bed, full backyard coverage, or drainage channel  buying in bulk by the cubic yard is almost always cheaper. River Rock Cost Per Yard vs Per Ton (Which Is Cheaper?) One of the most confusing parts of visiting a rock yard is that some sell by volume (cubic yards) while others sell by weight (tons). So, is it cheaper to buy river rock by the ton or by the yard? Generally, they are roughly equivalent, but here is the math you need to know: one cubic yard of river rock weighs approximately 2,800 to 3,000 pounds (about 1.4 to 1.5 tons). Unit Average Price Range Best For Cubic Yard $100 – $180 Visualizing space (filling a hole/bed) Ton $80 – $130 Determining truck weight limits Buying by the ton is often slightly cheaper at commercial quarries, but for residential projects, buying by the yard makes it much easier to calculate landscaping rock coverage without needing a degree in geology. How Much Area Does One Yard of River Rock Cover? Before you back up the truck, you need to know your square footage coverage. If you spread your rock too thin, the landscape fabric will peek through (which looks messy). If you go too deep, you’re just throwing money into the dirt. A single cubic yard of river rock covers: 160 square feet at a 2-inch depth. 110 square feet at a 3-inch depth (the “Goldilocks” zone for most yards). 80 square feet at a 4-inch depth (recommended for drainage pits or areas with heavy foot traffic). Why Rock Depth (2 inch, 3 inch, 4 inch) Matters At Robert’s Complete Care, we always recommend a minimum of 3 inches for river rock. Because these stones are rounded, they don’t “lock” together like crushed gravel. A 3-inch layer ensures that when the stones shift, you still have total coverage over your soil or weed barrier. How to Calculate Landscape Rock Needs Formula: Length (ft) × Width (ft) × Depth (ft) ÷ 27 = Cubic Yards Needed Example Covering a 20 ft × 10 ft garden bed at 3 inches deep: 20 × 10 = 200 sq ft 200 × 0.25 (3″ = 0.25 ft) = 50 cubic feet 50 ÷ 27 = 1.85 cubic yards Round up to 2 yards to account for settling Always add 10% extra for waste and uneven spreading. How Many Bags of River Rock Are in a Cubic Yard? If you don’t have a truck or a place to dump a massive pile of stone, you might be looking at a bag of landscape rocks from a big-box store. This is the most expensive way to buy rock, but it is convenient for small touch-ups. Most standard bags are 0.5 cubic feet. Since there are 27 cubic feet in one cubic yard, you would need 54 bags to equal just one yard of bulk rock. Bulk Cost: ~$130 per yard. Bagged Cost: ~$250 – $400 per yard (when buying 54 bags). If your project requires more than 15 bags, it is almost always cheaper to pay for a bulk delivery. River Rock Delivery Cost Per Yard Delivery is one of the costs that catches homeowners off guard the most, so don’t forget about it. Most landscaping suppliers charge a delivery fee in addition to the cost of the materials. This fee can be very different depending on how far away you are from their store. Most suppliers charge a flat fee of $50 to $150 for deliveries that are 10 to 20 miles away. If you live outside of their free delivery area, you should expect to pay an extra $5 to $10 per mile. Also, remember that many suppliers have a minimum order size for delivery, which is usually 1 to 2 cubic yards. This means that a small order may not be able to be delivered. If you need the rock right away, rush or same-day delivery can add $50 to $100 to the cost, depending on the company. Installed Cost of River Rock Per Yard Want a pro to handle it? Here’s what full installation costs: Item Cost River Rock (material) $45 – $130/cu yd Weed barrier $0.20 – $0.50/sq ft Labor to spread $50 – $100/hr or $1–$3/sq ft Site prep $50 – $150 Total installed estimate $150 – $400/cu yd If you’re in Southern California and want professional results without the hassle, Robert’s Complete Care offers Expert Hardscaping in Whittier, CA  from grading and edging to full river rock installation.

How Much Is a Yard of River Rock? (2026 Pricing Guide) Read More »

Fixing overwatered plants by repotting houseplants with soggy soil on a wooden table near a bright window

How to Fix Overwatered Plants?

It’s terrible to see a favorite houseplant start to die, especially when you understand that your “kindness” (too much water) is what caused it. Plants die most often because they get too much water, but the good news is that most plants are tough. You can fix things if you see the signals early. At Robert’s Complete Care, we believe that every thumb can be green with the right knowledge.  Whether you are dealing with a soggy succulent or a drooping fern, this guide will show you exactly how to fix overwatered plants and restore balance to your indoor jungle. Can You Overwater Plants? Yes, absolutely! While it seems like giving your plants plenty of water would keep them healthy, too much water can actually drown them. Plants need oxygen at their roots to survive, and when soil stays constantly wet, it fills up all the air pockets. This creates oxygen deprivation in roots, which weakens the plant and opens the door to serious problems like root rot. Think of it this way: just like you can’t breathe underwater, plant roots can’t breathe in waterlogged soil. When roots sit in soggy soil for too long, they start to suffocate and decay. This is why finding the right watering balance is crucial for plant health. Different plants have different water needs. Succulents and cacti, for example, need very little water, while ferns and tropical plants prefer more moisture. Understanding your specific plant’s requirements is the first step to avoiding overwatering problems. How to Tell If Plants Are Overwatered Knowing what an overwatered plant looks like can help you catch the problem early. Here are the telltale signs of overwatered plants: Visual Symptoms The first symptom of trouble is usually yellow or brown leaves. Leaves from plants that have been overwatered feel soft and may even become slimy, unlike the crispy, dry leaves of plants that have been underwatered. Many people who own plants think their plants need more water when they see them wilting, even while the soil is wet. Edema looks like little lumps on leaves that are like blisters. This happens when the roots take in water more quickly than the plant can use it, which makes cells explode. The leaves may also get brown or black patches that spread over the leaves. Root and Soil Indicators The finger test is your best friend here. Stick your finger about two inches into the soil. If it feels wet or muddy, you’re overwatering. Healthy soil should feel slightly moist but never soggy. When you check the roots (if possible), healthy ones should be white or light tan and firm. Mushy or brown roots are a dead giveaway of overwatering and potential root rot. They may also give off a rotten, unpleasant smell. Other Warning Signs Fungus gnats, those tiny flying insects around your plant love damp conditions. If you see them hovering near the soil surface, it’s a sign the soil is staying too wet. Green algae or mold growing on the soil surface is another red flag that screams overwatering. How to Bring a Plant Back to Life After Overwatering If you’re wondering how to help an overwatered plant, start with these immediate steps. Step 1: Stop Watering Overwatered Plants This is the most important step. Do not water again until the soil dries out properly. Many plants need time, not more moisture. Step 2: Check Soil Moisture the Right Way Use the moisture check finger test: Push your finger 2 inches into the soil If it feels wet or muddy, wait Only water when the soil feels lightly dry This simple test prevents repeat damage. Step 3: Improve Airflow and Light Move the plant to a bright area with indirect light. Better airflow helps excess moisture evaporate faster and reduces the risk of fungal problems. Proper Watering Techniques for Yellowing Plants Yellow leaves are a common result of overwatering. While it’s tempting to keep watering, the solution is usually the opposite. Best practices include: Water deeply but less often Always empty saucers under pots Use a pot with drainage holes Adjust watering by season (less in winter) If you’re caring for indoor vines, this pairs well with tips shared in our previous guide, How to Care for a Pothos Plant, which explains moisture balance in detail. Overwatering vs Underwatering (Comparison Table) Feature Overwatered Plant Underwatered Plant Soil condition Wet, soggy soil Dry, crumbly soil Leaf color Yellow, pale Brown, crispy Wilting Yes, even when wet Yes, from dryness Root condition Mushy or brown roots Dry, brittle roots Pot weight Heavy Light This comparison helps answer a common question: how to tell if a plant is overwatered or underwatered. Rescue Techniques for Wilting Plants Sometimes, just waiting isn’t enough. If the soil stays wet for days, you need to intervene. The Paper Towel Trick: Take the plant out of its pot and wrap the root ball in newspaper or thick paper towels. These will wick away the excess moisture. The “Tampon” Method: Strangely enough, placing a few tampons into the soil can help absorb deep-seated moisture quickly without disturbing the roots. The Fans: Set up a small desk fan to blow air across the soil surface. This speeds up evaporation. How to Save Overwatered Plants With Root Rot Root rot is the most serious consequence of overwatering, but can a severely overwatered plant be saved. Identify Root Rot Early The key is catching it early. Root rot symptoms include mushy or brown roots that fall apart when touched, a foul smell from the soil, and rapid decline in the plant’s overall health. The sooner you address it, the better your chances of saving the plant. Complete Root System Overhaul Remove the plant from its pot and wash away all soil under lukewarm running water. This lets you see exactly which roots are affected. Healthy roots are firm and white; rotted roots are brown, black, or gray and feel mushy. Cut away all affected roots using sterilized scissors or

How to Fix Overwatered Plants? Read More »

How to trim bushes using hedge shears for clean and healthy shrub shaping

How to Trim Bushes: A Complete Homeowner’s Guide

Well-trimmed bushes do more than make your yard appear nice. They make plants stronger, keep them from getting sick, and shape your outdoor space in a way that keeps your garden healthy for a long time. One of the easiest landscaping techniques for homeowners to learn is how to trim bushes. This is also one of the easiest ways to make your property look better from the street. This book goes over how to trim shrubs, how to shape them, when to do it, safety considerations, and even the basics of pruning palm trees. This page gives you straightforward, useful advice you can trust, whether you’re taking care of little bushes or big palms. Why do you need to cut back bushes? Think of trimming bushes like getting a haircut for your plants. Just as regular trims keep your hair healthy and styled, trimming bushes serves several important purposes that go beyond aesthetics. Promotes Healthy Growth Trimming shrubs on a regular basis makes them stronger. When you cut off dead or broken branches, the plant may put all of its energy into creating new, healthy growth. Those aged, dying branches are like energy vampires; they consume nutrition but don’t give anything back. You’re giving your bushes a new start by clipping them off. Prevents Disease and Pest Problems Pests and diseases love to hide in shrubs that are too big. Branches that are thick and twisted hold in moisture and block air flow, which makes it easier for fungi and insects to grow. Regular trimming makes the plant’s canopy more open, which lets air and light reach all regions of the bush. This little thing to perform can help you avoid having to pay for pest control later on. Maintains the Desired Shape and Size Bushes don’t develop in perfect shapes on their own. If you don’t trim them regularly, they can get too big, uneven, or block windows and walkways. Strategic pruning lets you control the size and shape of your bushes so that they fit precisely into your landscape design without getting in the way of other plants or structures. Before You Start: Important Things to Know You need to know the “why” and “when” before you grab your shears. Not all plants are the same! You can accidentally take off next year’s flowers if you trim at the incorrect time. When Can You Trim Bushes? The best time to trim bushes is usually in late winter or early spring, when they are still dormant. This allows the plant time to repair before it grows a lot in the summer. But if your bushes have flowers, wait until the flowers are gone before you do anything. Pruning Safety Gear Don’t start a job without the necessary safety gear. You should always wear: Heavy-duty gloves to keep thorns and scrapes from getting to you. Goggles to protect your eyes from flying twigs. Wear long sleeves and pants to keep sap and bugs from bothering your skin. Tools You’ll Need for Bush and Palm Trimming Using the right tools keeps plants healthy and keeps you safe. Basic Bush Trimming Tools Hand pruners for small branches Hedge shears for shaping Loppers for thicker limbs Tools Needed for Palm Tree Pruning Pole saw for high trimming Pruning saw for thick fronds Gloves, goggles, and pruning safety gear Sharp, clean tools make smoother cuts and reduce disease spread. How to Trim Bushes and Hedges Correctly Learning the best way to trim a bush comes down to method and patience. Remove Dead or Damaged Branches Cut off any branches that are damaged, sick, or dead first. This lets more air flow through and helps the plant grow in a healthy way.. Shape From the Bottom Up Cut it so that it is wider at the base and narrower at the top. This allows the sun to shine on all areas of the bush and keeps the lower branches from being bare.. Trim Lightly and Evenly Cut little pieces and then step back often. One of the most common mistakes homeowners make is cutting too much. How to Shape Bushes for a Clean Look Knowing how to shape bushes gives your yard a professional appearance. Popular Bush Trimming Ideas Rounded shapes for soft landscapes Straight edges for formal gardens Natural shaping for native plants Avoid forcing unnatural shapes. Let the bush’s natural growth guide your trimming style. Palm Tree Trimming: What Homeowners Should Know A lot of homeowners treat palm trees like typical plants, but they need special care. The most important thing to remember while trimming a palm tree is to not cut too much off. When Should You Prune Palm Trees? You should only cut back palm trees when the fronds are entirely dead and brown. Taking away dead fronds keeps pests like mice and scorpions from making their homes in the “skirt” of the tree. How to Trim Palm Fronds Without Killing the Tree Leave green fronds: Never cut off green leaves! The tree needs them for food. The 9-to-3 Rule: Think of a clock. Only remove fronds that are below the 9 and 3 positions. How to trim tall palm trees: This can be dangerous. Use a pole saw for high trimming or call a pro if the tree is near power lines. For a deeper dive into this specific topic, check out our previous guide on How to Trim a Palm Tree. Common Mistakes to Avoid Even experienced gardeners make mistakes when trimming bushes. Learning from others’ errors saves you time, money, and dead plants. Topping or Over-Trimming Cutting back branches to stubs at the top is one of the worst things you can do to a shrub. This method makes the plant grow back weakly, produces unattractive stubs, and puts a lot of stress on it. Instead of leaving stubs, always cut back to a lateral branch or bud. Trimming at the Wrong Time If you prune flowering shrubs at the incorrect time, you won’t get any blooms.

How to Trim Bushes: A Complete Homeowner’s Guide Read More »

Woman planning how to design a garden using layout drawings, plants, and tools in a backyard setting

How to Design a Garden? A Complete Beginner’s Guide

Have you ever dreamed your yard could be more than just grass and dirt? You could have imagined lovely flowers, comfortable places to sit, or fresh veggies blooming just outside your door. Anyone can make a beautiful outdoor environment with the correct planning and understanding. Designing a garden isn’t just for professional landscapers. Learning how to design a garden gives you a lot of options, whether you have a small balcony or a big backyard. This guide will help you make a garden that is both beautiful and useful by teaching you everything from how to understand your space to how to choose the right plants. Let’s get started and find out how to turn your outdoor space into the garden of your dreams. Learn About Your Garden Space   You need to be a detective in your own yard before you plant any seeds or acquire any supplies. Getting to know your garden space is like getting to know a new friend: the more you learn, the better your connection will be. Learning about Garden Zones and Microclimates Microclimates give your garden its unique identity. These are little spots in your yard where the weather is a little different from the rest of the yard. For instance, the sunny place on your south-facing wall stays warmer and drier than the gloomy spot under your big oak tree. Based on temperature, garden zones advise you which plants will grow well in your location. The USDA Plant Hardiness Zone Map splits the country into distinct zones. Knowing which one you’re in will help you choose plants that will not only survive but also do well. It takes less than a minute to determine your zone by searching online using your zip code. Tracking the Sun and Garden Aspect The garden aspect is a fancy way of saying which way your garden faces. This is important since it changes how much sun your plants get. Spend a day monitoring how the sun moves around your yard. Write down which areas get: Full sun means at least six hours of direct sunshine. Partially sunny (3 to 6 hours) Less than 3 hours of shade The sun in the morning is softer than the sun in the afternoon, which is important for fragile plants. Take pictures all day or draw a simple map that shows where the sun and shade are. When you pick plants later, this information will be very helpful. Great Gardening Advice for FREE Want to hear a secret? You don’t have to do everything by yourself. Your local Cooperative Extension office can help you with gardening questions that are relevant to your area. These professionals know your soil, weather, and the pests that are a problem in your area. You can also join local gardening clubs or online groups where more experienced gardeners talk about what worked and what didn’t for them. People who have already made the mistakes you’re destined to make can sometimes teach you the best lessons. You can see how your space will look before you spend any money with free online tools like garden planning applications. A lot of them let you drag and drop plants into a virtual garden to see how they will look when they are fully grown. How to Design a Garden From Scratch   It’s wonderful to start with a clean slate, but it can also be intimidating. To make it easier, picture planning a garden like you would a room in your house. You need “floors” (grass or asphalt), “walls” (hedges or fences), and “furniture” (plants and chairs). Before You Start: Write Down What You Want What do you really want to do outside? Do you want a location for kids to have fun? Are you seeking a peaceful place to read? Do you want to cultivate your own food? Make a list of the things you need. This wishlist will prevent you from overcomplicating your garden arrangement ideas. Garden Design Basics Every Beginner Should Know A good design isn’t only about flowers that look nice; it’s also about how things are put together. Using the ideas of functional outdoor space can make it easier to get around in your garden. Consider the Soil Your garden’s “engine” is its soil. Is it sandy, clay-like, or loamy? Before you start preparing your garden soil and planting, always do a basic squeeze test. If the earth stays in a ball, it’s clay. It’s sand if it breaks apart right away. Adding compost is usually the best way to remedy both! Basic Elements: Grass and Hardscaping The grass is the “negative space” that lets your eyes rest. But if you want a garden design that lasts, you could make your lawn smaller and replace it with wildflower meadows or gravel walks. Before You Start: Make a Wishlist Get everyone who will utilize the garden to sit down and dream big. What do you actually want? Even if it seems impossible, write down everything. You might want to add these things to your wishlist: A garden for vegetables to grow fresh tomatoes Flowers that draw butterflies A fire pit for getting together at night Keeping your neighbors from seeing you Plants that don’t need a lot of care because you travel a lot Color and interest all year long Don’t change anything yet. You can set priorities based on your budget, space, and time after you have your ideal list. But if you don’t know what you want, you’ll wind up with a garden that doesn’t meet anyone’s demands. Consider the Soil We talked about testing, but pH levels aren’t the only thing that matters in soil. Take a look at what is already growing in your yard. Some weeds tell you about the soil: Dandelions like thick clay. Chickweed grows well in soil that is rich and fertile. Thistle grows in locations that are hard to drain and are close together. It takes time to make the soil better. Don’t expect

How to Design a Garden? A Complete Beginner’s Guide Read More »

Professional lawn mowing service trimming grass, showing equipment and care How Much Does Lawn Mowing Cost

How Much Does Lawn Mowing Cost?

A clear price for lawn mowing helps homeowners plan and keeps service providers honest. For an average yard, mowing the lawn costs between $30 and $80 per visit in most parts of the U.S. Less money is needed for small lawns. It costs more to have a big or complicated yard. Prices also vary depending on where you are, how much work you need, and how good the service is. Using real service data, field experience, and pricing models used by professionals like Robert’s Complete Care, we show you how much lawn mowing costs in this guide. The goal is clear. Give you clear numbers, honest examples, and advice you can trust. How Much to Charge for Cutting Grass For professionals, the cost of mowing a lawn must include time, gas, tools, and profit. For homeowners, the same prices show how reliable and hard the work is. Most companies that take care of lawns charge in one of three ways: Pay a set amount for each visit Cost based on the size of the lawn Pay per hour of work Typical prices for mowing a lawn are: For a small lawn, $25 to $40 Medium-sized lawn: $40 to $60 Big lawn: $60 to $100 or more A single mower with basic tools costs less. A crew that is licensed and insured costs more. If the work is worth the price, both can be fair. When customers ask how much does lawn mowing cost, professionals should tell them what the price includes. Only mowing costs less. It costs more to mow, edge, and clean up. Lawn Mowing Cost by Location Location changes prices more than most people think. Costs of labour, fuel, and demand are all important. Areas in cities and suburbs  Prices for lawn mowing go up when there is more demand and higher wages. You should expect to pay between $45 and $80 for each visit. In the countryside  Prices are lower when costs are lower. A lot of jobs in rural areas pay between $30 and $50. Trends in the region  States that are warm have more months of the year. That usually lowers the cost per visit but raises the cost per year. Prices in places like Southern California are higher because of higher labour costs and service standards. This is why professional lawn care services in Whittier often cost more than the national average but are more reliable. How Much It Costs to Mow a Lawn by Size The size of the lawn is the most important factor in the price. It has an effect on time, fuel, and wear and tear on tools. Average costs for mowing lawns of different sizes: $25 to $40 for up to 5,000 square feet $40 to $60 for 5,000 to 10,000 square feet $60 to $90 for 10,000 to 20,000 square feet Cost of mowing an acre of lawn Per-acre pricing is common for big properties. $50 to $70 for a quarter acre For half an acre, it costs between $70 and $100. $100 to $150 or more for 1 acre Prices for mowing lawns per acre go down for very large areas with open layouts. Things like trees and slopes make the cost go up again. When people compare quotes, they should ask if edging and blowing are included. Size alone does not tell the full story. Cost of Labor The main cost of mowing a lawn is labour. Mowing is still a skilled job, even with machines. Hourly labor rates: $30 to $50 an hour for a single worker Crew of two: $50 to $75 an hour Full-service team: $75 to $100 or more an hour Higher rates usually mean that the crews are insured, have better tools, and have set service times. These teams help cut down on missed visits and uneven cuts. During the busy season, the cost of labour also goes up. In the spring and early summer, lawn mowing prices often go up because of demand. Pro Cost vs. DIY Cost A lot of people who own homes want to know if mowing their own lawn saves them money. It depends on the time and the tools you have. Cost of DIY Lawn Mowing:  It seems cheap at first. But the numbers make sense. Cost of a mower: $300 to $800 Fuel or power: $5 to $10 for each mow Cost of upkeep: $100 to $200 a year One to two hours of your time each week If you mow your own lawn, it can cost between $600 and $1,200 over the course of a season. Cost of Professional Lawn Mowing It costs more to hire a pro for each visit, but it’s less stressful. No need to maintain equipment No problems with storage Results that are always the same For a lot of homeowners, hiring a professional saves time and money. Other Things That Change the Cost of Mowing the Lawn Prices for lawns of the same size can be very different. Height and condition of the grass Lawns that are too big take longer and put more stress on tools. Cuts for the first time cost more. Terrain The job takes longer because of slopes, tight corners, and other things in the way. Mowing when the grass is wet Wet grass makes blades dull and clumps them together. A lot of pros don’t do it or charge more if they have to. How often Weekly service costs less per visit than mowing every other week or every month. Access and cleaning up Heavy debris or gated yards make people stay longer on site. Every factor affects the final estimate for mowing the lawn. Mowing Your Way to a Well-Groomed Lawn A clean, even cut does more than make your lawn look better. Mowing the lawn on a regular basis helps the grass grow thicker, keeps weeds down and keeps pests in check. When you don’t mow, the grass gets weaker, and it costs more to fix later. A smart schedule

How Much Does Lawn Mowing Cost? Read More »

Landscape worker spraying shrubs, showing what does landscape maintenance include in professional garden care

What Does Landscape Maintenance Include?

You don’t just get a nice yard by coincidence. It needs regular care, good planning, and the correct balance of services. Good maintenance keeps your plants safe, your grass healthy, and saves you money in the long run by fixing tiny problems before they get worse. If you are asking what does landscape maintenance include, the short answer is this. It includes taking care of plants and lawns, cleaning up, checking the irrigation, and keeping hard features like patios and walks in good shape. A complete plan makes sure that everything works together year after year. This handbook explains everything in simple terms. You will know what to expect, what is most important, and how to pick the best service for your home. What is included in residential landscape maintenance? The major goal of residential maintenance is to keep the outside of homes clean, safe, and healthy. It does a lot more than just cut grass. Most programs call for grass maintenance every week or every other week. That entails cutting the grass at the correct height, edging along the paths, and blowing away trash. This makes the grass thicker and keeps weeds from growing. Taking care of plants is equally vital. Teams cut back trees and shrubs and take away dead growth. This keeps plants healthy and stops homes and fences from becoming damaged. Taking care of the soil is very important. A lot of houses need to fertilize their lawns every season to make up for nutrients that have been lost. Better color and stronger roots come from healthy soil. When people wonder what does landscape maintenance includes, the response is regular care that keeps everything in balance and easy to enjoy. What does landscape maintenance include for clients of Total Maintenance Customers who pay for the whole maintenance get a higher level of service. These plans cover practically everything that isn’t within the house. Along with taking care of the lawn and plants, full plans frequently include checking for pests, controlling weeds, and testing the soil. Instead of waiting for harm to show, problems get treated right away. People check on irrigation systems on a regular basis. Heads are moved around, leaks are identified, and timers are set for the season. This preserves plants and saves water. They also inspect hard places. We clean and check for damage on walkways, borders, and minor walls. This is how a lot of landscape maintenance programs function. They want to be healthy for a long time, not just for a short time. Is All Landscape Maintenance in California the Same Not all services are the same, especially in places with bad weather. North Texas has to contend with heat, clay soil, and storms that come out of nowhere. Plans for maintenance there must deal with stress on grass and plants. A lot of companies utilize a plan that fits everyone. Some people change how they take care of their plants based on the kind of soil, the amount of shadow, and the mix of plants. The second choice is better. Staggs Landscaping and Hadley’s Landscaping are two companies that are known for their understanding of the area. They change the timing and treatments to fit the needs of the area. This is why asking what does landscape maintenance include should always include where the property is located Weekly lawn care? Included! Most plans are based on weekly care. To keep from ripping up the grass, crews use sharp blades to mow. Cleaning the edges of roads and pathways. Clippings are taken care of so they don’t build up. Regular checks also make it easier to find diseases or pests early on. People pay attention to small brown spots or areas that are getting thinner quickly. Companies like Denver Lawn and Landscape urge regular visits because missing weeks can cause tension and uneven growth. Weekly upkeep keeps lawns tidy, safe for youngsters, and easy to take care of. What does taking care of the landscape include? Weed Control and Fertilizing Fertilizer doesn’t just feed the grass; it also feeds the soil. Giving the proper nutrients at the right time makes roots stronger and more colorful. Weed control stops plants that are not native from spreading. This involves treatments before and after, depending on the season. Good crews don’t use too many goods. They focus on the areas that need work and observe safety standards. When clients inquire what landscaping is, fertilization and weed management are always important elements of the response. Taking care of the pond? Sure, why not? You also need to take care of water features. Cleaning up trash, monitoring the pumps, and making sure the water levels are right are all part of pond upkeep. Safe ways are used to control algae. If you don’t take care of things, they will smell bad, the water will be cloudy, and the equipment will break. Checks on a regular basis keep fixes from costing a lot. Some companies, like Mira Vista Landscaping, provide care for water features in their entire designs. It makes things better and keeps them fun. Seasonal Clean-Up? Included! Different needs come with each season. Spring cleanups remove winter trash and prepare beds for development. Fall cleanups remove leaves and prepare plants for the cold. During these visits, people often check on the plants, edge the beds, and mulch. Mulch keeps weeds out and helps the soil hold water. Seasonal work keeps houses clean and stops pests from moving in. Taking care of the irrigation system Water systems are simple to neglect until something goes wrong. Checking heads, lines, and valves is part of maintenance. Timers are changed when the weather changes. Leaks waste water and hurt plants. When heads are clogged, they make dry spots. A good strategy is to check the irrigation a few times a year. This keeps plants safe and saves money on utility expenses. Cleaning and fixing hardscape You should also take care of hard areas. Moss and dirt build up

What Does Landscape Maintenance Include? Read More »

What Is DG In Landscaping?

What Is DG In Landscaping | The Complete Homeowner’s Guide

If you’ve been looking at your yard and wondering how to make it more attractive without breaking the bank, you’ve probably heard about decomposed granite. Most people call it DG, and honestly, it’s one of the best-kept secrets in landscaping. It’s natural, it doesn’t cost a fortune, and it actually fixes the drainage headaches that concrete creates. Whether you’re thinking about building a new pathway or completely redoing your outdoor space, understanding what DG in landscaping really does matters for your project. Robert Complete Care has spent over 15 years doing Whittier landscape installation, and we’ve seen how DG transforms properties. This guide walks you through everything you need to know about DG materials, how to use them, and why they work so well for real homes. Understanding What Is DG In Landscaping How DG Actually Forms Here’s something interesting about decomposed granite. It starts out as solid granite rock, just like you see in mountains. Over years and years, weather beats on that rock. Rain seeps in, the sun heats it up, and winter freeze-thaw cycles do a number on it. Gradually, the granite breaks down into smaller and smaller pieces until it becomes fine particles mixed with sand and silt. That’s basically what DG is. The cool part is that this isn’t some manufactured product. It’s nature doing the work over centuries. You’re using natural material exactly as the earth creates it. Why DG Differs From Regular Gravel A lot of people confuse what is DG in landscaping with crushed granite gravel, but they’re actually pretty different. Crushed gravel has sharp, angular edges that stick out. Those edges don’t lock together. When you walk on crushed gravel, pieces shift and move under your feet. It’s uncomfortable, honestly, and you track it everywhere. Compacted decomposed granite is different because the particles are smaller and rounded. When you compact them properly, they fit together snugly like puzzle pieces. This creates a stable surface that actually holds its shape. You can walk on it barefoot without discomfort. The particles don’t scatter into your neighbor’s yard or end up stuck in your shoes. Natural Colors That Blend In DG comes in colors that actually look good. You’ve got golden and warm brown tones, gray shades, and rust-colored varieties. Where these colors come from matters. They’re determined by the mineral content in the original granite deposits. The warm earth tones make DG blend naturally into landscapes instead of looking out of place like bright crushed gravel or industrial concrete. When you drive through neighborhoods, you can spot homes with DG because the materials look intentional, not cheap. That’s an important difference. Your outdoor space actually looks thoughtfully designed. The Water Infiltration Advantage Here’s where DG really shines compared to other materials. Decomposed granite has tiny spaces between the particles. Water doesn’t sit on top like it does with concrete. Instead, it flows right through and soaks into the ground below. This solves real drainage problems that plague homeowners. Think about what happens when it rains hard. With concrete, water pools up and runs off. With DG, water infiltrates naturally. This means no puddles, no erosion, and no mosquito breeding grounds. In areas where drainage causes problems, this becomes incredibly valuable. You may read What Is Landscaping? Types of Decomposed Granite Natural Decomposed Granite The most affordable option is natural DG straight from the quarry with no additives. This works great for informal pathways, garden beds, and spaces where foot traffic stays light. If you’re on a tight budget, this is what you want. But here’s the honest truth. Natural DG can shift over time in areas with heavy use. Rain and foot traffic gradually move particles around. You’ll need to rake and refresh it periodically. Think of it like raking leaves, but less frequent. For some homeowners, this routine maintenance is fine. For others, it becomes annoying. Compacted Decomposed Granite This version has been mechanically pressed to increase density. The compaction process takes more effort during installation, which means higher labor costs. But you get a surface that holds its shape much better than natural DG. It handles moderate foot traffic without shifting around. Once it’s properly installed and compacted, you can walk on it more comfortably than natural varieties. The surface stays firmer longer. For most residential applications, compacted decomposed granite hits a sweet spot between cost and performance. Stabilized DG Stabilized DG includes a binding agent that locks particles together permanently. Different types of stabilizers exist. Some use polymeric compounds that bind particles without creating a hard shell. Others use resin-based products that create maximum durability. You get to choose based on your needs. Stabilized DG resists erosion way better than other types. It handles heavy foot traffic without issues. A properly installed stabilized DG surface lasts 10-15 years or longer with minimal maintenance. The trade-off is higher cost, but for driveways and high-use areas, stabilized products deliver real value that justifies the expense. Color Choices for Different Styles You get options when picking DG colors. Golden hues work well with warm-colored home exteriors. Gray tones match modern designs perfectly. Rust and brown shades enhance natural garden settings beautifully. Your choice really depends on what color your house is and what kind of look you want overall. Don’t underestimate this part. The right color makes your whole yard look intentional. The wrong color sticks out like a sore thumb. Using Decomposed Granite in Landscaping Creating Pathways and Walkways Pathways are where most people use DG first. The material creates smooth, comfortable walking surfaces that actually feel nice underfoot. The texture won’t embed in your shoes like gravel does. The natural color complements plants and hardscapes beautifully. A well-designed DG pathway guides visitors through your yard while looking attractive and serving a real purpose. When you’re planning a pathway, width actually matters. Three feet works for one person walking comfortably. Four feet lets two people walk side by side without bumping shoulders. You also need sturdy edges using landscape edging, brick,

What Is DG In Landscaping | The Complete Homeowner’s Guide Read More »

How to Install a Lawn Irrigation System – Step-by-Step Guide

How to Install a Lawn Irrigation System | A Complete Step-by-Step Guide

To keep your lawn thriving and lush, you need to water it, but if you can’t install an irrigation system, then you can either water it by yourself or make use of portable sprinklers, which not only take time but also may not be effective enough to provide your lawn with enough water. This has encouraged many individuals to think about investing in lawn sprinklers installed right in their lawns. And if you are contemplating doing your irrigation system installation by yourself, this guide on How to Install a Lawn Irrigation System will walk you step by step through all those processes, from planning to designing, testing, and maintaining your irrigation system. This is applicable whether you are upgrading your old irrigation system or deciding to go with a new one. Plan Your Irrigation System Layout Installing without first planning can be costly. Before you go out and install anything, planning is crucial. Measure Your Lawn Take measurements of the entire yard. Draw its layout, including: All trees and plants Lawn Areas House and pathways Flower beds/trees Slopes or Uneven Spots This will ensure that measurements are accurate, and pipe lengths and coverage by sprinklers are correct Determine Water Pressure & Flow Rate The water pressure you can provide will dictate how many sprinklers you can simultaneously operate. Use a water pressure gauge at an outdoor faucet Ideal pressure: 40–60 PSI Determine the flow rate by measuring how long it takes to fill a 5-gallon bucket This information will enable you to size zones appropriately. Choose Your Sprinkler Types Different lawns require different heads Rotor heads –excellent for open floor plans Pop-up spray heads – , which are excellent for small/medium lawns Drip lines –ideal for flower beds and bushes Mix and Match based on your yard layout. Create Irrigation Zones A zone is an area of your lawn that irrigates at the same time. The division of your lawn into zones will provide you with equal water pressure and tailored watering cycles. How to Design Zones Areas with same themes/notes/gotoops Sunlight Grass/shrub type Soil type Either Watering requirements For instance, some parts may need less water if they are under shades. Typical Zone Layout Front lawn =1-2 zones Backyard = 2-3 zones Garden beds = 1 drip zone Side yards = 1 zone An average home typically will contain 4-6 irrigation zones. Gather the Materials and Tools For a basic lawn sprinkler installation, you’ll need: Materials PVC or polyethylene piping PVC fittings, such as elbows, tees, Zone valves Valve box Backflow preventer Rotor/spray heads, also referred to as Drip irrigation tubing (optional) Controller/time Pipe glue and primer PTFE tape Tools Shovel or trenching tool Pipe cutter Screwdriver Measuring tape Stakes and string Wire connectors Multi-meter (for wiring tests) This speeds up the whole installation process. Mark Sprinkler Locations The locations of each sprinkler head should be marked with stakes or with spray paint. Space rotor heads 20–30 feet apart Space spray heads 8–15 feet apart Ensure coverage overlaps (this is called head-to-head coverage) Avoid placing heads behind obstacles like trees or walls A balanced layout prevents dry spots and overwatering. Dig Trenches for Your Irrigation System Now it’s time for the physical labor. Digging Depth Typical depth: 6–12 inches Expand into colder regions to protect your pipes from freezing You may dig by hand or use a trenching machine if you need it faster and dirtier. Trench Tips Keep trenches straight Avoid sharp pipe bends Remove rocks that could damage pipes Don’t place sprinklers too close to sidewalks—they may overspray Install the Main Water Line and Valves Connect to the Water Source You can connect through: Outdoor spigot Main water line Well system (if applicable) For permanent setups, tapping into the main line provides more consistent water supply. Install the Backflow Preventer This device prevents contaminated water from re-entering your home’s drinking water supply. Mount it above ground according to local plumbing codes. Install Zone Valves Zone valves are used to control water supply into irrigation sectors. Install them at: Within a valve box In an accessible area Near the mainline but hiding in the landscape The valves will be connected by wiring to your controller. Lay the Pipes Lay PVC or poly pipes in the trenches. Steps Set up piping based on your zone plan Connect piping with fittings Use primer and glue for PVC Secure all joints tightly Make sprinklers accessible by leaving risers Prevent air pockets and right angles. Tip The poly piping is more flexible and easier to handle if you are new at making waterfalls, while PVC piping is stiffer and more durable. You may read 5 Types of Irrigation Systems You Must Know for Your Property. Install Sprinkler Heads Connect sprinkler bodies to risers. Adjust Heads Put them at ground level, Too Low → Blocked by Grass Too high → Risk of Breakage Angle and path of spray prior to burial. Check Spacing The sprinklers should slightly overlap each other in terms of spray coverage. Wire the Valves to the Controller This is the electrical aspect of your water irrigation system. Basic Wiring Steps Use Waterproof Connectors All valves’ hot wire must be connected to its terminal All common wires need to be connected and attached to the “Common” terminal. Mount either indoors with the controller or in an outdoors weather-proof box “Programmable timers enable Manual run Automatic schedules Seasonal adjustments Rain sensor integration Flush and Test the System Before you bury anything, it is imperative to test your setup. Flush the Pipes Remove sprinkler heads and operate water system to rinse dirt and detritus. Test Each Zone Check: Water pressure Spray patterns Uniform coverage Leaks at pipe joints Carry out adjustments of spray angles and arcs. After all is functioning, lock all sprinklers and fill all trenches. Set Your Watering Schedule Watering smart optimizes water usage and maintains your lawn health. Suggested Schedule Early morning waterings are most effective Watering 2-3 times per week depending on climate Raise frequency in summer

How to Install a Lawn Irrigation System | A Complete Step-by-Step Guide Read More »

Beautiful backyard with lush green new lawn and swimming pool area showing the final result and cost for a new lawn installation.

How Much Does It Cost for a New Lawn?

If your yard looks tired or patchy, you might be thinking about starting fresh. But before you grab your shovel, the first question most homeowners ask is simple: how much does it cost for a new lawn? At Robert’s Complete Care, we help homeowners and businesses create healthy, beautiful lawns every season. The cost for a new lawn depends on several factors like grass type, soil condition, and lawn size. Below, we’ll break down real pricing insights so you can plan your project with confidence. What’s the Average Cost to Install a New Lawn? In Whittier and across Southern California, installing a new lawn typically costs between $4,000 and $9,000 for an average 2,000-square foot yard. Here’s a quick breakdown: Sod installation: $1.50–$3.50 per sq. ft. (includes prep and labor) Seeding: $0.50–$1.50 per sq. ft. Artificial turf: $6–$12 per sq. ft. The total lawn installation cost depends on your soil preparation needs, irrigation setup, and the types of grass lawns you choose. Sod is more expensive upfront but delivers instant results, while seeding costs less but takes patience. Key Factors That Affect the Cost of a New Lawn The cost of a new lawn isn’t one-size-fits all. Several factors influence how much you’ll pay: Lawn size: Larger lawns cost more overall but less per square foot due to bulk pricing. Type of grass: Warm-season grasses like Bermuda or St. Augustine are common in Whittier. Each variety has its own price and maintenance needs. Soil condition: Poor or compacted soil needs grading and topsoil, which adds to the cost. Labor rates: Professional crews in California typically charge $60–$100 per hour for installation and prep work. Access and slope: If your property is hard to reach or sloped, more labor and equipment are needed. These details help determine the true lawn installation cost for your property. Cost Breakdown by Lawn Installation Method Homeowners can choose from three main methods to install a new lawn: seeding, sodding, or turf. Here’s what each involves and how much it costs. 1. Seeding Cost: $0.50–$1.50 per sq. ft. Best for: Budget-conscious homeowners Pros: Affordable and easy to DIY Cons: Takes 2–3 months to fully grow 2. Sodding Cost: $1.50–$3.50 per sq. ft Best for: Quick results and erosion control Pros: Instant green lawn, fewer weeds Cons: Higher upfront cost, needs daily watering at first 3. Artificial Turf Cost: $6–$12 per sq. ft. Best for: Low-maintenance or commercial properties Pros: No mowing, minimal water use Cons: High initial investment, can get hot in sun For commercial properties, commercial lawn care services often recommend turf because it saves on long-term maintenance and water costs in California’s dry climate. New Lawn Cost by Size and Square Footage Lawn installation is often priced by square footage. Here’s a quick reference for Whittier homeowners: Lawn Size Seeding Sod Artificial Turf 500 sq. ft. $250–$750 $750–$1,750 $3,000–$6,000 1,000 sq. ft. $500–$1,500 $1,500–$3,500 $6,000–$12,000 2,000 sq. ft. $1,000–$3,000 $3,000–$7,000 $12,000–$24,000 These are average figures, but actual costs depend on the types of grass lawns and any site prep needed. Cost by Type of Grass or Turf Material Choosing the right grass is key to balancing beauty and budget. Here’s what Whittier homeowners typically pay: Bermuda grass: $0.35–$0.85 per sq. ft. (heat-tolerant and durable) Tall fescue: $0.40–$0.90 per sq. ft. (lush and drought-resistant) St. Augustine: $0.60–$1.10 per sq. ft. (great for shaded areas) Zoysia: $0.50–$1.20 per sq. ft. (soft texture, slow-growing) Artificial turf: $6–$12 per sq. ft. (long lifespan, minimal upkeep) Different lawn grass types have varying installation and maintenance needs. Bermuda is popular for sunny spots, while fescue works best in shaded or cooler areas. Labor Costs vs. DIY Lawn Installation Some homeowners try DIY seeding or sod installation to save money. However, hiring professionals often pays off in the long run. DIY cost: About 40–50% cheaper, but you handle soil prep, irrigation setup, and leveling. Professional labor cost: $1.00–$2.50 per sq. ft., depending on site conditions. Professional installers, like Robert’s Complete Care, ensure even grading, proper irrigation, and healthy soil saving you from costly mistakes later. For larger properties or commercial lawn care, pro installation guarantees a consistent and polished look. Additional Costs and Considerations to Plan For Beyond basic installation, a few hidden costs can affect your total lawn installation cost: Irrigation system installation: The cost to install lawn sprinkler system ranges from $2,000–$4,000 depending on size. Soil improvement or topsoil: Adding quality soil can cost $20–$40 per cubic yard. Debris removal or grading:  Expect $500–$1,200 for clearing and leveling. Edging and borders:  Decorative edging costs $5–$15 per linear foot. Pool fill-ins: The cost to fill in a swimming pool and convert it to lawn space ranges from $5,000–$10,000. Adding these costs upfront prevents surprises once your project begins. Regional Price Differences for New Lawn Installation Whittier’s warm, dry climate affects pricing and grass selection. Because of California’s water restrictions and labor rates, costs are slightly higher than the national average. Southern California average: $2–$4 per sq. ft. for sod National average: $1.50–$3 per sq. ft. However, professional Lawn Installation Services in Whittier use region-specific materials and drought-tolerant grasses, ensuring better longevity and lower water bills. How to Save Money on New Lawn Installation You can still achieve a lush green yard without overspending. Here’s how: Choose the right method: Seeding is cheaper than sod. Prep the soil yourself: Basic clearing can save labor costs. Install in cooler months: Spring or fall installations need less water. Compare quotes: Get at least three estimates from local pros. Opt for drought-tolerant grass: Reduces water bills long-term. Signs It’s Time to Replace Your Old Lawn You might not always need a full replacement. But these signs mean it’s time: Bare or brown patches that won’t recover Pest or disease damage across most of the yard Water runoff or poor soil drainage Repeated weed growth despite treatment If these problems persist, replacing the lawn can restore beauty and value to your home. Get a Professional Lawn Installation Estimate in Whittier, CA If you’re ready

How Much Does It Cost for a New Lawn? Read More »

A landscaper leveling soil and preparing the ground for new sod installation in a well-designed garden area with plants and stone edging.

What Is a Landscape Installation?

Landscape Installation is the procedure of transforming the outdoor design idea into a reality. It involves the preparation of the land by laying out plants, constructing walkways, installing lighting as well as creating an outdoor setting that homeowners envision. Each step needs careful planning, high-quality materials, and skilled craftsmanship. At Robert’s Complete Care we specialize in transforming barren yards into functional and attractive landscapes. If you’ve ever pondered what is an installation in the landscape the following guide will help you understand everything from the initial shovel to the final edges of lighting and edging. Why Landscape Installation Is Important Landscape installation is more than just enhance the appearance of your yard. It enhances property value and enhances outdoor living and improves the overall health of the environment. A landscape that is well-planned and maintained reduces the erosion of soil, enhances drainage and helps to ensure sustainable development of plants. Professional installation ensures that you have a well-planned irrigation plan, as well as hardscapes and plants are in sync. If you don’t plan it properly even the most elegant design could be a failure. This is why hiring experienced installers such as Robert’s Complete Care will help avoid costly mistakes and makes sure your investment lasts for many years. Steps Involved in Landscape Installation Landscape installation follows a series of clear steps to achieve a smooth and lasting result. Whether it’s a small garden or a full property transformation, each stage matters. Site Evaluation and Planning The process begins with a detailed site inspection. Professionals check the soil type, drainage, sun exposure, and slope. These details help determine what materials and plants will thrive best.  Site Preparation Before installation starts, the area is cleared of debris, weeds, and old structures. Proper grading ensures water drains away from your home and prevents pooling after rain. Hardscape Construction Once the ground is ready, walkways, patios, retaining walls, and borders are built. Installing landscaping timbers or concrete edges provides structure and shape to the design. Proper landscaping timber installation adds strength and helps define different zones in your yard. Irrigation and Drainage Systems An efficient irrigation system ensures plants get the right amount of water without waste. During this step, underground pipes, sprinklers, and drip systems are installed. Planting and Mulching This is when your landscape comes to life. Plants, trees, and shrubs are arranged according to the design. Mulch is added to retain moisture and improve soil quality. Landscape Lighting Installation Outdoor lighting enhances beauty and safety. Landscape lighting installation includes pathway lights, accent fixtures, and spotlights for trees and architectural features. Many homeowners also install low voltage landscape lights, which save energy and highlight focal points without overwhelming brightness. Final Touches and Clean-Up The last stage includes installing landscape edging, cleaning debris, testing irrigation systems, and ensuring everything functions perfectly. Once complete, the space is ready to enjoy. Main Elements of a Landscape Installation A well-designed landscape is a blend of natural and constructed elements. Each plays a specific role in the look and function of your outdoor space. Softscape This includes living elements trees, grass, flowers, and shrubs. The right combination adds texture, color, and seasonal variety. Hardscape Hardscape refers to non-living features like patios, driveways, walkways, and retaining walls. They provide structure and accessibility. Lighting Good lighting brings the landscape to life after sunset. It adds drama, improves security, and makes outdoor spaces usable at night. Irrigation A well-installed irrigation system supports healthy plant growth. It reduces water waste and keeps maintenance simple. Borders and Edging Installing landscaping timbers or stones defines planting beds and keeps grass from spreading into garden areas. Proper edging gives the landscape a finished look. Landscape Design vs. Landscape Installation Landscape design and installation are often confused, but they’re very different stages of a project. Landscape Design is the creative planning stage. Designers create a layout that includes plant placement, lighting, pathways, and features. Landscape Installation is the hands-on work that turns that design into a real space. In short, design is the blueprint installation is the build. Both are essential for a successful outdoor transformation. Residential and Commercial Landscape Installation Landscape installation isn’t one-size-fits-all. The process varies between residential and commercial properties. Residential Installation For homes, the focus is on comfort, beauty, and functionality. Projects may include patios, lawns, flowerbeds, or small water features. Homeowners often want low-maintenance designs that look great year-round. Commercial Installation Commercial projects are larger and require more durable materials. Business properties need professional curb appeal, efficient irrigation, and sustainable plantings that reduce long-term upkeep costs. Whether it’s a backyard or a business frontage, Robert’s Complete Care tailors each installation to the client’s goals and local climate. Modern Trends in Landscape Installation The landscaping world continues to evolve with new ideas and sustainable practices. Here are some popular trends: Eco-Friendly Installations Homeowners now prefer native plants that require less water and chemicals. Using recycled materials for walkways and landscaping timber installation reduces waste.  Smart Irrigation Systems Modern irrigation controllers use weather data to adjust watering schedules automatically saving water and money. Outdoor Living Spaces More families are turning their yards into functional extensions of their homes. Think patios, fire pits, and built-in seating. LED and Solar Lighting Energy-efficient lighting like install low voltage landscape lights offers beautiful illumination while minimizing energy use. Minimalist Design Simple lines, clean borders, and natural materials are replacing cluttered, high-maintenance landscapes. Landscape Installation Cost Guide The cost of landscape installation depends on project size, materials, and complexity. Small projects like garden beds or new sod installation can start around $2,000 to $5,000. Mid-range installations with hardscaping, irrigation, and lighting may range from $10,000 to $25,000. Full property transformations can exceed $50,000, especially with custom features and high-end materials. Prices also vary based on the region, soil condition, and plant types. When to Hire a Professional Landscaper DIY projects can be fun, but professional landscapers bring precision, efficiency, and long-term reliability. You should hire a landscaper when: Your project includes irrigation or lighting systems.

What Is a Landscape Installation? Read More »