Landscape Design

Explore expert tips and inspiration on creating custom landscape designs for front yards, backyards, and full outdoor transformations.

Landscape garden with pathway and plants grouped in threes demonstrating the rule of 3 landscaping design

What Is the Rule of 3 in Landscaping?

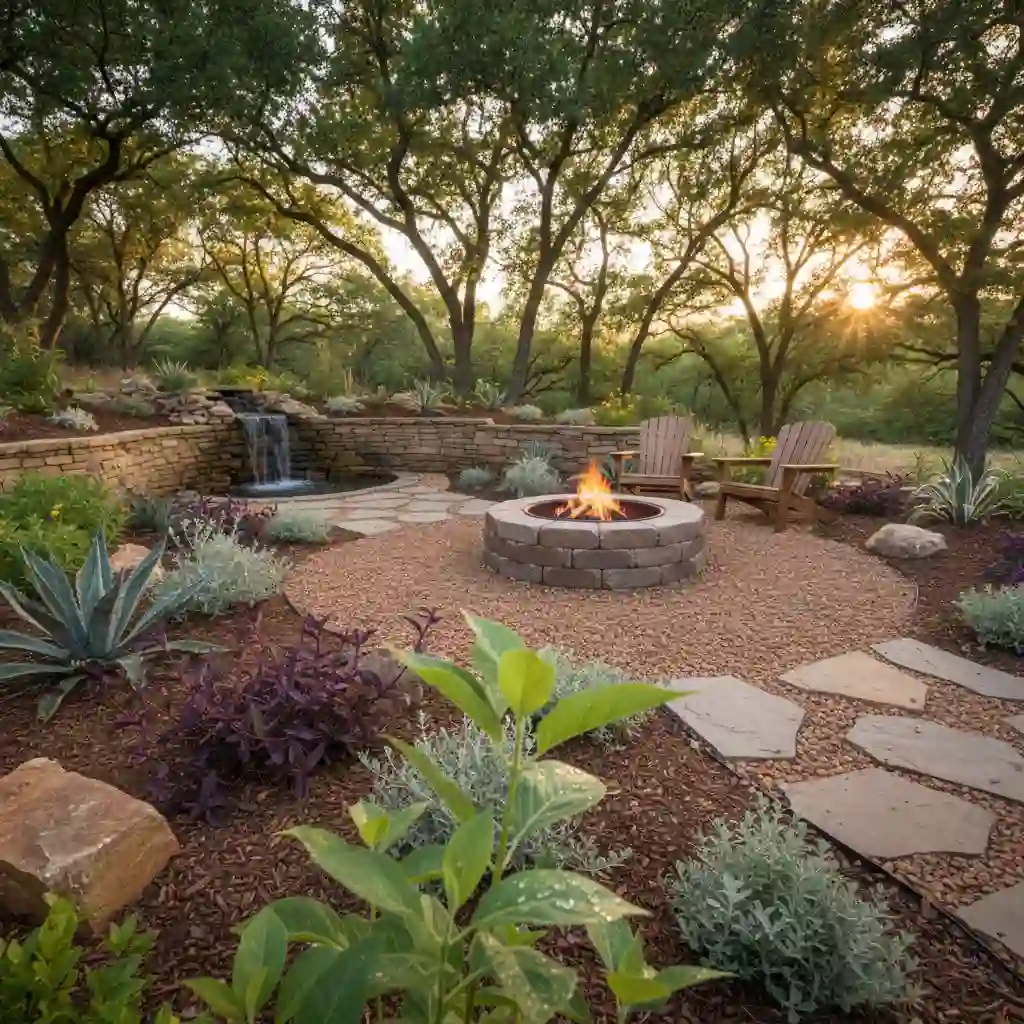
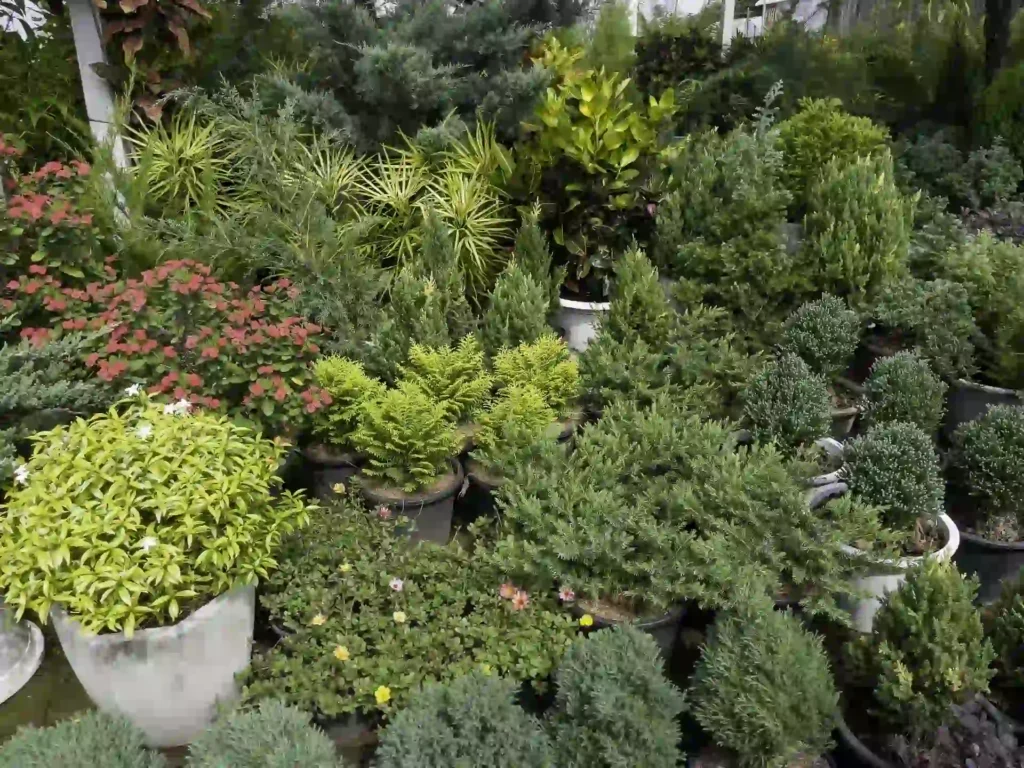
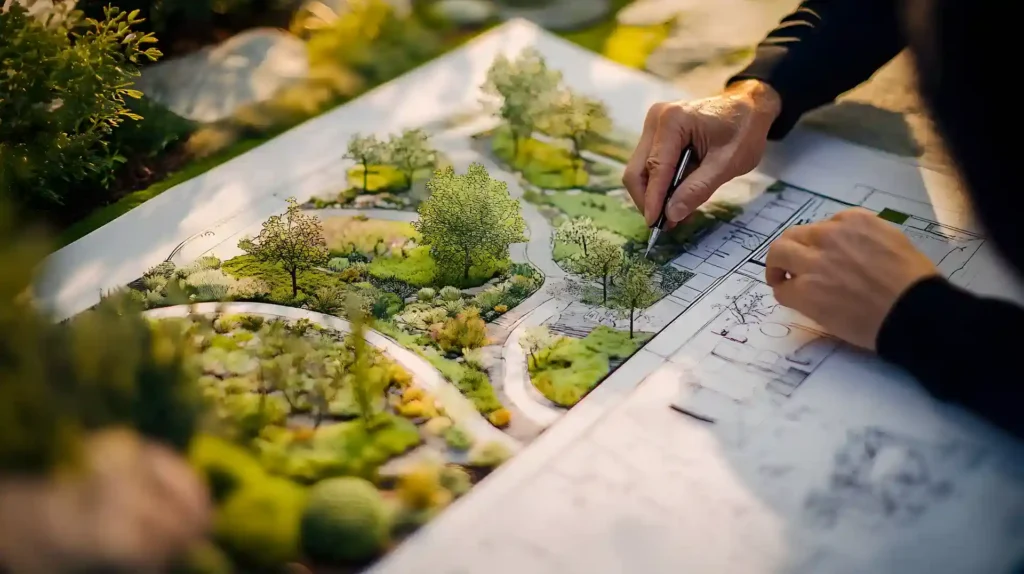
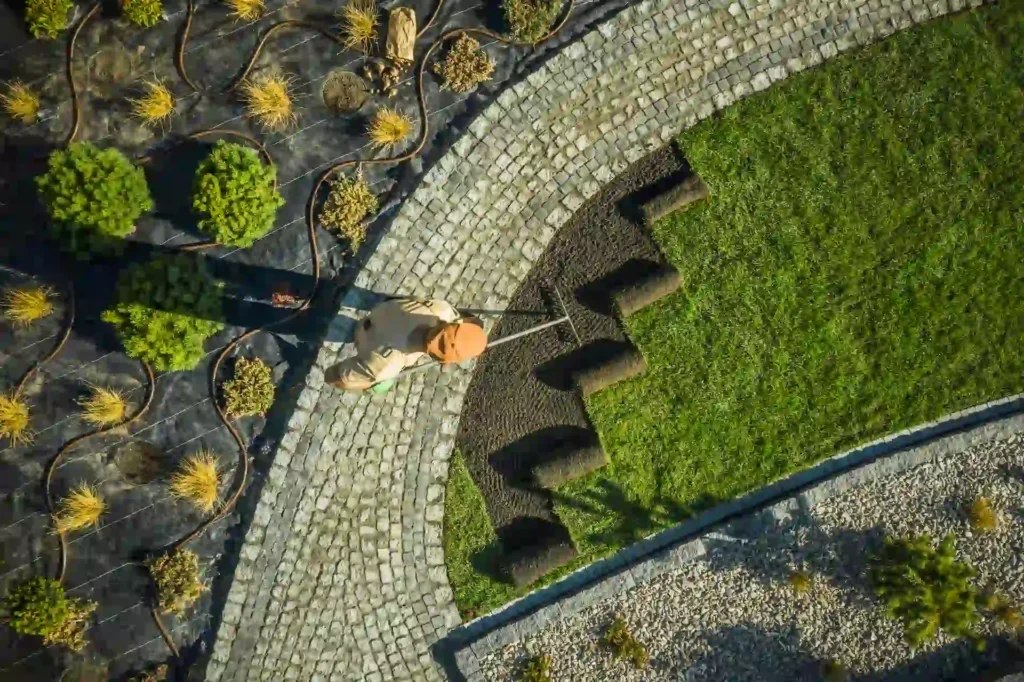
Most yards that look “off” aren’t missing expensive plants or tall rock features. They’re missing a simple design principle. The rule of 3 in landscaping is the idea that plants, rocks, and design elements look most natural and visually balanced when grouped in odd numbers, especially threes. It works because the human eye finds odd-numbered groupings more interesting and easier to process than even ones. Here’s the quick answer: The rule of 3 in landscaping means grouping plants, stones, or features in sets of three (or other odd numbers) to create a more natural, balanced, and visually pleasing landscape. It applies to flower beds, hardscaping, containers, focal points, and seasonal plantings alike. Understanding the Rule of 3 in Landscaping The core of this rule relies on human psychology and how we perceive data from our surroundings. Our brains naturally look for pairs and try to categorize objects into symmetrical matches. When you place two identical shrubs next to each other, your eye locks onto them as a pair, creating a static focal point that stops visual movement. Threes break this patterns. An odd number prevents the brain from easily pairing things up, forcing your eyes to travel across the composition in a triangular path. This movement creates a sense of rhythm and flow that mimics natural environments. In nature, plants rarely grow in perfect pairs or clean, even rows; they cluster organically. Design Element Even Groupings (Pairs) Odd Groupings (Threes) Visual Effect Static, rigid, artificial symmetry Dynamic, fluid, organic movement Brain Perception Catches patterns instantly and stops Scans the layout continuously Best Used For Formal entryways, structured gates Garden beds, rock clusters, general borders Applying the Rule of 3 in Your Garden Start by looking at what you already have. If you’ve planted two of something side by side, add a third. If you have a row of four identical shrubs, pull one and rearrange into a triangle-shaped cluster of three. The triangle formation is the most powerful application of this rule. Place three plants at the three points of an imaginary triangle, slightly staggered in depth. This creates layering and shadow, which makes the group look full even with just three plants. You can also mix species within the group of three. Try one tall statement plant in the back, one mid-height bloomer in the middle, and one low ground-cover plant at the front. That single trio does the work of a much larger planting scheme. Tips for Implementing the Rule of 3 in Your Landscape Design Here are practical ways to put this rule to work immediately: Use varying heights. A group of three identical plants at the same height looks flat. Vary by 12 to 18 inches between each plant for a natural layered look. Repeat groups across the yard. Three groups of three plants across a long bed creates rhythm. Your eye moves from one trio to the next, which makes the whole space feel considered and cohesive. Mix textures, not just colors. Pair fine-textured ornamental grass with a broad-leaf hosta and a spiky agave. The contrast between textures makes each plant pop. Apply the rule to rocks, too. A single large landscaping rock looks placed. Two rocks look like an accident. Three rocks, staggered in size, look like they were always there. This works especially well with river stone fireplace surrounds and garden borders. Creating Focal Points with the Rule of 3 A focal point is the first thing someone’s eye lands on when they look at your yard. Without one, the eye wanders and the space feels unresolved. The rule of 3 helps create strong focal points by giving the eye a clear “anchor and surround” structure. Place your boldest element at the center, then flank it with two supporting elements, like two ornamental grasses on either side of a tall rock or river stone feature. This three-point structure works for front entries, garden corners, and around mailboxes or garden gates. It’s the same reason most well-designed storefronts use three display items in a window. Why the Rule of 3 Matters in Landscape Design Symmetry is satisfying in architecture, but in gardens it can feel stiff and formal. Nature doesn’t plant things in pairs. Go to any forest or meadow and you’ll see clusters of plants in varying sizes and numbers, rarely even, rarely perfectly spaced. The rule of 3 mimics that natural randomness while still giving you control. It’s a framework that produces organic-looking results even when you’re making every single decision yourself. For anyone wondering what is the rule of 3 in landscaping in a practical sense, think of it this way: it’s a shortcut that makes your design decisions easier and your results more consistent. Rule of 3 vs. Rule of Thirds  What’s the Difference? These two rules are related but not the same, and they get confused often. The rule of 3 refers to grouping elements (plants, stones, features) in sets of three or other odd numbers. It’s about quantity and composition of individual elements within a space. The rule of thirds is a photography and design principle where you divide a space into a 3×3 grid and place key elements along the grid lines or at intersection points. It’s about where in the overall frame or yard you place things. Both rules work together. Apply the rule of thirds to position your planting beds or focal points within the yard’s overall layout, then use the rule of 3 to arrange the plants within each bed. Rule of 3 in Flower Beds Flower beds are the most common places to use odd-numbered groupings. To make a lasting impression, mass your perennials in trios along the length of your border. Instead of scattering individual flowers randomly, plant three echinacea together, followed by three blocks of lavender, and three clumps of coreopsis. This clustering technique creates bold blocks of color that can be appreciated from a distance, rather than a muddy blend of textures. For long foundation beds, repeat your chosen

What Is the Rule of 3 in Landscaping? Read More »

Low cost backyard fire pit landscape design with gravel base, stone seating, and natural plants

Low Cost Fire Pit Landscape Design: Transform Your Backyard Without Breaking the Bank

We can all agree on one thing: practically every homeowner wants a pleasant backyard with a fire pit where they can relax, have friends around, and enjoy chilly evenings without leaving home. The problem is that a lot of people don’t go through with it because they think fire pit landscaping is too expensive, too hard, or too full of permission problems. It’s really frustrating, especially when you’re already trying to decide between outdoor enhancements and comparing them like you would enamel and latex paint, trying to get the greatest finish without spending too much. The good news is that you can have a low-cost fire pit landscape design, and it’s one of the best ways to improve your outdoor space. This guide will show you step by step how to make a fire pit area that is safe, beautiful, and cheap. You’ll find out about true costs, material options, DIY processes, and layout ideas that will help you make a fire pit arrangement that appears expensive but doesn’t cost much. What Is Low Cost Fire Pit Landscape Design? A low cost fire pit landscape design is simply a planned outdoor setup that centers around a fire pit while keeping both construction and material costs as low as possible  without sacrificing safety, function, or curb appeal. It’s not about cutting corners. It’s about being smart with your choices. This means selecting affordable hardscaping materials like gravel, concrete pavers, or recycled brick. It means using a fire pit design that works with your existing yard layout rather than fighting against it. And it means knowing which parts of the project you can DIY and which ones actually save you money in the long run when done by a professional. Hardscaping vs. Landscaping:  When you plan a fire pit area, you’ll hear both of these words used. Hardscaping is the part of the yard that isn’t alive, including gravel walks, patio pavers, stone edging, and the fire pit structure itself. Plants, grass, shrubs, and trees are all part of landscaping. Hardscaping is your best friend if you want to build a fire pit on a budget. Many hardscaping jobs are great for DIY, and the cost is usually only once and lasts for years. Knowing the difference between these two things can help you decide how to spend your money. First, use your cash to choose hardscaping materials that will last. Then, add low-maintenance plants around the edges to finalise the effect. Why Learn How to Design an Outdoor Fire Pit for Your Backyard? A well-designed backyard with a fire pit does more than just look nice. It extends your outdoor living space into a true second living room, a place where family gathers, where guests linger, and where the evening doesn’t have to end when the sun goes down. From a real estate standpoint, outdoor fire pits consistently rank among the most desired backyard features for homebuyers. Realtors frequently note that a well-landscaped yard with a fire feature can increase perceived home value and reduce time on the market. More practically, a thoughtfully designed fire pit area gives you a return on investment every single weekend you use it. And from a purely personal standpoint? There’s something deeply satisfying about creating a space with your own hands that your whole family actually uses. How Much Does a Budget Fire Pit Really Cost? One of the most common questions is: “How much does a fire pit cost?” In 2026, the national average for a professionally installed fire pit is around $850, but a savvy DIYer can get the job done for much less. Depending on your choice of materials and the size of the area, you can expect to spend between $200 and $500 for a solid, safe, and beautiful setup. Feature Estimated DIY Cost (2026) Pro Installation Cost Basic Metal Fire Pit $50 – $150 N/A (Portable) Gravel Base (100 sq ft) $100 – $200 $300 – $600 Stone/Paver Surround $150 – $300 $500 – $1,200 Seating (Thrifted/DIY) $0 – $150 $500+ Total $300 – $800 **$1,300 – $2,300+** Is a DIY fire pit worth it? Absolutely. Most of the cost in professional landscaping goes toward labor and site prep. If you are willing to spend a weekend le veling the ground and hauling some gravel, you can save over $1,000. For residents looking for expert guidance, our Landscape Design Whittier CA Service can help you plan the perfect layout that fits your budget perfectly. Choosing the Right Materials for Your Fire Pit Material selection is the single biggest factor controlling your project cost. Here’s how to make smart choices. Cheapest Materials for Fire Pit Landscaping Gravel Fire Pit Base: A gravel fire pit base is the most affordable and practical foundation you can choose. Pea gravel or crushed stone costs roughly $3–$5 per square foot and provides excellent drainage, heat resistance, and a clean, finished look. Spread it 2–4 inches deep across your fire pit area and you’re done. Concrete Retaining Wall Blocks: You can find these at any home improvement store, and they cost between $1 and $3 each. Put them in a circle to make a fire pit ring that works properly and looks surprisingly good. You don’t need any mortar for a basic construction because the bricks fit together naturally. Recycled Brick: Check local salvage yards, Facebook Marketplace, or Craigslist for free or cheap used bricks. Recycled brick has a warm, rustic look that actually looks better than many expensive alternatives. Concrete Pavers for the Seating Area: A simple circle of concrete pavers around your fire pit creates a defined patio area. Budget pavers run $1–$2 each and can be laid directly on compacted gravel with no concrete foundation required. Pressure-Treated Landscape Timbers: For edging or raised platform seating, landscape timbers are inexpensive and easy to work with. Cut them to length, secure with rebar, and you have clean, defined borders for your fire pit zone. DIY Fire Pit Landscaping: Step-by-Step Ready to get your hands

Low Cost Fire Pit Landscape Design: Transform Your Backyard Without Breaking the Bank Read More »

Woman planning how to design a garden using layout drawings, plants, and tools in a backyard setting

How to Design a Garden? A Complete Beginner’s Guide

Have you ever dreamed your yard could be more than just grass and dirt? You could have imagined lovely flowers, comfortable places to sit, or fresh veggies blooming just outside your door. Anyone can make a beautiful outdoor environment with the correct planning and understanding. Designing a garden isn’t just for professional landscapers. Learning how to design a garden gives you a lot of options, whether you have a small balcony or a big backyard. This guide will help you make a garden that is both beautiful and useful by teaching you everything from how to understand your space to how to choose the right plants. Let’s get started and find out how to turn your outdoor space into the garden of your dreams. Learn About Your Garden Space   You need to be a detective in your own yard before you plant any seeds or acquire any supplies. Getting to know your garden space is like getting to know a new friend: the more you learn, the better your connection will be. Learning about Garden Zones and Microclimates Microclimates give your garden its unique identity. These are little spots in your yard where the weather is a little different from the rest of the yard. For instance, the sunny place on your south-facing wall stays warmer and drier than the gloomy spot under your big oak tree. Based on temperature, garden zones advise you which plants will grow well in your location. The USDA Plant Hardiness Zone Map splits the country into distinct zones. Knowing which one you’re in will help you choose plants that will not only survive but also do well. It takes less than a minute to determine your zone by searching online using your zip code. Tracking the Sun and Garden Aspect The garden aspect is a fancy way of saying which way your garden faces. This is important since it changes how much sun your plants get. Spend a day monitoring how the sun moves around your yard. Write down which areas get: Full sun means at least six hours of direct sunshine. Partially sunny (3 to 6 hours) Less than 3 hours of shade The sun in the morning is softer than the sun in the afternoon, which is important for fragile plants. Take pictures all day or draw a simple map that shows where the sun and shade are. When you pick plants later, this information will be very helpful. Great Gardening Advice for FREE Want to hear a secret? You don’t have to do everything by yourself. Your local Cooperative Extension office can help you with gardening questions that are relevant to your area. These professionals know your soil, weather, and the pests that are a problem in your area. You can also join local gardening clubs or online groups where more experienced gardeners talk about what worked and what didn’t for them. People who have already made the mistakes you’re destined to make can sometimes teach you the best lessons. You can see how your space will look before you spend any money with free online tools like garden planning applications. A lot of them let you drag and drop plants into a virtual garden to see how they will look when they are fully grown. How to Design a Garden From Scratch   Designing a garden from scratch means starting with observation, not shovels. Before buying a single plant, spend time watching your outdoor space. Note where the sun hits, where water pools after rain, and which areas stay shaded. This single habit saves most beginners from expensive mistakes. The most common error? Planting first and planning second. Gardens designed this way end up patchy, unbalanced, and hard to maintain. Start by sketching a rough layout on paper. It doesn’t need to be precise. Just mark your boundaries, structures (fences, walls, sheds), and any existing plants or trees. This becomes your working map. Garden Design Basics Every Beginner Should Know Good garden design isn’t about making things look fancy. It’s about creating a space that’s functional, easy to manage, and enjoyable to spend time in. Here are the core principles worth keeping in mind: Balance means your garden feels visually even, not necessarily symmetrical. A large tree on one side might balance with a dense planting bed on the other. Scale matters more than most beginners realize. A tiny water feature in a large garden looks lost. A towering shrub in a small courtyard feels suffocating. Focal points give the eye somewhere to land. A statement tree, a garden bench, or a raised bed can all serve as anchors that pull the design together. Repetition creates rhythm. Using the same plant or material in two or three spots ties a garden together without looking boring. Before You Start: Make a Wishlist Sit down and write out what you actually want from your garden. This sounds simple, but most people skip it. Ask yourself: Do you want a space to relax in? Grow vegetables? Create privacy from neighbours? A garden for children to play in? These goals shape every decision that follows. Be realistic about how much time you’ll spend maintaining it. A wildflower meadow is low-effort once established. Formal hedging requires regular trimming. A vegetable plot needs consistent attention from spring to autumn. Consider the Soil Soil is the foundation everything grows in, and yet most beginners ignore it completely. Good garden design always accounts for soil type because it determines which plants will thrive and which will struggle. Sandy soil drains fast but loses nutrients quickly. Clay soil holds water and nutrients but can become waterlogged. Loamy soil is the ideal middle ground. Buy a basic soil testing kit (around £10 to £15 from most garden centres) to check your pH level. Most plants prefer a pH between 6.0 and 7.0. Acid-loving plants like rhododendrons and blueberries need a lower pH, while lavender and most vegetables prefer neutral to slightly alkaline conditions. If your soil is poor,

How to Design a Garden? A Complete Beginner’s Guide Read More »

Landscape estimator using drone data and software for automated project quoting

How Do Landscape Contractors Get Automated Estimates?

Today, landscape contractors have a heavy job: they have to make quick, accurate estimates while also keeping track of workers, resources, and customer expectations. Estimating by hand takes time, makes mistakes, and often slows down sales. That’s why a lot of professionals are now asking, “How do landscape contractors get automated estimates” Automated estimating employs clever tools, data, and contemporary software to quickly and accurately figure out how much a project will cost. It helps contractors get more work, keep their revenues, and rank higher online by giving clients the quick answers they want in 2026 and beyond. What Are Commercial Landscaping Estimates? Commercial landscaping estimates show how much it will cost to do big projects like office parks, shopping centres, HOAs, and industrial properties. Most of the time, these estimations include: Hours of work Things like plants, pavers, soil, and parts for irrigation Using equipment Costs of ongoing maintenance Commercial landscaping estimates, on the other hand, need to be consistent, repeatable, and detailed. Property managers want clear prices and professional proposals. Automation helps contractors meet these needs without having to spend hours on spreadsheets. What Is Automated Landscape Estimating? Automated landscape estimating is when you use software to figure out how much a task will cost using digital data instead of doing it by hand. You don’t have to drive to a location anymore; instead, you use landscaping estimate technologies that get high-resolution data from the cloud. You may measure a patio by clicking on a few spots on the screen. The software will then tell you how many pallets of pavers you need and how long it will take to build them. Why Are Landscaping Estimates Important? Your commercial relationship with clients is based on estimates. If you don’t do a good job on an estimate, it might cause confusion, scope creep, and lost earnings. Here’s why it’s important to get things right: First impressions matter: Your estimate is generally the first business document a potential client sees from you. A thorough, well-organised estimate indicates that you care about your work and establishes trust before the task even starts. Correct pricing keeps your profits safe: If you don’t think a job is worth it, you’ll lose money. If you overestimate, you could lose the client to a competitor. When you’re bidding against other contractors, accuracy is really important. Legal Protection: A detailed estimate keeps both you and your customer safe. It makes clear what is included in the price and what costs extra, which will help avoid arguments later. Business Planning: Good estimates help you better predict your income, plan your time, and keep track of your cash flow. You can make better judgments about recruiting, buying equipment, and growing your firm when you know what’s coming in. Why Automating Landscaping Estimates Is a Game-Changer Not only does manual estimating take a long time, but it’s also easy to make mistakes. If you fail to include a section of fence, forget to factor in how hard the slope is, or miscalculate the square footage, you might lose hundreds or even thousands of dollars. Automated estimate software and landscaping tools fix these challenges and open up new possibilities: Speed: Make estimates in 15 to 30 minutes instead of 2 to 4 hours. That means you can reply to more leads while they’re still hot and beat your competitors who are still driving to properties to take measurements. Every estimate: uses the same professional format and your usual prices, so it’s always the same. You won’t forget to include anything or mistakenly give multiple pricing for the same service anymore. Accuracy: Satellite images and GPS technologies give exact measurements. Cost prediction algorithms make sure that you always include all of the materials, labour, and overhead in your calculations. Professional Presentation: Modern landscape estimating templates make documents that are clean, branded, and make your organisation look established and trustworthy. Job costing analytics give you data insights that tell you which services make you the most money, where you’re losing money, and how to change your prices to make more money. How Does an Automated Landscaping Estimate Tool Work? A mix of “Property Intelligence” and cost prediction algorithms makes the magic happen. Here is a step-by-step breakdown: Measure the property from a distance Contractors employ products that work with Google Earth or high-resolution sources like Nearmap. You type in the address, and the program shows you a top-down view. Drones are also becoming a common way for complicated commercial sites to collect 3D topography data for measuring land. Using Production Rates This is the “secret sauce.” Landscaping production rates are rules that tell you how much work one person can do in an hour. For example, “One man can install 50 sq. ft. of sod per hour.” The program multiplies your digital measurements by the rates at which you make things. Updates on prices in real time In 2026, the prices of materials will change a lot. The best automated estimating software connects to supplier databases so that it can give you real-time price changes for plants, stone, and mulch. Integrating CRM and Estimating Your CRM and estimating interface will save the estimate right away after the maths is done. So, if the client clicks “Approve,” the job is automatically scheduled, and the materials are ordered. Benefits of Using Automated Landscaping Estimates No Onsite Visits Needed: You can figure out how much landscaping work will cost without having to go to the site, which saves you thousands of dollars in gas and ‘windscreen time’. Better task Costing Analytics: The software looks at the actual hours spent after the task is done and compares them to your estimate. This “closed-loop” data will help you make an even better bid next time. Professionalism: A digital proposal with colour-coded maps of the property looks a lot better to a business board than a handwritten letter. These benefits explain how to automate estimates for commercial landscaping jobs while staying competitive in crowded markets. Top Tools

How Do Landscape Contractors Get Automated Estimates? Read More »

What type of plants are involved landscaping with evergreen shrubs, ornamental grasses, and potted garden plants

What Type of Plants Are Involved Landscaping?

When homeowners ask, “What kind of plants are involved  landscaping?” They really want to know how to make their yard look nice, grow well, and stay easy to care for over time. Putting in a few flowers is not enough for landscaping. You need to pick the right combination of trees, shrubs, grasses, ground covers, and flowering plants that all work together to make a whole design. The right plants for landscaping can make your home look better from the street, raise its value, and make your outdoor spaces more fun. But if you pick the wrong plants, you might have to spend a lot of time and money on them. That’s why it’s so important to know what kinds of plants you want to grow, how much care they need, and what type of weather they need before you start planting. Landscaping for Beginners: Choosing the Right Plants Choosing plants can be hard if you’re new to landscaping. There are a lot of options, and not all plants go well together. The most important thing is to start small. Most beautiful landscapes have a mix of plants that don’t need much care, plants that give structure, and plants that change color with the seasons. Beginners should start with hardy, forgiving, and well-known yard plants that grow well in their area.  Choosing the right plants for landscaping: Works with your climate and plant hardiness zones. Works with the amount of sun and shade you have. Fits how much time you want to spend on your career, not just in one season, but all year long. Starting with the right plants will save you money, water, and stress. Landscaping Plant Categories Knowing the different types of plants makes it easier to figure out what type of plants are involved  landscaping. To make a yard that is healthy and balanced, every kind of plant has a job to do. Trees Most landscapes are built around trees. They give your yard height and balance, as well as shade, privacy, and structure. Some common choices are shade trees like oak and maple, ornamental trees like crepe myrtle and Japanese maple, and evergreen trees that stay green all year. It’s very important to pick the right tree right away because they grow slowly and live for a long time. Shrubs Shrubs fill in the gaps between trees and flowers and help shape the overall look. People like evergreen shrubs because they stay green all year and don’t need much care. Shrubs are an important part of professional landscaping plant design because they are often used to make privacy screens, borders, and add structure. Perennial Plants Perennial plants come back every year, so they are a reliable and cost-effective choice for landscaping. They add color to the garden in the spring and summer, draw in pollinators like bees and butterflies, and cut down on the need to replant. Lavender, daylilies, and coneflowers are some of the most common perennials. Annual Flowers Annual flowers grow and bloom quickly, adding bright colors to gardens, but they only last for one season. They look best in pots, along walkways, and in borders where you want seasonal color. If you’re not sure what flowers are good for landscaping, annuals are a good choice because they grow quickly but need more care than perennials. How to Choose Plants for Landscaping Design It’s easier to pick the right plants if you follow these simple steps. This method helps homeowners pick plants for their landscaping design without any stress or guesswork. Know Your Sun and Shade Plants need a certain amount of sunlight to grow well. Some plants do well in full sun with six or more hours of light, while others do better in partial or full shade. Matching plants to how much sun your yard gets keeps them healthy and cuts down on the work you have to do to care for them. Understand Plant Maintenance Levels Different plants need different amounts of care. Plants that don’t need much care don’t need to be watered or pruned very often, but plants that do need a lot of care do. Choose native plants, evergreen shrubs, and drought-tolerant varieties if you want low maintenance plants all year round plants. Consider Plant Hardiness Zones Plant hardiness zones tell you which plants can live in your area’s weather. Plants grown outside of their recommended zone often have a hard time, even with extra care. This step is very important for long-term success. Match Plants to Your Lifestyle Think about how much time you can spend on yard work, whether you want plants that stay green all year or ones that change color with the seasons, and if saving water is important to you. These things are very important when choosing plants for your landscape that will last.  Top Landscaping Plants by Category Different types of land need different things. It’s easier to make a healthy and beautiful yard when you choose plants by type. Best Low Maintenance Landscaping Plants for Hot Climates Plants that can handle a lot of sun and not much water are needed in hot climates. Lavender, agave, bougainvillea, and ornamental grasses are all great options because they can handle heat and don’t need as much water once they are established. Landscaping Plants for Small Garden Spaces Small gardens benefit from plants that grow neatly without overcrowding. Dwarf shrubs, compact ornamental trees, vertical vines, and container-friendly perennials help keep the space open while still adding beauty and structure. Top Landscaping Plants for Front Yard In hot places, you need plants that can live in a lot of sun and not much water. These plants, like lavender, agave, bougainvillea, and ornamental grasses, are all great choices because they can handle heat and don’t need as much water once they are established. Beginner Friendly Landscaping Plants and Trees Choose plants that are easy to grow and will forgive you if you make mistakes if you are new to gardening. If you give them

What Type of Plants Are Involved Landscaping? Read More »

Landscape designer creating a detailed garden plan with plants, paths, and outdoor layout on paper

How to Become a Landscape Designer?

Most people who love the outdoors never realize they could turn that passion into a real career. If you’ve ever looked at a beautifully planned garden or a perfectly arranged outdoor space and thought, “I could do that,” you probably can. Knowing how to become a landscape designer is less complicated than it looks, and the path is more open than most careers in the built environment. This article gives you a straight line from where you are now to a working career in landscape design. We’ll cover the skills you need, the training options available, how to get your first real projects, and what day-to-day work actually looks like. Whether you’re starting from scratch or already working in a related field, you’ll find a clear, honest picture of what the job requires. What Is a Landscape Designer? A landscape designer plans and creates outdoor spaces, including gardens, patios, pathways, and green areas for residential and commercial properties. They work with plants, terrain, and structures to make outdoor areas both functional and visually appealing. Unlike landscape architects, they typically don’t need a licensed degree, but they do need strong design knowledge. Think of a landscape designer as the interior decorator of the outdoors. They read the land, understand the client’s lifestyle, and create a plan that makes the space work. Their work includes plant selection, soil analysis, irrigation planning, hardscape design, and project coordination Learn Landscape Design Basics Before anything else, you need to understand what landscape design actually involves. It’s not just planting flowers or mowing grass. It’s about understanding space, drainage, soil types, plant biology, climate zones, and how people actually use outdoor spaces. Core subjects you should get comfortable with: Horticulture: How plants grow, what they need, and how they behave in different climates Soil science: pH levels, drainage, compaction, and nutrient content Grading and drainage: How water moves across a property Design principles: Balance, proportion, unity, rhythm, and contrast applied to outdoor spaces Plant identification: Latin names, growth habits, seasonal changes, and maintenance needs Construction basics: Hardscaping elements like patios, retaining walls, and pathways You don’t need to master all of this overnight. Start with plant identification and basic design principles. These two areas will carry you furthest in the early stages. Landscape Design Steps You Should Know Here’s a step-by-step look at what the actual design process looks like on a real project. 1. Site Analysis Before drawing a single line, good designers walk the property. They note sun and shade patterns, existing plants, slope, drainage problems, and how the space connects to the home or building. 2. Client Consultation You sit down with the client and ask questions. What do they want to use the space for? Do they have kids or pets? What’s their maintenance tolerance? What’s their budget? 3. Concept Plan This is a rough sketch that shows general zones: entertaining areas, planting beds, lawn areas, walkways. It’s a framework, not a final plan. 4. Design Development Here you get specific. Plant selections, materials, dimensions, and grades get worked out in detail. This is where software becomes helpful. 5. Construction Documents For larger or more complex projects, you produce detailed drawings that contractors can build from. These include planting plans, grading plans, and detail drawings. 6. Project Oversight Some designers stay involved during installation to make sure the work matches the plan. This is especially important for grading and structural elements. Build a Portfolio Your portfolio is your most powerful marketing tool. It’s how potential clients and employers decide whether to trust you before they ever meet you. Start documenting every project you work on, even small ones. Include before-and-after photos, design sketches, plant lists, and a brief description of the challenge and your solution. For digital portfolios, platforms like Squarespace, Adobe Portfolio, or even Instagram work well for visual work. What matters most is clarity and presentation quality. If you’re just starting out, create three to five speculative projects. Design a real location you know well, even if you weren’t hired to do it. The work is real, even if the client relationship isn’t. Link to an educational article like “What Are the Basic Elements of Landscape Design?” to prove that you know how to design. Only use it once. Become a member of professional groups Joining professional associations gives you access to continuing education, industry news, job boards, and a network of peers who’ve solved the same problems you’re facing. Key organizations to consider: Association of Professional Landscape Designers (APLD): Focused specifically on landscape design (not architecture). Offers the Certified Professional Landscape Designer (CPLD) credential. American Society of Landscape Architects (ASLA): More relevant if you pursue a licensed landscape architect path. Strong network and advocacy presence. National Association of Landscape Professionals (NALP): Broad industry group covering maintenance, design, and installation businesses. Membership fees vary, but student rates are often available and very affordable. The connections you make at regional chapter events can directly lead to job offers. Landscape Architecture vs Landscape Design Landscape architecture requires a licensed, accredited degree (usually a 4-year Bachelor of Landscape Architecture or a Master’s), a state license, and the ability to legally stamp construction documents. Landscape design has no universal licensing requirement, giving it a lower barrier to entry, though it also comes with more limited legal scope on certain projects. The practical difference: landscape architects can work on large-scale public projects like parks, highways, and urban planning. Landscape designers typically focus on residential and smaller commercial properties. If your goal is to work on private gardens and residential properties, the landscape design path is faster and more direct. If you want to shape public spaces, landscape architecture is the route. Learn More Through Training Programs Formal education isn’t the only path, but it’s one of the fastest ways to build a solid foundation. There are flexible options for every schedule and budget. Degree Programs: A two-year associate degree or four-year bachelor’s in landscape design, horticulture, or environmental design gives you structured training and

How to Become a Landscape Designer? Read More »

Overhead view of hardscape stone path beside green lawn and landscaped plants showing design contrast

What is the Difference Between Hardscape and Landscape?

There are two basic sections to your yard. One is made. One is grown. You can plan and spend better if you know how they function together. Hardscape is made up of substantial things like walls, patios, and paths. Plants, grass, soil, and trees are all part of the landscape, which is sometimes called softscape. Both are important. They make a space that looks good and works well when they are balanced. What is the Difference Between Hardscape and Landscape is simple at its core. Hardscape is a permanent part of the structure. The terrain is alive and always changing. Most great outdoor areas use both of these things in the correct amounts. How to Tell the Difference Between Hardscape and Landscape A lot of homeowners mix these words up. That makes for bad planning and wasted money. It’s not about picking one over the other when it comes to hardscape and landscape. It’s about recognizing what each one is best at. Hardscape affects how you use and move around in the area. The landscape changes how the area feels and grows over time. You need to know both from the start if you want a yard that lasts and is easy to take care of. What Is Hardscape? Hardscape is everything in your yard that is solid and not alive. This comprises steps, patios, walks, roads, retaining walls, fire pits, and sitting walls. These traits don’t change or grow with the seasons. They stay in place for years after they are put in. The hardscape definition is simple.  It includes anything made of stone, concrete, brick, or wood that gives shape. Hardscape in landscaping design affects how people move, how water drains, and how things work. A patio is a place to sit. A wall keeps dirt in place. A path shows people where to walk. A yard can feel cluttered or hard to use without a hardscape. What Is Softscape? Landscape includes everything that lives in your yard. The plants and soft surfaces in your outdoor space make it look alive and beautiful. Important parts of the landscape are: Turf and lawns Bushes and trees Flower beds Ornamental grasses and ground coverings Vegetable patches and gardens Landscaping not only makes things look better, but it also helps the environment by improving air quality, supporting local species, and keeping the temperature stable. A well-kept landscaping gives hardscape features texture, colour, and a natural look. How to Use Hardscape and landscape to Make Your Yard Look Great The best yards have a mix of hardscape and landscape to make them seem good. For instance: A stone path (hardscape) with flowers and shrubs (landscape) on either side makes a welcome entrance. A patio in the rear (hardscape) with trees and a lawn (landscape) around it is a great place to relax. Adding flowering plants (landscape) to retaining walls (hardscape) makes them both useful and pretty. You make things work together by thinking about both parts. Hardscape gives things shape and strength, whereas landscape makes things softer and more alive. What is the difference between permeable and non-permeable pavers Not all hardscape works the same way. Water can get through the gaps in permeable pavers. This helps keep the soil healthy and cuts down on runoff. They are great for patios and walks. Pavers that don’t let water through block it. This group includes concrete slabs and sealed stone. They are sturdy, but if the drainage isn’t good, they might cause pools. Choosing the proper kind has an impact on long-term care and water management. In dry places, permeable solutions are frequently better. Hardscape vs Landscape Explained This is a clear method to see the difference. Hardscape is made. Plants grow throughout the landscape. The hardscape stays the same. Changes in the landscape. Hardscape costs more up front, but it lasts longer. Initially, landscaping costs less, but it needs regular attention. Both change how your yard appears and works. If you don’t pay attention to one, you’ll have difficulties later. This is why understanding What Is the Difference Between Hardscape and Landscape matters before any project starts. Understanding the Key Differences Let’s make it simpler. Stone, brick, and concrete are all examples of hardscape materials. Soil, plants, and mulch are all types of landscape materials. Hardscape doesn’t need as much water. Landscape has to be watered on a regular basis. Hardscape doesn’t need as much care. The landscape has to be trimmed, fed, and cared for. Hardscape makes things work. Landscape makes everything more comfortable and beautiful. Important things to think about when hardscaping Think about the long term before putting in hardscape. Look at the drainage. If water doesn’t flow well, it might crack concrete and move pavers. Think about the heat. In the summer, stone and concrete get hot. Shade trees or pergolas can help. Plan how to get there. Paths should not seem awkward; they should feel natural. Pick materials that go with your home. This makes the room look neat and planned. Expert Hardscaping in Whittier, for example, focuses on function and climate demands for local projects. Important things to think about when it comes to landscapes Plants are more than just pretty things. Pick plants that will grow well in your area. This saves water and time spent on care. Think about how to grow. Small plants today could get in the way of walkways later. Combine different heights and textures. This gives it more dimension without making it look messy. Soil that is healthy is more important than showy plants. Everything grows better in good soil. A lot of the time, people don’t think of this planning stage when they question what landscaping is. Adding hardscaping to your landscape design Hardscape should help shape the design, not take over. Put patios where they can get shade, and plants around the edges to soften the lines. Use walls to make raised beds, which is a mix of hardscape and softscape. Paths should connect important areas, not

What is the Difference Between Hardscape and Landscape? Read More »

Cost of Landscape Lighting Installation Complete Guide

Cost of Landscape Lighting Installation

Landscape lighting is a great investment to increase your curb appeal, home security, and home value. From highlighting your garden, to brightening pathways, to lighting seating areas outside, knowing the cost of landscape lighting installation enables you to plan your finances correctly. Costs vary considerably depending on the type of lighting, materials, and design, and the amount of labour required. This guide will tell you everything you need to know — including pricing factors and lighting options, to the installation process and budgeting tips. Understanding the Cost of Landscape Lighting Installation Understanding how much to budget for landscape lighting starts with knowing what affects the cost. Some people require just a few lights to illuminate walkways, whereas others desire a full lighting design for their yard, garden, and patio. As outdoor environments vary greatly, so too does the price according to system size, fixtures, wiring, and installation complexity. To a large extent, the cost will also depend on whether you opt for the simple model or the luxury lighting system. Basic solar lights are inexpensive, while high-quality LED and low-voltage systems can increase the cost. Knowing the difference will enable you to make informed decisions on lighting without spending too much. What Factors Affect the Cost to Install Landscape Lighting? A number of elements influence the cost to install landscape lighting when calculating it. Having this information allows you to compare quotes and select the ideal lighting solution for your home. The Type of Lighting Fixtures The fixtures you select are one of the largest suppliers of cost factors. Path lights, spotlights, deck lights, and floodlights vary in cost. High-end options like brass or stainless steel fixtures are more expensive, but they have a longer lifespan and better performance. Many people who live in their homes are buying high-end LED lights for their longevity and energy efficiency. Total Number of Lights Needed The farther you need to go, the more fixtures you need, and the more you’re going to pay. A plain footpath can be lit with a handful of lights, but to light up every inch of a large garden requires an elaborate lighting scheme. Plan the quantity of light in the design, not just the decorative effect. Materials and Wiring Requirements Professional kits will generally need low-voltage wiring, transformers, connectors, and even waterproof sealing materials. While they add to the overall landscape lighting cost, they make for a safe, long-lasting solution. Solar lights are less expensive since there is no need to install wiring or electricity, but they are not as bright, and they can be unreliable. Labor and Installation Complexity The labor cost for this work depends on who you hire and the complexity of the job. Installation may be longer if your land is hilly, stony, or has long trails. Rigs Professional installers are guaranteed for proper depth of wiring, protection from the weather, and electrically safe connections. Types of Landscape Lighting and Their Costs Each lighting style has a different price tag. Selecting the appropriate type for your needs will allow you to remain within your budget and select the style you prefer. Pathway Lighting These fixtures offer safety and visibility all along your walks, garden paths, and even your driveway. Path lights are designed to be staggered and are made with a variety of finishes and sizes. And they’re cost-effective for most homeowners who want a little taste of the good life. Spotlights and Uplighting Spotlights can be used to accentuate trees, a garden feature, or an architectural detail. They deliver focused beams and add dramatic appeal at night. Uplights are ideal for highlighting focal points and casting shadows that add visual texture. Deck and Patio Lighting Deck lights can be mounted on steps, on railings, or beneath seating to maximize the safety and ambience they bring. Great for entertaining outdoors, they cast a gentle but practical light in the space around your patio. Floodlights Floodlights are used to illuminate large spaces, including driveways, backyards, and outdoor play and work areas. These lights offer powerful, wide beam extra illumination and are often professionally wired and installed. You may read Cost of Landscape Lighting Installation. Cost Breakdown for Outdoor Lighting Installation When discerning the cost of outdoor lighting installation, it is good to know how each item affects the bottom line. Fixture Costs Standard lights are very affordable, but quality metal or LED fixtures have a higher price tag upfront. Yet, these lead to better output and more years of life, so you save more money in the long run. Wiring and Electrical Work Wiring low voltage, transformers, and connectors are also needed for safety. Electrical work is supposed to meet code, which is why you’re told to get a professional installer. Design and Planning Fees Custom designs for multi-room or whole-house lighting require an additional fee, yet provide for the best positioning of lights and an even distribution of light. Designers lead you away from pitfalls like uneven lighting or too many fixtures. Labor Charges The installation work involves trenching, wiring, mounting fixtures, testing, and then cleaning up. Professional labor guarantees the quality and durability of work. How to Budget for Landscape Lighting Installation Planning, getting quotes, and knowing what is important to you is the best way to budget for your project. Full systems are not needed in every yard. Begin by determining which areas you care about most — sidewalks, flower beds, decks, or security lighting. Get quotes from several experts, and inquire about both their basic and their premium packages. In some cases, using better materials results in lower costs because you need to make fewer repairs or replacements. Phased lighting advantage: You can put your lighting in phases, focusing first on the essentials and adding later. DIY vs. Professional Installation A lot of homeowners do lighting installation on their own to save money. While DIY lighting is possible with simple solar lights or plug-in systems, wired lighting requires skill and knowledge. A single mistake in wiring can drain efficiency or create a hazard. The pros have the tools, bury wire properly, and test every connection. They also know how to create a well-balanced lighting design. Professional labor always discounts any landscape lighting cost for the total job, but it’s worth every penny for peace of mind and lighting you can count on. When

Cost of Landscape Lighting Installation Read More »

Cement Patio Ideas to Transform Your Home Exterior

Cement Patio Ideas | Stylish, Durable, and Affordable Outdoor Makeovers

A plain gray slab gets boring fast. You want a patio that feels finished, not forgotten. The bare concrete look isn’t holding your interest anymore, and that’s exactly why you’re here. This guide walks through patterns, colors, layouts, and add ons that turn a flat slab into a real living space. You’ll see how stamped textures, fire pits, borders, and plantings work together, and you’ll pick up real direction on how to design outdoor living spaces that fit your home and the Southern California climate. The short answer: the best cement patio ideas pair a durable surface with a clear layout and one focal feature, whether that’s a fire pit, an outdoor kitchen, or a shaded sitting area. What Makes a Great Cement Patio? A perfect cement patio has a slip resistant surface, a pattern that works with how you actually use your yard, and at least one design feature, whether it be color, texture, or a built in element like a fire pit or seating wall. Proper joint spacing and drainage make it last for decades. Most concrete patio ideas you see online are all about appearances and don’t get into the practical side. Think about how your family spends time outdoors before you choose a pattern. Once you know how to create outdoor living spaces around your routine, all other decisions about cement patio ideas are easier. Quick note on terms: cement is a constituent of concrete, not the final surface itself, but most homeowners search and talk about both the same way. We will use cement and concrete interchangeably in this piece as that’s how people actually search for it. Modern Minimalist Cement Patios Large smooth slabs in a grid layout give a clean look. Pair them with simple furniture and a few potted plants, and the space feels open instead of cluttered. Minimal lines work especially well with newer stucco or modern farmhouse homes. If you’re after modern concrete patio ideas, grid layouts and a tight two tone palette are the easiest way to get there. A light gray or sand colored slab paired with dark metal furniture reads as modern without trying too hard. This style also keeps maintenance simple, since there’s no stamped texture to clean. Stamped Cement Patterns That Mimic Natural Materials Stamped concrete is still one of the most popular concrete patio design ideas out there providing you texture for a fraction of the expense of actual stone. A mold is pushed into wet concrete before it solidifies , and leaves a design behind . The most popular pattern is ashlar slate, which works well with almost any kind of home, and then random flagstone, which creates a more casual, natural edge. Color is generated with three layers working in concert. An integral color incorporated into the slab, a color hardener spread on the surface and a release agent that falls into the grooves for depth. The primary reason a stamped patio appears painted instead of like actual stone is the lack of releasing agent. A local installer can hold color swatches against your siding and roof before you commit to a job. Geometric Cement Paver Patio Ideas Geometric layouts use squares, hexagons, or staggered rectangles instead of one solid pour. Combining a paver pattern with poured concrete borders gives you sharp lines without the full cost of natural stone. This look works well in side yards or narrow spaces where one flat shape would feel plain. A herringbone or basket weave layout adds movement without looking busy. If your home has brick details, matching the pattern angle to your brick ties the whole yard together. These small details are what separate generic backyard concrete patio ideas from ones that actually look designed. Cozy Backyard Cement Patio Ideas With Fire Pits A built in fire pit turns a patio into the spot everyone gathers around after the sun goes down. Surround it with a ring of exposed aggregate or stamped stone for grip and heat resistance. Keep at least three feet of clear space around the pit for seating and safety. Gas fire pits are cleaner and easier to switch on for a quick evening outside. Wood burning pits feel more old fashioned and work well if you already have stone seating walls planned. Either option needs a non combustible base, which concrete already provides. Outdoor Kitchen or BBQ Zone on a Cement Patio Outdoor concrete patio ideas surrounding a kitchen or BBQ zone require a flat, level, completely cured slab before anything else is put down. Concrete will stand up to grease, heat and heavy equipment better than any wood decking ever would. Plan for a modest run-away from the house so water runs off, not pool around appliances. Even a basic BBQ area looks better with a defined footprint, maybe a border of a different colour or a distinct texture marking out the grilling area. It keeps the foot traffic patterns clear and keeps the remainder of the patio from grease splatter.” There is also a shade structure nearby so you are not in the direct light during the warmest part of the day. Decorative Borders and Inlays A contrasting border, even only twelve inches wide, outlines the entire patio and conceals slight edge wear where it’s least visible. “A frame is a soldier course of brick, stained borders or a stamped band. Borders also provide you a tidy line if you’re pairing concrete with pavers or turf down the line. Inlays like a compass rose, house number or family initials give a unique touch for little added cost. It is best used as a single modest focal point at an entry or dining area and not distributed all over the slab. One well-placed inlay seems planned; five inlays look cluttered. Multi-Level Cement Patio Design Ideas Step downs and low retaining walls separate a dining area from a lounge area without adding fences. This layout works especially well on sloped lots where you’d otherwise need heavy grading. Each level

Cement Patio Ideas | Stylish, Durable, and Affordable Outdoor Makeovers Read More »

What Are the Basic Elements of Landscape Design?

What Are the Basic Elements of Landscape Design?

A great landscape is rarely the result of chance. Most appealing outdoor spaces are based on the same essential design principles, whether it’s a modest front yard, a rear retreat or a sprawling estate garden. That’s why many homeowners look into What Are the Basic Elements of Landscape Design when they are preparing to embark on a landscaping job. The simple answer is: the essential aspects of landscaping are line, form, color, texture, scale, balance, focal points, and unity. The result of these components is outdoor areas that are coherent, practical and attractive. Understanding them may transform random plantings and hardscape pieces into a purposeful landscape. 8 Elements & Principles of Landscape Design Experienced property planners rely on eight physical building blocks to organize outdoor environments. We must analyze each component to understand its practical role in your yard. 1. Line Lines establish the physical boundaries and pathways across your entire property layout. They control how the human eye moves through the space and direct physical foot traffic. We create lines whenever two different textures or materials meet on the ground. Vertical lines draw the eye upward toward the sky, making compact backyards feel much larger. You can build vertical structure by installing upright arborvitae trees or tall wooden trellises. Horizontal lines rest flat along the ground, which naturally widens your field of vision. Patios, low retaining walls, and wide walkways are excellent tools for creating strong horizontal baselines. 2. Form Form refers to the three-dimensional shape of your plants and hardscape features. It defines the central theme and style of your outdoor property layout. Plants grow in several distinct structural shapes, including upright, weeping, rounded, mounding, and prostrate. A tall, conical conifer provides a sharp structural contrast when placed next to a low, spreading groundcover. If you mix these shapes carelessly, the garden bed will look messy and unorganized. Hardscape forms include geometric features like square concrete patios, rectangular pergolas, and circular fire pits. Formal designs rely on manicured, symmetrical shapes like perfectly clipped boxwood spheres. Informal properties use loose, freeform plant silhouettes that blend into the surrounding environment naturally. 3. Mass and Weight Mass is the perceived visual weight of any object or group of features in your yard. Every tree, stone wall, deck, and open lawn space contributes to this balance. Your layout must balance filled spaces with open areas, which designers call negative space. A massive stone outdoor kitchen requires a wide lawn or a spacious brick patio nearby to offset its structural footprint. If you group too many heavy structures into one tight corner, the space will feel claustrophobic. We must also consider the mature size of living plants when calculating visual mass. A young tree might look small today, but it will eventually dominate the entire sky. Matching the mass of your plants to the size of your home preserves proper spatial harmony. 4. Color Color captures human attention faster than any other component in an outdoor environment. It sets the immediate emotional mood of your patio or garden entrance. Color exists in blooming flowers, softscape foliage, stained wood, and hardscape pavers. Warm colors like bright reds, deep oranges, and golden yellows create high-energy environments. These hues catch the eye instantly and make distant boundaries appear much closer than they actually are. They work beautifully around active entertaining zones like outdoor bars or barbecue pits. Cool colors like soft blues, light purples, and deep greens promote a tranquil, relaxing atmosphere. They tend to fade into the background, which helps a small urban courtyard feel open and breezy. To maximize year-round appeal, select evergreens and colored twigs that provide deep shades during cold winter months. 5. Texture Texture describes the surface quality of your softscape and hardscape materials. Combining diverse textures adds physical depth and prevents your property layers from looking flat. Hardscape materials carry specific texturing that influences the overall design theme. Rough, irregular flagstones project a rustic, naturalistic style. Smooth, cut slate or polished concrete pavers deliver a crisp, modern aesthetic that feels clean underfoot. 6. Light and Shadow Light is a shifting component that alters how we perceive your yard throughout the day. It changes how colors look and how shadows modify your spatial boundaries. Bright afternoon sunlight intensifies warm colors but can completely wash out soft pastel flowers. Morning light creates long, elegant shadows that highlight the unique shapes of your trees and shrubs. We must track how sunlight moves across the property before installing expensive features. A patio built for evening relaxation needs shaded protection from the hot western afternoon sun. Dark, damp corners that receive constant shadow require light-colored gravel and bright foliage to lift the mood. Strategic outdoor lighting extension extends the usability of your space long after the sun goes down. 7. Sound Sound modifies how you experience an outdoor living space by engaging your ears. It can mask distracting street noises and reinforce a peaceful backyard environment. We can introduce natural sounds by planting ornamental grasses that rustle softly in a light breeze. Installing a bubbling stone fountain or a small tumbling waterfall creates a consistent background splash. This water sound blocks out traffic noise and creates a private sanctuary. You can also use sound to bring wildlife into your garden spaces. Placing wooden bird feeders and stone birdbaths encourages local songbirds to visit. Their natural music adds a pleasant, dynamic layer to your daily outdoor experience. 8. Scent Scent provides an invisible layer of interest that photos cannot capture. It triggers deep memories and makes your outdoor space feel personal and welcoming. We should position aromatic plants near seating areas, patio edges, and main walkways. Walking past these zones releases the fragrance into the air automatically. Lavender, rosemary, confederate jasmine, and creeping thyme release pleasant aromas when brushed against or stepped on. Avoid mixing too many competing fragrances in one small area because the scents will clash. Space out your aromatic plants so visitors enjoy one distinct scent at a time as they move

What Are the Basic Elements of Landscape Design? Read More »