Uncategorized

Professional lawn mowing service trimming grass, showing equipment and care How Much Does Lawn Mowing Cost

How Much Does Lawn Mowing Cost?

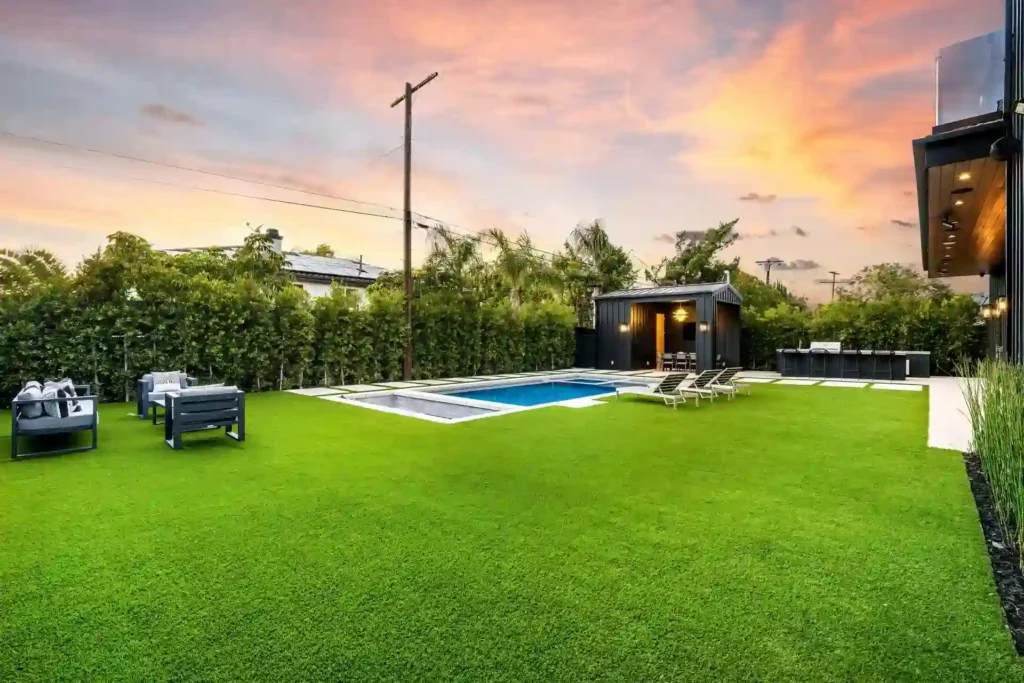
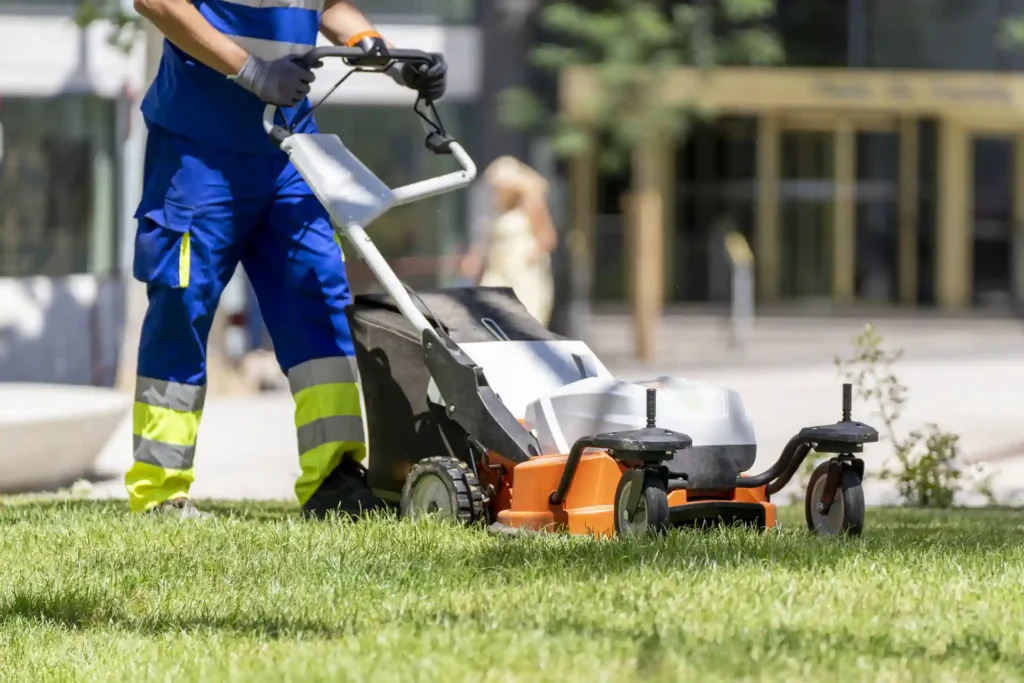
A clear price for lawn mowing helps homeowners plan and keeps service providers honest. For an average yard, mowing the lawn costs between $30 and $80 per visit in most parts of the U.S. Less money is needed for small lawns. It costs more to have a big or complicated yard. Prices also vary depending on where you are, how much work you need, and how good the service is. Using real service data, field experience, and pricing models used by professionals like Robert’s Complete Care, we show you how much lawn mowing costs in this guide. The goal is clear. Give you clear numbers, honest examples, and advice you can trust. How Much to Charge for Cutting Grass For professionals, the cost of mowing a lawn must include time, gas, tools, and profit. For homeowners, the same prices show how reliable and hard the work is. Most companies that take care of lawns charge in one of three ways: Pay a set amount for each visit Cost based on the size of the lawn Pay per hour of work Typical prices for mowing a lawn are: For a small lawn, $25 to $40 Medium-sized lawn: $40 to $60 Big lawn: $60 to $100 or more A single mower with basic tools costs less. A crew that is licensed and insured costs more. If the work is worth the price, both can be fair. When customers ask how much does lawn mowing cost, professionals should tell them what the price includes. Only mowing costs less. It costs more to mow, edge, and clean up. Lawn Mowing Cost by Location Location changes prices more than most people think. Costs of labour, fuel, and demand are all important. Areas in cities and suburbs  Prices for lawn mowing go up when there is more demand and higher wages. You should expect to pay between $45 and $80 for each visit. In the countryside  Prices are lower when costs are lower. A lot of jobs in rural areas pay between $30 and $50. Trends in the region  States that are warm have more months of the year. That usually lowers the cost per visit but raises the cost per year. Prices in places like Southern California are higher because of higher labour costs and service standards. This is why professional lawn care services in Whittier often cost more than the national average but are more reliable. How Much It Costs to Mow a Lawn by Size The size of the lawn is the most important factor in the price. It has an effect on time, fuel, and wear and tear on tools. Average costs for mowing lawns of different sizes: $25 to $40 for up to 5,000 square feet $40 to $60 for 5,000 to 10,000 square feet $60 to $90 for 10,000 to 20,000 square feet Cost of mowing an acre of lawn Per-acre pricing is common for big properties. $50 to $70 for a quarter acre For half an acre, it costs between $70 and $100. $100 to $150 or more for 1 acre Prices for mowing lawns per acre go down for very large areas with open layouts. Things like trees and slopes make the cost go up again. When people compare quotes, they should ask if edging and blowing are included. Size alone does not tell the full story. Cost of Labor The main cost of mowing a lawn is labour. Mowing is still a skilled job, even with machines. Hourly labor rates: $30 to $50 an hour for a single worker Crew of two: $50 to $75 an hour Full-service team: $75 to $100 or more an hour Higher rates usually mean that the crews are insured, have better tools, and have set service times. These teams help cut down on missed visits and uneven cuts. During the busy season, the cost of labour also goes up. In the spring and early summer, lawn mowing prices often go up because of demand. Pro Cost vs. DIY Cost A lot of people who own homes want to know if mowing their own lawn saves them money. It depends on the time and the tools you have. Cost of DIY Lawn Mowing:  It seems cheap at first. But the numbers make sense. Cost of a mower: $300 to $800 Fuel or power: $5 to $10 for each mow Cost of upkeep: $100 to $200 a year One to two hours of your time each week If you mow your own lawn, it can cost between $600 and $1,200 over the course of a season. Cost of Professional Lawn Mowing It costs more to hire a pro for each visit, but it’s less stressful. No need to maintain equipment No problems with storage Results that are always the same For a lot of homeowners, hiring a professional saves time and money. Other Things That Change the Cost of Mowing the Lawn Prices for lawns of the same size can be very different. Height and condition of the grass Lawns that are too big take longer and put more stress on tools. Cuts for the first time cost more. Terrain The job takes longer because of slopes, tight corners, and other things in the way. Mowing when the grass is wet Wet grass makes blades dull and clumps them together. A lot of pros don’t do it or charge more if they have to. How often Weekly service costs less per visit than mowing every other week or every month. Access and cleaning up Heavy debris or gated yards make people stay longer on site. Every factor affects the final estimate for mowing the lawn. Mowing Your Way to a Well-Groomed Lawn A clean, even cut does more than make your lawn look better. Mowing the lawn on a regular basis helps the grass grow thicker, keeps weeds down and keeps pests in check. When you don’t mow, the grass gets weaker, and it costs more to fix later. A smart schedule

How Much Does Lawn Mowing Cost? Read More »

Landscape worker spraying shrubs, showing what does landscape maintenance include in professional garden care

What Does Landscape Maintenance Include?

You don’t just get a nice yard by coincidence. It needs regular care, good planning, and the correct balance of services. Good maintenance keeps your plants safe, your grass healthy, and saves you money in the long run by fixing tiny problems before they get worse. If you are asking what does landscape maintenance include, the short answer is this. It includes taking care of plants and lawns, cleaning up, checking the irrigation, and keeping hard features like patios and walks in good shape. A complete plan makes sure that everything works together year after year. This handbook explains everything in simple terms. You will know what to expect, what is most important, and how to pick the best service for your home. What is included in residential landscape maintenance? The major goal of residential maintenance is to keep the outside of homes clean, safe, and healthy. It does a lot more than just cut grass. Most programs call for grass maintenance every week or every other week. That entails cutting the grass at the correct height, edging along the paths, and blowing away trash. This makes the grass thicker and keeps weeds from growing. Taking care of plants is equally vital. Teams cut back trees and shrubs and take away dead growth. This keeps plants healthy and stops homes and fences from becoming damaged. Taking care of the soil is very important. A lot of houses need to fertilize their lawns every season to make up for nutrients that have been lost. Better color and stronger roots come from healthy soil. When people wonder what does landscape maintenance includes, the response is regular care that keeps everything in balance and easy to enjoy. What does landscape maintenance include for clients of Total Maintenance Customers who pay for the whole maintenance get a higher level of service. These plans cover practically everything that isn’t within the house. Along with taking care of the lawn and plants, full plans frequently include checking for pests, controlling weeds, and testing the soil. Instead of waiting for harm to show, problems get treated right away. People check on irrigation systems on a regular basis. Heads are moved around, leaks are identified, and timers are set for the season. This preserves plants and saves water. They also inspect hard places. We clean and check for damage on walkways, borders, and minor walls. This is how a lot of landscape maintenance programs function. They want to be healthy for a long time, not just for a short time. Is All Landscape Maintenance in California the Same Not all services are the same, especially in places with bad weather. North Texas has to contend with heat, clay soil, and storms that come out of nowhere. Plans for maintenance there must deal with stress on grass and plants. A lot of companies utilize a plan that fits everyone. Some people change how they take care of their plants based on the kind of soil, the amount of shadow, and the mix of plants. The second choice is better. Staggs Landscaping and Hadley’s Landscaping are two companies that are known for their understanding of the area. They change the timing and treatments to fit the needs of the area. This is why asking what does landscape maintenance include should always include where the property is located Weekly lawn care? Included! Most plans are based on weekly care. To keep from ripping up the grass, crews use sharp blades to mow. Cleaning the edges of roads and pathways. Clippings are taken care of so they don’t build up. Regular checks also make it easier to find diseases or pests early on. People pay attention to small brown spots or areas that are getting thinner quickly. Companies like Denver Lawn and Landscape urge regular visits because missing weeks can cause tension and uneven growth. Weekly upkeep keeps lawns tidy, safe for youngsters, and easy to take care of. What does taking care of the landscape include? Weed Control and Fertilizing Fertilizer doesn’t just feed the grass; it also feeds the soil. Giving the proper nutrients at the right time makes roots stronger and more colorful. Weed control stops plants that are not native from spreading. This involves treatments before and after, depending on the season. Good crews don’t use too many goods. They focus on the areas that need work and observe safety standards. When clients inquire what landscaping is, fertilization and weed management are always important elements of the response. Taking care of the pond? Sure, why not? You also need to take care of water features. Cleaning up trash, monitoring the pumps, and making sure the water levels are right are all part of pond upkeep. Safe ways are used to control algae. If you don’t take care of things, they will smell bad, the water will be cloudy, and the equipment will break. Checks on a regular basis keep fixes from costing a lot. Some companies, like Mira Vista Landscaping, provide care for water features in their entire designs. It makes things better and keeps them fun. Seasonal Clean-Up? Included! Different needs come with each season. Spring cleanups remove winter trash and prepare beds for development. Fall cleanups remove leaves and prepare plants for the cold. During these visits, people often check on the plants, edge the beds, and mulch. Mulch keeps weeds out and helps the soil hold water. Seasonal work keeps houses clean and stops pests from moving in. Taking care of the irrigation system Water systems are simple to neglect until something goes wrong. Checking heads, lines, and valves is part of maintenance. Timers are changed when the weather changes. Leaks waste water and hurt plants. When heads are clogged, they make dry spots. A good strategy is to check the irrigation a few times a year. This keeps plants safe and saves money on utility expenses. Cleaning and fixing hardscape You should also take care of hard areas. Moss and dirt build up

What Does Landscape Maintenance Include? Read More »

What Is DG In Landscaping?

What Is DG In Landscaping | The Complete Homeowner’s Guide

If you’ve been looking at your yard and wondering how to make it more attractive without breaking the bank, you’ve probably heard about decomposed granite. Most people call it DG, and honestly, it’s one of the best-kept secrets in landscaping. It’s natural, it doesn’t cost a fortune, and it actually fixes the drainage headaches that concrete creates. Whether you’re thinking about building a new pathway or completely redoing your outdoor space, understanding what DG in landscaping really does matters for your project. Robert Complete Care has spent over 15 years doing Whittier landscape installation, and we’ve seen how DG transforms properties. This guide walks you through everything you need to know about DG materials, how to use them, and why they work so well for real homes. Understanding What Is DG In Landscaping How DG Actually Forms Here’s something interesting about decomposed granite. It starts out as solid granite rock, just like you see in mountains. Over years and years, weather beats on that rock. Rain seeps in, the sun heats it up, and winter freeze-thaw cycles do a number on it. Gradually, the granite breaks down into smaller and smaller pieces until it becomes fine particles mixed with sand and silt. That’s basically what DG is. The cool part is that this isn’t some manufactured product. It’s nature doing the work over centuries. You’re using natural material exactly as the earth creates it. Why DG Differs From Regular Gravel A lot of people confuse what is DG in landscaping with crushed granite gravel, but they’re actually pretty different. Crushed gravel has sharp, angular edges that stick out. Those edges don’t lock together. When you walk on crushed gravel, pieces shift and move under your feet. It’s uncomfortable, honestly, and you track it everywhere. Compacted decomposed granite is different because the particles are smaller and rounded. When you compact them properly, they fit together snugly like puzzle pieces. This creates a stable surface that actually holds its shape. You can walk on it barefoot without discomfort. The particles don’t scatter into your neighbor’s yard or end up stuck in your shoes. Natural Colors That Blend In DG comes in colors that actually look good. You’ve got golden and warm brown tones, gray shades, and rust-colored varieties. Where these colors come from matters. They’re determined by the mineral content in the original granite deposits. The warm earth tones make DG blend naturally into landscapes instead of looking out of place like bright crushed gravel or industrial concrete. When you drive through neighborhoods, you can spot homes with DG because the materials look intentional, not cheap. That’s an important difference. Your outdoor space actually looks thoughtfully designed. The Water Infiltration Advantage Here’s where DG really shines compared to other materials. Decomposed granite has tiny spaces between the particles. Water doesn’t sit on top like it does with concrete. Instead, it flows right through and soaks into the ground below. This solves real drainage problems that plague homeowners. Think about what happens when it rains hard. With concrete, water pools up and runs off. With DG, water infiltrates naturally. This means no puddles, no erosion, and no mosquito breeding grounds. In areas where drainage causes problems, this becomes incredibly valuable. You may read What Is Landscaping? Types of Decomposed Granite Natural Decomposed Granite The most affordable option is natural DG straight from the quarry with no additives. This works great for informal pathways, garden beds, and spaces where foot traffic stays light. If you’re on a tight budget, this is what you want. But here’s the honest truth. Natural DG can shift over time in areas with heavy use. Rain and foot traffic gradually move particles around. You’ll need to rake and refresh it periodically. Think of it like raking leaves, but less frequent. For some homeowners, this routine maintenance is fine. For others, it becomes annoying. Compacted Decomposed Granite This version has been mechanically pressed to increase density. The compaction process takes more effort during installation, which means higher labor costs. But you get a surface that holds its shape much better than natural DG. It handles moderate foot traffic without shifting around. Once it’s properly installed and compacted, you can walk on it more comfortably than natural varieties. The surface stays firmer longer. For most residential applications, compacted decomposed granite hits a sweet spot between cost and performance. Stabilized DG Stabilized DG includes a binding agent that locks particles together permanently. Different types of stabilizers exist. Some use polymeric compounds that bind particles without creating a hard shell. Others use resin-based products that create maximum durability. You get to choose based on your needs. Stabilized DG resists erosion way better than other types. It handles heavy foot traffic without issues. A properly installed stabilized DG surface lasts 10-15 years or longer with minimal maintenance. The trade-off is higher cost, but for driveways and high-use areas, stabilized products deliver real value that justifies the expense. Color Choices for Different Styles You get options when picking DG colors. Golden hues work well with warm-colored home exteriors. Gray tones match modern designs perfectly. Rust and brown shades enhance natural garden settings beautifully. Your choice really depends on what color your house is and what kind of look you want overall. Don’t underestimate this part. The right color makes your whole yard look intentional. The wrong color sticks out like a sore thumb. Using Decomposed Granite in Landscaping Creating Pathways and Walkways Pathways are where most people use DG first. The material creates smooth, comfortable walking surfaces that actually feel nice underfoot. The texture won’t embed in your shoes like gravel does. The natural color complements plants and hardscapes beautifully. A well-designed DG pathway guides visitors through your yard while looking attractive and serving a real purpose. When you’re planning a pathway, width actually matters. Three feet works for one person walking comfortably. Four feet lets two people walk side by side without bumping shoulders. You also need sturdy edges using landscape edging, brick,

What Is DG In Landscaping | The Complete Homeowner’s Guide Read More »

How to Install a Lawn Irrigation System – Step-by-Step Guide

How to Install a Lawn Irrigation System | A Complete Step-by-Step Guide

Watering your lawn by hand every day gets old fast, especially in summer. If you’re tired of dragging hoses around or watching your grass go brown during a dry spell, you’re already halfway to deciding you need a smarter solution. Learning how to install a lawn irrigation system isn’t as complicated as it sounds, and the payoff, a healthy lawn that basically waters itself, is absolutely worth the weekend effort. Here’s the quick answer: you plan your layout, dig trenches, lay PVC pipe, install valves and sprinkler heads, wire everything to a controller, and set your schedule. This guide walks through every step clearly, including gaps most tutorials skip, like water pressure calculation, winterization, and troubleshooting. What Is a Lawn Irrigation System? A lawn irrigation system is a network of underground pipes, valves and automatic pop-up sprinkler heads that deliver water to a landscape. It is hard wired into your primary water line or a secondary utility meter. The brain of the system is the central electronic controller that instructs particular valves to open and close according to a programmed schedule. Unlike manual sprinklers, an underground system offers targeted hydration through pressurized lines, meaning no waste of resources. It divides your yard into different areas called zones to keep the pressure correct for operation. Modern systems employ smart Wi-Fi controllers that automatically adjust watering times based on local weather forecasts. Is DIY Irrigation Installation Right for Your Yard? DIY irrigation installation is right for your yard if you have a property under a half-acre, flat terrain, and a basic comfort level with physical tools. Large properties with complex slope changes or heavy stone retaining walls require heavy commercial machinery and specialized engineering. If you are willing to handle intense physical labor like trenching and pipe assembly, a self-installed project is highly practical. Consider your personal schedule and physical limits before buying materials. Digging hundreds of feet of trenches by hand or operating a heavy walk-behind trencher strains your back and shoulders. However, managing the project yourself gives you total familiarity with your property’s plumbing, making future troubleshooting and repairs simple. Why Install a Sprinkler System? A sprinkler system will keep your deep soil moist all over, keep from overwatering, add to the value of your home and get rid of the daily manual labor.  An automated system delivers the exact amount of water your root zones need to thrive. Modern systems also use less water, so you may notice a decrease in your monthly utility bills. Water loss from evaporation and wind drift will be minimized by scheduling irrigation for the early morning hours. It also protects your costly investments in sod, ornamental trees and fragile flower beds in the middle of the brutal summer heat waves. Calculate Water Pressure and Flow Rate You measure the water pressure by connecting a pressure gauge to an outdoor spigot, and you measure the flow rate by timing how quickly a bucket fills. These two metrics determine the maximum number of sprinkler heads that can be on a single valve at the same time. Too many nozzles in a zone and the operating pressure drops and the heads will not pop up or spray properly. Be sure that all indoor faucets, washing machines, and showers are turned all the way off so that you can measure your static water pressure. Screw a standard $PSI$ (pounds per square inch) gauge onto the outdoor faucet nearest your water meter. Open the valve all the way. The normal range of pressure for a residential home should be between $40\text{ and }65\text{ PSI}$. Now do the bucket test to find out the $GPM$ (gallons per minute) capacity of your system. Place a clean 5-gallon bucket under the open spigot and time the exact number of seconds it takes to fill to the brim using a stopwatch. Use this math equation to figure out your ability: How to Install a Lawn Irrigation System: Step-by-Step 1. Plan Your Layout and Zones Never guess where to place your sprinkler heads. Draw a map of your property to scale on graph paper, marking the location of the house, driveway, sidewalks, and major trees. Divide the yard into square or triangular grids to ensure total head-to-head coverage. Head-to-head coverage means the spray from one sprinkler head must physically reach the base of the neighboring head. This overlapping design prevents dry patches caused by wind distortion or natural spray drop-off. Group your heads into separate zones based on your calculated $GPM$ limit and the sun exposure of each area. 2. File for Permits and Call 811 Before your shovel touches the dirt, you must contact your local building department regarding building codes and required plumbing permits. Most municipalities require a certified backflow preventer to stop non-potable lawn water from siphoning back into your clean domestic drinking supply. You must dial 811 at least a few days before digging to have your local utility lines marked for free. Utility technicians will spray paint or place small flags over buried gas, electric, and fiber optic lines. Striking an underground power cable or gas main is incredibly dangerous and carries massive financial liabilities. 3. Dig the Trenches Mark your planned pipe paths across the lawn using white landscape spray paint or string lines. Rent a walk-behind power trencher from a local tool supply yard for approximately $100 to $200 a day to save your back. These machines are heavy and vibrate intensely, so pull the unit backward slowly along your painted lines. [Image Idea: Real photo of a homeowner operating a rented mechanical walk-behind trencher, showing the machine carving a clean 8-inch deep trench in a front yard while leaving the churned dirt neatly piled on one side.] Dig your main line trenches to a depth of 8 to 12 inches to protect the pipe from lawn aerators and heavy traffic. Run your secondary zone lines at a minimum depth of 6 inches. When working near utility flags or tree roots, put away the power

How to Install a Lawn Irrigation System | A Complete Step-by-Step Guide Read More »

Beautiful backyard with lush green new lawn and swimming pool area showing the final result and cost for a new lawn installation.

How Much Does It Cost for a New Lawn? (2026 Price Guide)

A good grass may transform the whole appearance of a property. It improves curb appeal, generates useful outside space and can even add value to your property. But before you buy grass seed, sod or artificial turf, one question comes first: What does a new lawn cost. The bottom line is most homes will pay between $500 to $15,000 or more, depending on the size of your lawn, the installation method, soil conditions and labor costs. A small-seed lawn is a lot cheaper than a big sod job or an artificial turf operation. Knowing where the money goes helps you avoid surprises and makes planning easier. Average Cost to Install a New Lawn at a Glance Lawn Installation Cost Per Square Foot by Method How much does it cost for a new lawn per square foot? The total grass installation cost ranges from $0.09 per square foot for basic hand-seeding up to $25.00 per square foot for premium artificial turf. On average, standard natural lawn replacement projects involving sod or hydroseed run between $0.15 and $4.00 per square foot for both labor and materials. The baseline cost varies significantly depending on the physical delivery method and the amount of professional labor required to handle the material. Lawn Installation Method Material Cost Only (Per Sq. Ft.) Total Installed Cost (Labor + Materials Per Sq. Ft.) Traditional Hand-Seeding $0.02 – $0.15 $0.09 – $0.30 Slice Seeding $0.05 – $0.10 $0.08 – $0.18 Hydroseeding Slurry $0.03 – $0.08 $0.07 – $0.25 Sod Installation $0.30 – $0.85 $1.50 – $4.00 Artificial Turf $2.50 – $8.00 $10.00 – $25.00 Total Cost Breakdown by Typical Yard Size The absolute square footage of your property is the single largest factor driving your final invoice. Larger properties require heavy machinery and bulk delivery loads, which changes the logistical framework of the project. Lawn Size (Square Feet) Hand-Seeding Total Cost Hydroseeding Total Cost Sod Installation Total Cost 1,000 sq. ft. (Small Yard) $90 – $300 $70 – $250 $1,500 – $4,000 2,500 sq. ft. (Medium Yard) $225 – $750 $175 – $625 $3,750 – $10,000 5,000 sq. ft. (Average Suburb) $450 – $1,500 $350 – $1,250 $7,500 – $20,000 10,890 sq. ft. (1/4 Acre) $980 – $3,267 $762 – $2,722 $16,335 – $43,560 Detailed Breakdown by Lawn Installation Method Traditional Hand-Seeding: The Budget Choice How much does it cost to grow a lawn from seed? The average new lawn installation cost using traditional hand-seeding methods runs between $0.09 and $0.30 per square foot. This translates to an affordable $450 to $1,500 for an average 5,000-square-foot lawn, making it the least expensive entry point for property owners. Using a mechanical broadcast spreader to scatter loose seed across bare dirt keeps your initial material expenses remarkably low. The primary tradeoff here is time and a prolonged vulnerability to external elements. A hand-seeded yard requires rigorous watering cycles up to three times daily for the first eight weeks to achieve proper germination. Heavy rainstorms can easily wash away your loose seeds, leaving bare patches that require completely repeating the process. Furthermore, exposed, un-mulched dirt provides a perfect environment for opportunistic weed seeds to sprout rapidly alongside your new grass blades. Hydroseeding: Efficient Large-Scale Application What is the average cost to hydroseed a lawn? The professional cost to hydroseed a lawn ranges from $0.07 to $0.25 per square foot, with most homeowners spending around $1,250 for a 5,000-square-foot area. This specialized process uses a high-pressure machine to spray an integrated slurry of grass seed, starter fertilizer, water, and green cellulose fiber mulch. The thick, paper-like mulch slurry acts like a protective blanket over the topsoil, locking in essential moisture and keeping the seeds warm. This environment dramatically speeds up the germination process while protecting the delicate seeds from wind, birds, and minor soil erosion. While hydroseeding is exceptionally cost-effective for large properties or sloped terrain, it still requires restricted foot traffic during the initial 60 days. You must keep pets off the area and maintain daily watering routines until the young root systems solidify. Sod Installation: Instant Turf Solutions How much does sod cost to buy and install? Professional sod installation costs between $1.50 and $4.00 per square foot, approximately $7,500 to $20,000 for a typical 5,000-square-foot residence. This is more expensive due to the cost of mature grass pallets ( which are more expensive ) and the work involved in rolling them out . Sod is buying mature, already-grown blankets of grass that have been harvested straight from local turf farms with the top layer of soil and root system intact. Your yard is filled with crews joining the heavy rolls like a huge puzzle, giving you a green lawn immediately on day one. This immediate root matrix of course shuts out airborne weed seeds and needs heavy watering for only the first two weeks. The downside is that sod farms typically grow a single monoculture, i.e., a single, uniform type of grass. A monoculture yard of the same type of grass is much more susceptible to utter destruction if a certain pest or disease strikes your neighborhood than a mixed, seeded lawn. Artificial Turf: Zero Maintenance, High Investment What is the true artificial turf installation cost for residential properties? Synthetic grass installation runs between $10.00 and $25.00 per square foot, meaning a 5,000-square-foot yard requires a significant upfront investment of $50,000 to $125,000. This process involves total dirt excavation, laying a gravel drainage sub-base, and pinning down heavy synthetic fibers. While the initial price tag causes immediate sticker shock, artificial options remove water bills, weekly mowing chores, annual fertilizing, and chemical pesticide applications. The system pays for itself over its 20-year lifespan in drought-prone areas where natural grass maintenance is expensive. However, you must account for summer heat buildup, as synthetic materials can become uncomfortably hot to the touch under direct sunlight. Technical Prep Work: The Hidden Costs The final invoice for a lawn replacement cost is rarely limited to just the grass itself. Most yards require significant dirt preparation

How Much Does It Cost for a New Lawn? (2026 Price Guide) Read More »

A landscaper leveling soil and preparing the ground for new sod installation in a well-designed garden area with plants and stone edging.

What Is a Landscape Installation?

Most homeowners picture a finished yard and assume getting there is simple. Plant some grass, add a few shrubs, and call it done. But if you’ve ever gotten a quote and felt confused by what’s actually included, you’re not alone. What is a landscape installation, really? It’s the full process of building your outdoor space from the ground up  covering everything from grading the soil to laying patios, planting trees, installing irrigation, and adding lighting. This guide walks you through every part of that process so you know exactly what to expect before a single shovel hits the dirt. Why Landscape Installation Is Important A well-installed landscape does more than look good. It adds measurable value to your property. Beyond curb appeal, proper landscaping installation controls erosion, manages stormwater runoff, reduces heat around the home, and even cuts energy costs. Trees placed on the west and south sides of a house can lower cooling costs by up to 25%, according to the U.S. Department of Energy. It also gives you usable space. A yard without structure is just grass. A yard with defined zones for seating, planting, and movement becomes an extension of your home. What Is a Landscape Installation? A Closer Look What Is A Landscape Installation? A landscape installation is the intentional assembly of an outdoor setting that incorporates both hardscape and softscape elements. It’s more than just simple grass care or seasonal planting. It’s a system that’s planned, constructed and installed, an organized build-out of the exterior of your property. It’s like a home makeover, but for the exterior. You wouldn’t just throw new cabinets in a kitchen without testing plumbing first. Same goes with landscape installation . “We plan everything from drainage to soil quality to plant placement before anything goes into the ground. And it’s crucial to know what it isn’t as well. To install a landscape is not the same as maintaining a landscape. Maintaining an existing outdoor space is ongoing. Installation is the creation of that area to begin with.” Landscape Installation vs. Landscape Maintenance This is one of the most common points of confusion for homeowners, so it’s worth being direct about it. Landscape installation is a one-time construction project. Landscape maintenance is the ongoing service that keeps that project looking good after it’s done. The two are related, but they’re not the same thing  and confusing them can lead to serious budget surprises. When you hire a landscape installation company, you’re paying for design, labor, materials, and construction. When you hire a maintenance crew, you’re paying for mowing, trimming, irrigation checks, and seasonal cleanups. A good contractor will walk you through both  what it costs to build your landscape and what it costs to maintain it afterward. Landscape Design vs. Landscape Installation Is design and install two independent services? Yes, design and installation are two completely independent stages in property development. The design step generates the visual blueprint and spatial layouts on paper or digital software. In the construction phase, the detailed design is implemented by excavating earth, erecting buildings and installing physical plant. Think of the design as a road map to your yard. You can’t create a stable retaining wall without detailed blueprints. The design step saves you from costly mistakes before the heavy equipment arrives at your house. In the installation phase, that flat blueprint becomes reality. Our technicians take those lines on paper and turn them into stone walkways and lush plants. For a very effective project, both phases need to be working together. Steps Involved in a Landscape Installation The professional landscape installation process follows a clear sequence. Skipping steps is where most DIY projects fall apart. Step 1: Site Consultation and Assessment A contractor visits your property to assess the terrain, soil conditions, sun exposure, drainage patterns, and existing structures. This step is non-negotiable for accurate planning. Step 2: Design Planning A detailed plan gets created. This includes plant selection, hardscape layout, irrigation routing, drainage solutions, and lighting placement. Everything is mapped before anything is ordered. Step 3: Site Preparation and Grading This is where the real work starts. The crew clears vegetation, grades the soil for proper drainage, and prepares the base for any hardscape elements. Poor grading is one of the top reasons landscapes fail early. Step 4: Hardscape Installation Patios, walkways, retaining walls, pergolas, and other non-living structures go in first. Getting the hardscape right before planting protects your softscape investment. Step 5: Irrigation and Drainage Systems Irrigation lines, drip systems, and drainage solutions are integrated at this stage. Installing these systems after planting is expensive and disruptive, which is why they go in during construction. Step 6: Soil Amendment and Preparation Soil testing happens here. Based on the results, topsoil, compost, or fertilizer gets added to create the right growing environment for your selected plants. Step 7: Softscape Installation Trees, shrubs, ground cover, sod, flowers, and specialty plants are installed according to the design plan. Proper spacing and depth matter enormously here for long-term plant health. Step 8: Mulching and Finishing Touches Mulch goes in around plants to hold moisture and regulate soil temperature. Outdoor lighting gets installed. Final cleanup and inspection close out the project. Main Elements of a Landscape Installation Every property project relies on two main categories of materials. We balance these elements to build a beautiful, long-lasting space. Hardscaping Features Hardscaping refers to the non-living, structural pieces of your yard. These elements shape the flow of movement across your property. They provide the strength and backbone for the rest of the scenery. Retaining wall construction: Holds back soil slopes and creates flat, usable tiers. Permeable pavers: Build stable driveways and walkways that let stormwater drain naturally. Outdoor seating areas: Create functional flat spaces for patios, fire pits, and stone benches. Softscaping Features Softscaping involves all the living, organic elements in the design plan. These pieces bring color, texture, and natural life to the hard stone structures. They change and grow healthier over the years with proper

What Is a Landscape Installation? Read More »

Professional landscaper planting shrubs and trees during a landscape horticulture project, using irrigation lines and design plans for a sustainable garden in Whittier, California.

What Is Landscape Horticulture? Guide by Robert’s Complete Care

Most homeowners play their garden like a game of chance. You pick out what looks good at the nursery, water it on whatever timetable you discovered online, and watch half of it die by July. It is not a matter of trying. The problem is not knowing the science underlying how plants truly work in your particular soil, temperature and area. That’s what landscape horticulture is built to address. What Is Landscape Horticulture? It’s the science of choosing, positioning and caring for plants in outdoor settings in a way that ensures they live, and thrive, long term. It blends plant biology, soil science and design concepts to produce landscapes that look good and stay healthy with minimal guesswork. This guide breaks out what landscape horticulture is, what professionals in this area actually perform, how it differs from general landscaping, and why it matters for households in Southern California. Understanding What Is Landscape Horticulture Landscape horticulture is the science and practice of growing, managing, and designing plant life in outdoor environments. It covers everything from lawn installation and turf management to ornamental plant selection, soil health, and pest control. It’s not just about making a yard look good. It’s about making it work. Think of it this way: general gardening is knowing how to plant a flower. Landscape horticulture is knowing which flower to plant, where to plant it, what the soil needs first, how it will interact with neighboring plants, and what it’ll look like in five years. The landscape horticulture definition sits at the cross-section of three disciplines:       Plant biology: understanding how plants grow, reproduce, and respond to stress       Soil science: reading and improving the ground that feeds everything above it       Environmental design: arranging living elements in a space for function and beauty The Connection Between Horticulture in Landscaping and Design Horticulture in landscaping is not decoration. It’s the foundation of every good landscape decision. When a landscaper places a shrub near your entryway, a horticulturist asks: Does this plant match the sun exposure here? Will its roots conflict with the foundation in 10 years? Does it attract pollinators or problem pests? Those are horticultural questions, and they’re the difference between a yard that holds up and one that needs constant fixing. Good landscape design starts with plant knowledge. Color, texture, layering, and seasonal interest all rely on understanding plant behavior. A designer who skips horticulture is essentially decorating without knowing their materials. What Horticulture Adds to Landscape Design       Correct plant-to-site matching (sun, wind, drainage, soil type)       Seasonal planning so the landscape looks good year-round       Plant groupings that support each other rather than compete       Water efficiency through smart plant selection and layout       Reduced long-term maintenance costs  Horticulture and Landscape Architecture: The Artistic Science Horticulture and landscape architecture share the same purpose, but work at different sizes. Landscape architecture deals with the design of outdoor environments by way of grading, hardscaping and flow. Horticulture fills in the living layer with plants, turf, trees and ground covers, using accuracy based in science. Horticulture is an art, and creative choices include mixing soft ornamental grasses with bold-leafed shrubs, or warm-toned flowering plants to accent a front entry. It’s not by chance, it’s by design. The science stuff is when such decisions take root depth, canopy spread, water needs and seasonal behaviour into consideration. Art without science provides you a garden that looks great in pictures, but breaks apart in the summer. The Role of Horticulture and Landscape Management Horticulture and landscape management refers to the ongoing care of outdoor spaces using plant science as the guide. It’s not just cutting grass and blowing leaves. It’s monitoring soil health, adjusting irrigation schedules, managing pests before they spread, and timing fertilization to match plant growth cycles. Management without horticulture is reactive. You fix problems after they happen. Management with horticulture is preventive. You read early warning signs, adjust conditions before plants stress, and build a landscape that stays healthy across seasons. What Ongoing Horticultural Management Looks Like       Soil testing: checking pH, nutrient levels, and compaction to adjust amendments accurately       Seasonal fertilization: matching fertilizer type and timing to the plant’s active growth window       Pest scouting: identifying insect or fungal problems early using integrated pest management (IPM)       Irrigation management: adjusting drip lines and sprinkler schedules by season and rainfall       Pruning schedules: timing cuts to promote growth, not damage it       Mulch application: retaining soil moisture, moderating soil temperature, and suppressing weeds Why Landscape Horticulture Matters for Southern California Homeowners Southern California is not a forgiving climate for the wrong plants. Summer heat, periodic drought, clay-heavy soils, and Santa Ana wind conditions create real stress on landscapes. Horticulture matters here more than in many other parts of the country. When the wrong plant goes in the wrong spot, the problems multiply fast. Overwatering to keep stressed plants alive. Root systems cracking hardscape. Pest populations that exploit weakened plants. These are expensive problems with predictable causes. Southern California-Specific Horticultural Considerations       Drought-tolerant and native plant selection reduces irrigation costs significantly       Clay soil common in Whittier requires specific amendments before most plantings       Microclimates vary dramatically between sun-facing and shade-facing yard zones       Fire-resistant plant choices matter in areas near hillsides and open land       WELO (Water Efficient Landscape Ordinance) compliance affects new installations What Does a Landscape Horticulturist Actually Do? Landscape horticulturists applies plant science to design, build & manage plant-based outdoor settings. They evaluate soil conditions, choose suitable species for the site, prepare planting plans, oversee installation, and monitor plant health over time. They work on private yards, commercial properties, parks and public landscapes. This is NOT a general labourer or lawn maintenance crew. The diagnostic ability is a horticulturist’s job skill. They can

What Is Landscape Horticulture? Guide by Robert’s Complete Care Read More »

Learn How to Design Landscape Lighting with Simple Steps

Most homeowners spend thousands on their outdoor spaces and then let everything go dark at night. That’s leaving serious curb appeal, safety, and property value on the table. When you take the time to learn how to design landscape lighting properly, your yard stops being an afterthought after sunset and starts working for you around the clock. The good news? You don’t need to be an electrician or a professional designer. You need a clear plan, the right fixtures, and a basic understanding of how light behaves outdoors. This guide walks you through everything, from sketching your first layout to choosing fixture types, wiring methods, and design techniques that actually look good. What Is Landscape Lighting? Landscape lighting refers to any outdoor lighting used to highlight the natural and built features of your property after dark. This includes your lawn, garden beds, trees, pathways, driveway, patio, and the facade of your home. Modern landscape lighting systems almost always run on low-voltage power, typically 12 volts, stepped down from your home’s standard 120-volt supply using a transformer. This makes them far safer and easier to install than older high-voltage systems. The goal isn’t just visibility. It’s about creating depth, guiding the eye, and making your outdoor space feel like it was designed with intention, not just lit for safety. The Importance of Your Landscape Lighting Plan A landscape lighting plan is the single step most homeowners skip, and it’s also the reason most DIY lighting jobs look uneven or amateurish. Without a plan, you end up over-lighting some areas, leaving others dark, and wasting money on fixtures you don’t need. Planning also determines your transformer size. If you buy lights before calculating your total wattage load, there’s a real chance your transformer trips, or worse, delivers inconsistent power to every fixture on the circuit. A two-hour planning session up front prevents three trips back to the hardware store and saves the whole project. Should You Learn How to Design Landscape Lighting or Leave It to the Professionals? Designing your own landscape lighting is highly achievable for any homeowner willing to learn basic low-voltage layout principles. It saves thousands in professional labor fees and allows you to customize the look of your property. However, very complex properties with sprawling stone walls or tall roofline peaks might require commercial setups. Project Factor DIY Path Professional Path Average Cost $400 – $1,200 (Materials only) $3,500 – $8,000+ (Parts & Labor) Safety Level High (Safe 12V current) Expert (Handles high-voltage tying) Design Control Total personal customization Relies on contractor vision Installation Time 1 – 2 weekends of light digging 1 – 2 days of crew installation For a standard suburban yard, low-voltage systems carry zero risk of dangerous electrical shock. This makes it the perfect entry-level project for do-it-yourself fans. If your project demands high-voltage 120-volt trenching for heavy outbuildings, that’s when you call a licensed electrician. How to Create a Landscape Lighting Installation Plan 1. Sketch a Property Map Grab a piece of grid paper and draw a bird’s-eye view of your yard. Include the house outline, main pathways, patios, mature trees, and large planting beds. You don’t need architectural drawing skills, but keeping the distances close to reality prevents buying short wire runs later. 2. Choose Your Primary Focal Points Step out into your yard at dusk with a powerful flashlight. Shine it at different features to see what looks best under direct light. Focus on the corners of your home, architectural pillars, textured stone walls, or ornamental trees. Mark these chosen spots on your paper map with small stars. 3. Plot Your Power Sources Identify your outdoor GFCI-protected electrical outlets. Your low-voltage transformer must mount near one of these sources. From that spot, draw lines out to your fixture stars to map the path for your 10-gauge and 12-gauge cables, keeping your total wire run lengths under 100 feet to preserve power. Understanding Landscape Lighting: Techniques That Actually Work Before you place a single fixture, understand the six core outdoor lighting techniques. Getting these right is the difference between a yard that looks polished and one that just looks bright. Uplighting Uplighting is the most dramatic effect in outdoor lighting design. You aim the light source upward from below, which works beautifully on trees, architectural columns, and textured walls. For trees under 20 feet tall, two 20-watt uplights positioned at the base are usually enough. Larger trees may need three to five uplights at 35 to 50 watts each. Always light both the trunk and the canopy. Lighting only the canopy creates a floating-tree effect that looks unnatural. Downlighting and the Moonlighting Effect Downlights are mounted high on trees or structures and cast light downward, mimicking the soft, natural glow of moonlight. This works well over patios, seating areas, and garden paths. The moonlighting effect is subtle and one of the most elegant techniques in professional landscape lighting design. Use copper or brass housings for tree-mounted downlights since you won’t want to climb to replace them regularly. Wall Washing Wall washing uses a soft, wide-angle light to create even illumination across a flat surface, like a facade, fence, or garden wall. It makes surfaces appear larger and more inviting. Place the fixture one to three feet from the wall and angle it slightly for the cleanest spread. Silhouetting Place a spotlight between a feature and a wall directly behind it. The feature casts a shadow against the lit wall, turning the shadow itself into the focal point. Topiary bushes, sculptures, and ornamental trees respond especially well to this technique. Grazing Grazing is one of the most underused techniques in residential outdoor lighting design. Position a light very close to a textured surface, like a stone wall, brick facade, or ornamental bark, and aim it almost parallel to the surface. The light skims across the texture and makes it pop. It looks extraordinary on hardscape features. Path and Spread Lighting Path lights cast a downward pool of light to guide movement along

Learn How to Design Landscape Lighting with Simple Steps Read More »