Most homeowners spend thousands on their outdoor spaces and then let everything go dark at night. That’s leaving serious curb appeal, safety, and property value on the table. When you take the time to learn how to design landscape lighting properly, your yard stops being an afterthought after sunset and starts working for you around the clock.
The good news? You don’t need to be an electrician or a professional designer. You need a clear plan, the right fixtures, and a basic understanding of how light behaves outdoors. This guide walks you through everything, from sketching your first layout to choosing fixture types, wiring methods, and design techniques that actually look good.
What Is Landscape Lighting?
Landscape lighting refers to any outdoor lighting used to highlight the natural and built features of your property after dark. This includes your lawn, garden beds, trees, pathways, driveway, patio, and the facade of your home.
Modern landscape lighting systems almost always run on low-voltage power, typically 12 volts, stepped down from your home’s standard 120-volt supply using a transformer. This makes them far safer and easier to install than older high-voltage systems.
The goal isn’t just visibility. It’s about creating depth, guiding the eye, and making your outdoor space feel like it was designed with intention, not just lit for safety.
The Importance of Your Landscape Lighting Plan
A landscape lighting plan is the single step most homeowners skip, and it’s also the reason most DIY lighting jobs look uneven or amateurish. Without a plan, you end up over-lighting some areas, leaving others dark, and wasting money on fixtures you don’t need.
Planning also determines your transformer size. If you buy lights before calculating your total wattage load, there’s a real chance your transformer trips, or worse, delivers inconsistent power to every fixture on the circuit.
A two-hour planning session up front prevents three trips back to the hardware store and saves the whole project.
Should You Learn How to Design Landscape Lighting or Leave It to the Professionals?
Designing your own landscape lighting is highly achievable for any homeowner willing to learn basic low-voltage layout principles. It saves thousands in professional labor fees and allows you to customize the look of your property. However, very complex properties with sprawling stone walls or tall roofline peaks might require commercial setups.
| Project Factor | DIY Path | Professional Path |
| Average Cost | $400 – $1,200 (Materials only) | $3,500 – $8,000+ (Parts & Labor) |
| Safety Level | High (Safe 12V current) | Expert (Handles high-voltage tying) |
| Design Control | Total personal customization | Relies on contractor vision |
| Installation Time | 1 – 2 weekends of light digging | 1 – 2 days of crew installation |
For a standard suburban yard, low-voltage systems carry zero risk of dangerous electrical shock. This makes it the perfect entry-level project for do-it-yourself fans. If your project demands high-voltage 120-volt trenching for heavy outbuildings, that’s when you call a licensed electrician.
How to Create a Landscape Lighting Installation Plan
1. Sketch a Property Map
Grab a piece of grid paper and draw a bird’s-eye view of your yard. Include the house outline, main pathways, patios, mature trees, and large planting beds. You don’t need architectural drawing skills, but keeping the distances close to reality prevents buying short wire runs later.
2. Choose Your Primary Focal Points
Step out into your yard at dusk with a powerful flashlight. Shine it at different features to see what looks best under direct light. Focus on the corners of your home, architectural pillars, textured stone walls, or ornamental trees. Mark these chosen spots on your paper map with small stars.
3. Plot Your Power Sources
Identify your outdoor GFCI-protected electrical outlets. Your low-voltage transformer must mount near one of these sources. From that spot, draw lines out to your fixture stars to map the path for your 10-gauge and 12-gauge cables, keeping your total wire run lengths under 100 feet to preserve power.
Understanding Landscape Lighting: Techniques That Actually Work
Before you place a single fixture, understand the six core outdoor lighting techniques. Getting these right is the difference between a yard that looks polished and one that just looks bright.
Uplighting
Uplighting is the most dramatic effect in outdoor lighting design. You aim the light source upward from below, which works beautifully on trees, architectural columns, and textured walls. For trees under 20 feet tall, two 20-watt uplights positioned at the base are usually enough. Larger trees may need three to five uplights at 35 to 50 watts each.
Always light both the trunk and the canopy. Lighting only the canopy creates a floating-tree effect that looks unnatural.
Downlighting and the Moonlighting Effect
Downlights are mounted high on trees or structures and cast light downward, mimicking the soft, natural glow of moonlight. This works well over patios, seating areas, and garden paths. The moonlighting effect is subtle and one of the most elegant techniques in professional landscape lighting design.
Use copper or brass housings for tree-mounted downlights since you won’t want to climb to replace them regularly.
Wall Washing
Wall washing uses a soft, wide-angle light to create even illumination across a flat surface, like a facade, fence, or garden wall. It makes surfaces appear larger and more inviting. Place the fixture one to three feet from the wall and angle it slightly for the cleanest spread.
Silhouetting
Place a spotlight between a feature and a wall directly behind it. The feature casts a shadow against the lit wall, turning the shadow itself into the focal point. Topiary bushes, sculptures, and ornamental trees respond especially well to this technique.
Grazing
Grazing is one of the most underused techniques in residential outdoor lighting design. Position a light very close to a textured surface, like a stone wall, brick facade, or ornamental bark, and aim it almost parallel to the surface. The light skims across the texture and makes it pop. It looks extraordinary on hardscape features.
Path and Spread Lighting
Path lights cast a downward pool of light to guide movement along walkways and driveways. Space them six to eight feet apart, staggered on alternating sides of the path rather than lined up like a runway. This creates a more natural, welcoming flow.
Types of Outdoor House Lighting
Choosing the right fixture type for each area is the foundation of a good landscape lighting layout. Here’s a quick reference for each fixture category:
| Fixture Type | Best Used For | Typical Lumens |
| Path Lights | Walkways, driveways, garden edges | 100 to 200 lumens |
| Bullet/Spotlights | Tree trunks, sculptures, columns | 50 to 300 lumens |
| Well Lights | Uplighting trees, grazing walls | 50 to 300 lumens |
| Wash Lights | Facades, fences, privacy walls | 150 to 400 lumens |
| Flood Lights | Large trees, wide facades | 700 to 1300 lumens |
| Downlights | Patios, seating areas, lawns | 300 to 700 lumens |
| Step/Deck Lights | Stairs, deck perimeter, risers | 50 to 150 lumens |
| Submersible Lights | Ponds, fountains, water features | 100 to 300 lumens |
Choosing the Right Bulbs: LED vs. Halogen
The bulb you choose determines your energy costs, color quality, and how often you’re replacing things. For modern landscape lighting, LED wins on almost every metric.
| Factor | LED | Halogen |
| Lifespan | Up to 40,000 hours (~20 years) | ~2,000 hours (~2 years) |
| Wattage | 1 to 11 watts | 20 to 60 watts |
| Energy Cost | Up to 75% less than halogen | Higher ongoing cost |
| Heat Output | Low, safer near plants | High, can damage nearby foliage |
| Upfront Cost | Higher initial price | Lower initial price |
| Best Color Temp | 2700K to 3000K for warm glow | 2700K to 3200K range |
Landscape Lighting Design Ideas Worth Trying
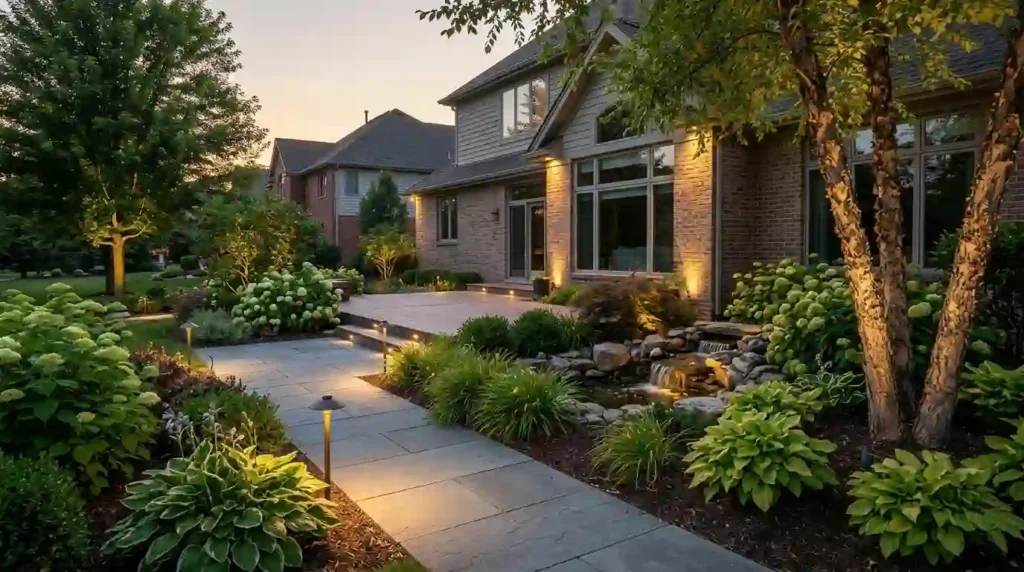
Front Yard and Facade
Pair bullet lights aimed at architectural details, like columns, dormers, or eaves, with wash lights that fill the space between. This layered approach adds depth and makes the home look intentional, not just bright.
Place upward-facing bullet lights about one foot from the foundation for the cleanest angle on vertical architectural features.
Pathways and Driveways
Stagger path lights on alternating sides of the walkway, six to eight feet apart. For driveways, combine downlighting from nearby trees with low-level path lights along the edges. Avoid over-lighting these areas. Continuous illumination looks like an airport runway, not a home.
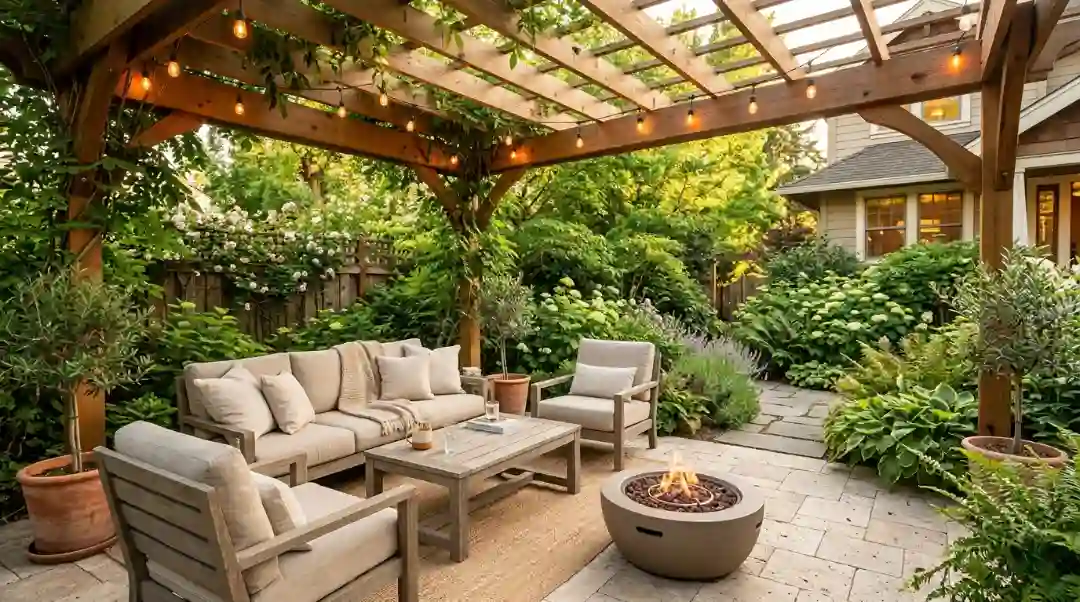
Patios, Decks, and Outdoor Kitchens
Tree-mounted downlights create a soft moonlit atmosphere for seating areas. Use warm-temperature bulbs here. Add step lights to every riser on deck stairs and consider low-level well lights around the perimeter to define the space without harsh shadows.
Outdoor kitchen areas need brighter, more even illumination for prep and cooking. A mix of downlighting and task lighting works best.
Fence and Privacy Wall Lighting
Most guides skip this entirely. Your fences and privacy walls are excellent surfaces for grazing and wall washing. A line of well-placed uplights aimed at a textured block wall or wood fence creates a dramatic backdrop that makes the whole garden feel enclosed and designed.
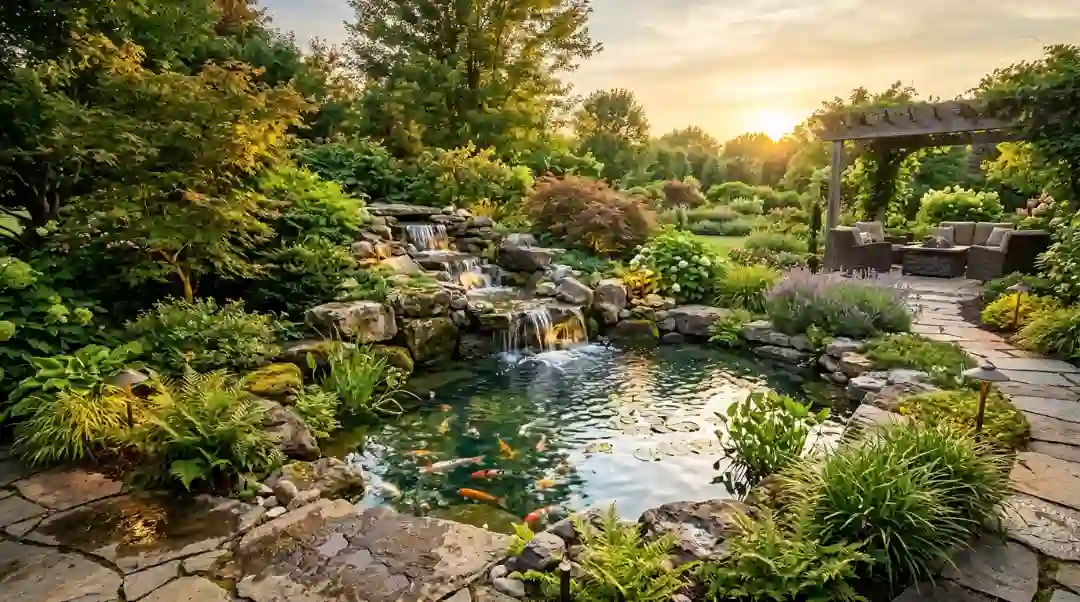
Water Features
Submersible LED lights placed inside ponds or fountains create a shimmering effect that’s hard to replicate any other way. For a waterfall or raised fountain, use the uplighting technique to make the moving water glow. Always use waterproof-rated fixtures with sealed connectors in or near water.
How Much Does Landscape Lighting Cost?
This is one of the most commonly searched questions around this topic, and almost no guide answers it directly. Here’s a straightforward breakdown:
| Installation Type | Typical Cost Range | Notes |
| DIY (8 to 12 fixtures) | $150 to $500 | Fixtures + transformer only |
| DIY (15 to 20 fixtures) | $400 to $900 | Low-voltage LED kits |
| Professional (basic) | $1,500 to $3,000 | Design, fixtures, labor |
| Professional (full property) | $3,000 to $8,000+ | Multiple zones, premium fixtures |
The biggest cost driver is the number of zones and fixture quality. Budget-tier path lights start around $10 to $20 each. Commercial-grade copper or brass fixtures can run $80 to $200 per unit. For most homeowners, mid-range LED kits offer the best balance of durability and cost.
Energy Efficiency and Smart Controls
LED outdoor fixtures have changed the cost equation entirely. Running a full low-voltage landscape system with LEDs costs a fraction of what older halogen setups used to. Your electricity bill will barely notice the difference.
Smart controls make good systems even better. A basic timer keeps lights on only when needed, typically from dusk to midnight. Photocell sensors handle on/off automatically based on ambient light. Smart transformers let you adjust zones, set schedules, and change brightness from your phone.
Solar path lights have improved significantly and work well in high-traffic, sun-exposed areas. Modern solar fixtures hold their charge even on overcast days and no longer look cheap or dim.
Maintenance: What People Always Forget
Good outdoor lighting design ideas mean nothing if the system falls apart in two seasons. Here’s what to stay on top of:
- Clean fixture lenses twice a year. Dirt and oxidation cut output noticeably.
- Replace bulbs as they dim, not just when they fail. Dimming LEDs often signal early failure.
- Check wire connections after hard winters or major rainstorms.
- Clear solar panel surfaces of leaves and debris monthly.
- Adjust fixture angles seasonally plants grow and block light paths over time.
Get Professional Help When You Need It
If you want a system that’s fully customized, multi-zone, and built to last working with a professional landscaping team makes sense. At Robert’s Complete Care, we design and install landscape lighting systems for homes across the area. Whether you need a simple path lighting setup or a complete outdoor lighting plan, our team handles it from start to finish.
If you’re in Southern California and want expert help with your outdoor space, check out our Landscape Design Whittier CA Service we’d be glad to help you build something worth seeing after dark.
Frequently Asked Questions
What are the six rules of landscape design?
The six core rules are unity, balance, proportion, focalization, rhythm, and simplicity. These apply to lighting too a well-lit yard uses consistent warm-white tones, balances bright focal points with softer fill lighting, and avoids cluttering every corner with fixtures.
What is the golden rule of lighting?
The golden rule is to layer your lighting: always combine ambient, task, and accent light sources. In outdoor spaces, that means general path lighting, functional step lighting, and focused accent lighting on plants or features.
What are the 7 steps to landscape design?
Assess your space, identify goals, sketch a layout, choose plant and hardscape materials, plan irrigation and lighting, set a budget, then install in phases. Lighting should be planned from the beginning even if it’s installed last.
How can I learn lighting design?
Start with free resources from the American Lighting Association, study real yard examples, and experiment with a small low-voltage kit before committing to a full system. Hands-on practice teaches more than theory.
What is the 3 lighting rule?
The 3 lighting rule says every space indoor or outdoor should have three types of light: ambient, task, and accent. In a backyard, that might be string lights overhead, path lights on walkways, and spotlights on a tree.