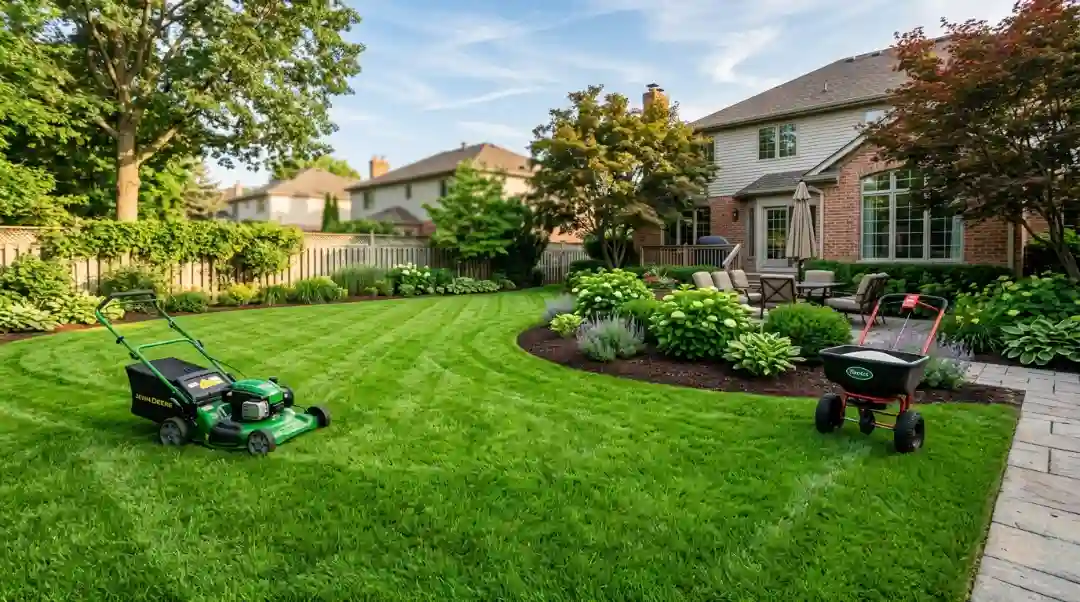
If you’ve ever spent a weekend spreading mulch across a hillside, only to watch the next rainstorm carry it straight down to the driveway, you know exactly how frustrating that is. Slopes fight gravity every single day, and mulch, without the right setup, doesn’t stand a chance. The good news? Knowing how to keep mulch on slopes and hillsides isn’t complicated. It just takes the right materials, the right technique, and a bit of planning upfront.
In this guide, we’ll walk through every method that actually works, from choosing the correct mulch type to laying erosion control blankets and building natural plant barriers. Whether you’re dealing with a gentle grade or a steep hillside that sends everything sliding, there’s a solution here that fits your yard and your budget. Let’s get straight into it.
Why Mulch Slides Down Slopes in the First Place
Before fixing the problem, it helps to understand what’s causing it.
Gravity pulls everything downhill, and mulch is no exception. When rain hits a slope, water moves fast across the surface instead of soaking in evenly. That moving water picks up lightweight mulch particles and carries them down with it.
The steeper the slope, the faster this happens. A mild 10-degree grade might only lose mulch in heavy storms, but a 35-degree hillside can strip bare after a single afternoon shower. Slope angle is one of the most overlooked factors when people plan their mulching strategy.
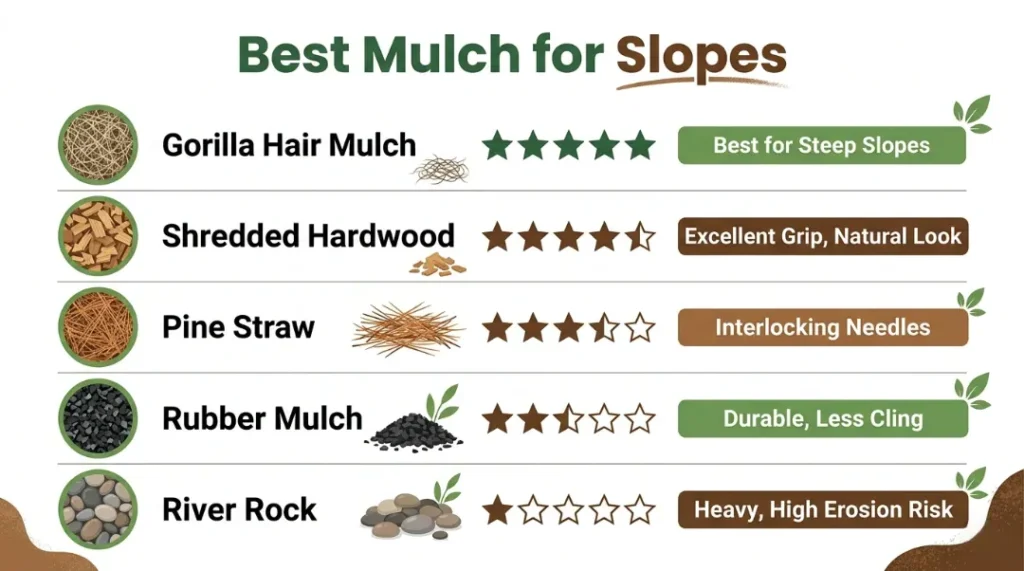
Best Mulch Types for Slopes and Hillsides
 Not all mulch behaves the same on a hillside. Choosing the right type is your first line of defense.
Gorilla Hair Mulch is widely considered the best option for steep slopes. It’s made from shredded redwood or cedar bark, and its fibrous, stringy texture causes individual pieces to lock together. It mats down naturally and resists being displaced even on slopes that would wash away standard bark chips.
Shredded Hardwood Bark is a close second. It’s denser than standard bark nuggets, settles into a more compact layer, and its irregular edges help pieces interlock. This mulch works well on moderate slopes and is one of the more affordable heavy-duty options.
Pine Straw (Pine Needles) is surprisingly effective on mild-to-moderate slopes. The needles naturally weave together and shed water sideways rather than absorbing it, which reduces surface runoff. It’s also lightweight to carry up a hill, which matters more than people think.
Rubber Mulch is made from recycled tires and sits heavy on the ground. It won’t blow away in wind, it won’t float in rain, and it lasts far longer than organic options. The downside is cost and the fact that it doesn’t improve soil health over time.
River Rock or Pea Gravel is best reserved for very steep slopes or drainage channels where organic mulch simply won’t stay. Rock doesn’t wash away, but it also doesn’t insulate plant roots or add organic matter to the soil.
How to Keep Mulch on Slopes and Hillsides: 9 Methods That Work
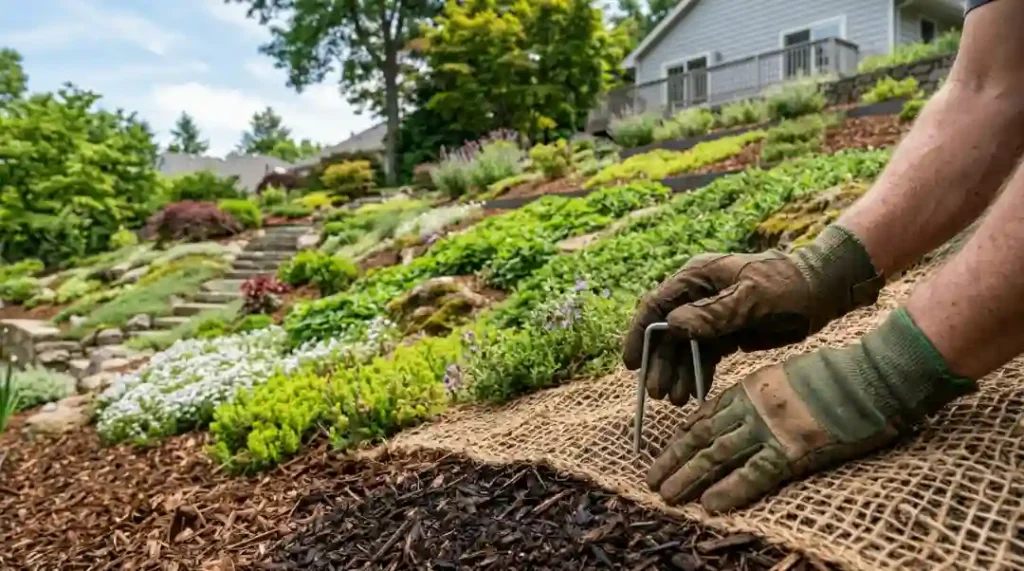
1. Lay Jute Netting or Erosion Control Blankets
This is the single most effective method for steep slopes. Jute netting is a biodegradable mesh fabric that you lay directly over the mulch. It physically holds the material in place while rain and gravity try to pull it down.
For mild slopes, a single layer of jute netting pinned with landscape staples works well. On steeper hillsides, use a straw or coconut fiber erosion control blanket instead. These heavier blankets provide more surface coverage and stay put longer.
Plastic erosion netting is also available and works better in high-traffic or long-term applications where biodegradable options would break down too quickly.
2. Use Landscape Staples to Secure Everything
Landscape staples, sometimes called mulch pins or sod staples, are U-shaped metal pins that you push into the ground through your netting or erosion blanket. They’re cheap, easy to install, and make a dramatic difference in how well your netting holds.
Space them every 12 to 18 inches along the edges and seams of your netting. On steeper sections, tighten the spacing to every 8 to 10 inches. Don’t skip this step. Netting without staples on a slope is like a tarp without tie-downs in a windstorm.
3. Install Edging Along the Downhill Edge
Edging acts as a physical dam that stops mulch from sliding off the bottom of your slope. The key is installing it on the downhill side specifically, not just around the perimeter like a flat garden bed.
For hillsides, steel or aluminum edging works best. Bury it 4 to 6 inches deep, and leave 2 to 3 inches above the soil surface to form a lip that catches mulch. For a more natural look, a row of landscape stones or timber edging along the base of the slope does the same job.
4. Build a Mulch Trench at the Base
A mulch trench is a dug-in channel at the downhill edge of your slope that catches runoff and contains mulch that shifts. Dig a trench about 3 to 4 inches deep and pack the outer wall firmly. You can add a row of flat stones or pavers inside the trench for extra hold.
This method costs almost nothing and works surprisingly well on moderate slopes. It also improves drainage, which reduces the force of water flowing down the hillside during heavy rain.
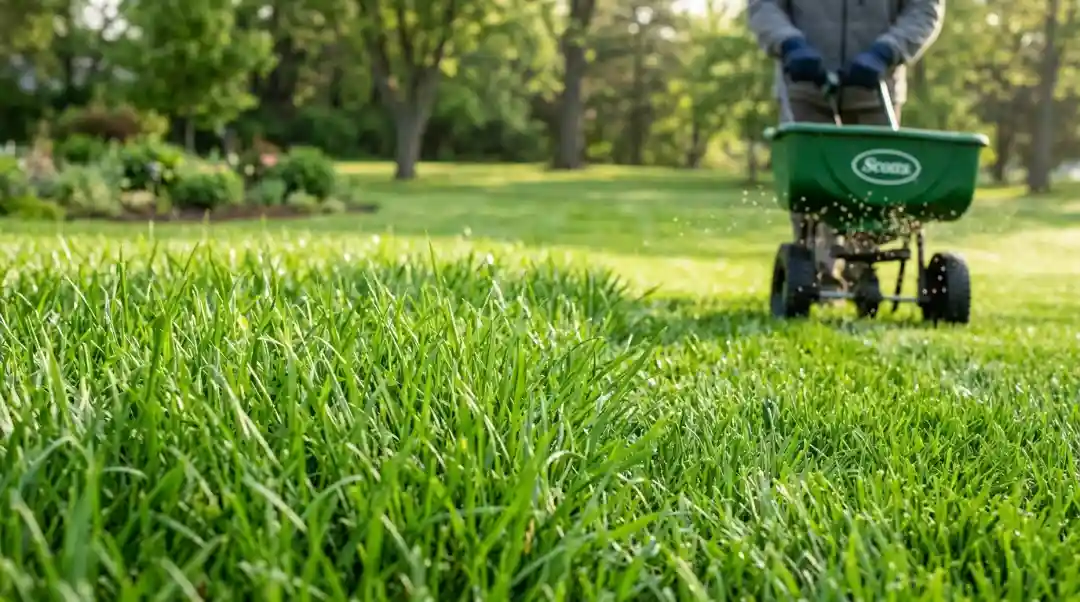
5. Choose the Right Mulch Depth
Depth matters more on slopes than on flat ground. Too thin, and rain picks up the mulch easily. Too thick, and the bottom layer gets waterlogged and slick, turning into a slide for everything above it.
The right depth for most slopes is 2 to 3 inches. If you’re using gorilla hair mulch or shredded hardwood, 2 inches is enough since both materials compact well. Don’t go over 4 inches on steep slopes under any circumstances.
6. Apply Mulch Stabilizer Spray
Mulch stabilizer, sometimes called mulch glue or tackifier, is a spray-on adhesive that binds mulch particles together into a semi-solid layer. It’s particularly useful on slopes where physical barriers alone aren’t enough.
Apply it with a garden sprayer after laying your mulch. Let the first coat dry for about 2 hours, then apply a second coat if needed. Avoid watering the area for 24 hours after application. Most stabilizers hold for 12 to 18 months before needing a reapplication.
7. Keep Mulch Lightly Moist
Dry, loose mulch is much easier for wind and water to displace than mulch that’s slightly damp. Keeping the surface moist right after installation helps it settle and compact naturally.
Install drip irrigation or soaker hoses beneath the mulch layer if possible. Surface watering with a hose can actually displace mulch on a slope, so avoid it. Drip irrigation also prevents the runoff channels that form when water hits a slope all at once.
8. Remove Slippery Landscape Fabric
Many homeowners lay plastic sheeting or landscape fabric under mulch to control weeds. On slopes, this creates a slick surface that mulch slides down like a playground slide. If you’re dealing with a slope that keeps losing mulch, check whether fabric is the culprit.
Replace plastic sheeting with cardboard or layers of newspaper. Both suppress weeds, they break down into the soil over time, and they grip mulch much better than smooth plastic.
9. Plant Ground Covers to Anchor the Mulch Naturally
Plants with dense, fibrous root systems physically hold both the soil and the mulch in place. Ground covers spread quickly, create a living mat over the surface, and protect the slope even in areas between plantings.
Good ground cover options for slopes include creeping juniper, ivy, lantana, creeping phlox, and ice plants. Native ornamental grasses like Muhlenbergia rigens and Carex testacea are also excellent because their dense clumping bases catch runoff and trap mulch.
Matching Your Method to Your Slope Angle
Not every slope needs the same solution. Here’s a quick breakdown:
Mild Slopes (Under 15 degrees): Basic edging along the downhill edge combined with shredded hardwood or pine straw is usually enough. Keep mulch at 2 to 3 inches and water with drip irrigation.
Moderate Slopes (15 to 30 degrees): Use gorilla hair mulch or shredded hardwood with jute netting pinned by landscape staples. Add ground cover plants in open areas.
Steep Slopes (30 to 45+ degrees): Erosion control blankets, mulch stabilizer, and retaining structures are all necessary. Consider combining rubber mulch with coconut fiber blankets and dense ground cover planting.
Step-by-Step: How to Mulch a Slope Correctly
Here’s the exact process to follow for a moderate-to-steep slope:
Step 1: Clear the slope of debris, dead plants, and loose soil. Rake the surface smooth.
Step 2: Install your edging along the downhill edge. Bury it deep and leave a lip above the soil.
Step 3: If using landscape fabric, replace plastic sheeting with cardboard or newspaper. Overlap layers by 6 inches.
Step 4: Spread your mulch evenly at 2 to 3 inches deep. Work from the top down.
Step 5: Unroll jute netting or your erosion control blanket over the mulch surface. Overlap seams by at least 6 inches.
Step 6: Secure the netting with landscape staples every 12 to 18 inches. Add extra staples along edges and uphill sections.
Step 7: Apply mulch stabilizer if needed. Let it cure for 24 hours before watering.
Step 8: Water lightly with a drip system to help everything settle.
Alternative Solutions for Very Steep Slopes
When a slope is too severe for mulch alone, you need structural support.
Retaining walls built from timber, railroad ties, or masonry block are the most permanent fix. They create flat terraced sections where mulch actually stays put. Timber and railroad ties are more affordable. Poured concrete or stone veneer retaining walls last longer but cost significantly more.
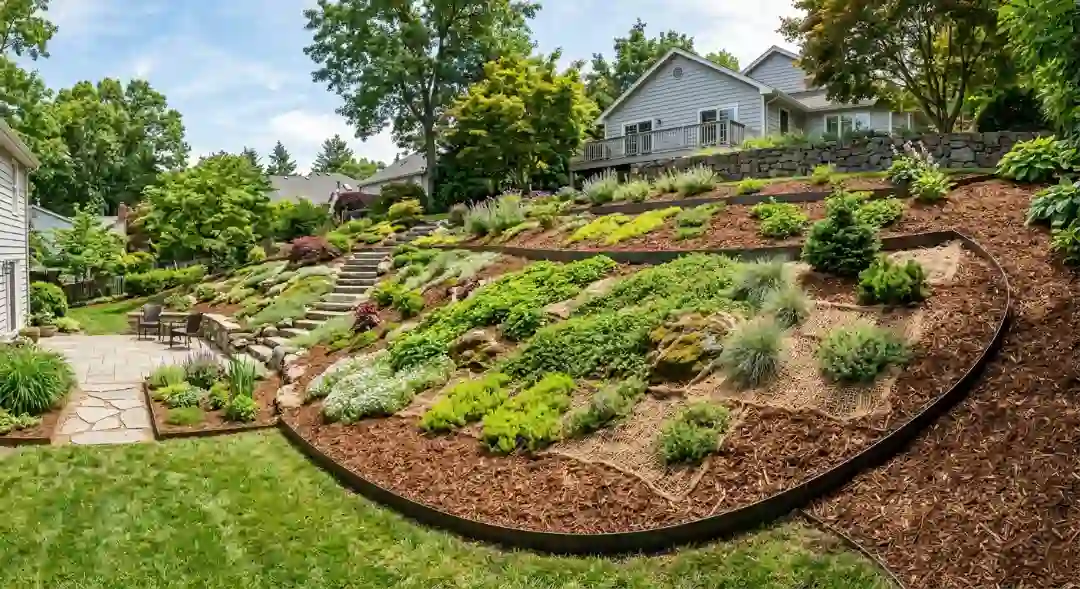
Terracing breaks a long, steep slope into shorter, more manageable sections. Each terrace acts like a mini flat bed that holds mulch, plants, and soil. It also dramatically improves the look of a hillside yard.
Bioengineering techniques like live staking (planting dormant cuttings directly into the slope) are a longer-term solution that builds a living root network to hold everything in place. This approach is used widely in commercial erosion control but rarely discussed in residential landscaping content.
Maintenance Tips for Sloped Mulch Areas
Slopes need more frequent checks than flat beds. After any heavy rain, walk the slope and look for bare patches, eroded channels, or areas where mulch has piled up at the base.
Top up thin spots promptly. A 1-inch top dressing once per year in spring is usually enough for most organic mulches. Check landscape staples and netting after each winter season and replace any that have corroded or loosened.
Replace organic mulch every 2 to 3 years as it breaks down. When replacing, remove the old mulch completely rather than layering on top, which builds up excess depth and suffocates plant roots.
Cost Breakdown: What to Budget
| Method | Estimated DIY Cost |
| Jute netting (per 100 sq ft) | $15 to $30 |
| Landscape staples (per 50 pack) | $8 to $15 |
| Gorilla hair mulch (per cubic yard) | $35 to $55 |
| Mulch stabilizer spray (per gallon) | $20 to $40 |
| Steel edging (per 20 ft) | $25 to $50 |
| Professional mulching service | $200 to $400 average |
Best Plants to Hold Mulch on Hillsides
Plants are the most natural long-term solution for keeping slopes stable. The goal is root density, not just coverage.
Creeping Juniper spreads wide and low, forming a dense mat that traps mulch and holds soil. It’s drought-tolerant and requires almost no maintenance once established.
Lantana grows fast, spreads wide from a single root ball, and handles heat well. It’s a strong choice for warmer climates.
Ornamental Grasses like Pennisetum setaceum ‘Rubrum’ and Muhlenbergia capillaris form clumping bases that act as natural mulch catchers. Their deep fibrous roots also stabilize soil below the surface.
Creeping Phlox is low-growing with a tight spreading habit. It blooms in spring and provides year-round ground coverage.
Ice Plant is ideal for dry, sunny slopes. It spreads aggressively and its thick foliage weighs down the mulch layer beneath it.
Final Thoughts
Keeping mulch on a hillside is a solvable problem. The key is layering your approach: start with the right mulch type, add physical barriers like netting and edging, and back it all up with ground cover plants that anchor the slope naturally. Knowing how to keep mulch on slopes and hillsides the right way means less time redoing the work every season and more time actually enjoying your yard.
If you’re ready to get the job done properly and want expert help, contact Robert’s Complete Care today. Their team handles slope landscaping, mulch installation, and erosion control for homeowners throughout the Whittier area.
A Note on Local Lawn Services
If this feels like more work than you want to tackle solo, professional help makes a real difference. For homeowners in Southern California, Robert’s Complete Care provides expert Lawn Installation Services in Whittier and handles everything from slope prep to mulch selection and erosion control installation. A well-installed slope done right the first time saves significant time and money in the long run.
Frequently Asked Questions
What is the best mulch to use on a hillside?
Gorilla hair mulch is the best choice for hillsides. Its fibrous, interlocking texture resists wind and water displacement better than standard bark chips or nuggets. On moderate slopes, shredded hardwood bark is a strong, more affordable alternative that also compacts well.
How do you keep mulch from washing away in heavy rain?
Combine jute netting or an erosion control blanket with landscape staples and a downhill edging barrier. Using heavier mulch like gorilla hair or shredded hardwood also reduces washout. Mulch stabilizer spray adds an extra layer of protection for slopes that face heavy or frequent rainfall.
Does landscape fabric help keep mulch on a slope?
Plastic landscape fabric actually makes the problem worse on slopes. Its smooth surface acts as a slide for mulch above it. Replace plastic sheeting with cardboard or newspaper, which grip mulch better and break down into the soil over time.
How deep should mulch be on a slope?
Keep mulch depth between 2 and 3 inches on slopes. Anything thinner allows rain to displace it too easily. Anything thicker creates a waterlogged, slippery base layer that slides. Two inches of compacting mulch like gorilla hair is sufficient on steep grades.
Can I use straw instead of mulch on a slope?
Straw can work on very mild slopes as a temporary erosion control measure, especially right after seeding. It breaks down quickly and offers less long-term protection than proper mulch. Pair it with jute netting if you use it, and plan to replace it with a more permanent solution within one growing season.
What are landscape staples used for in mulching?
Landscape staples are metal U-pins that hold jute netting or erosion control blankets firmly against the soil surface. Without them, netting shifts and bunches in wind and rain. They’re inexpensive and are a required part of any effective slope netting installation.