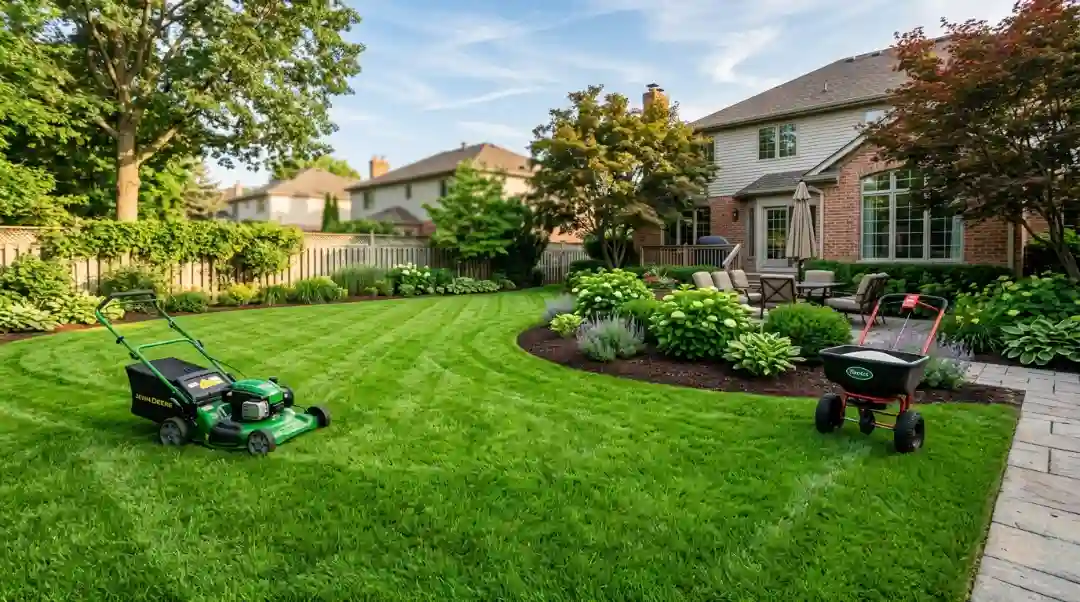
It’s a real pain to have to drag a green garden hose across your yard every single morning. I understand the anguish of watching your grass grow brown during those hot summer stretches when hand watering just can’t keep up. The smartest approach to recover your weekends and maintain your landscaping investment is to install your own automatic, permanent watering system.
This entire guide gives you the step-by-step arithmetic, trenching depths, and plumbing calculations to set it up right. Follow my field-tested roadmap and save thousands of dollars in labour costs and build a commercial-grade home sprinkler system that keeps your turf lush. The short answer: To do this successfully, you need to first run a bucket test to find out the capacity of your water supply, lay out separate watering zones with full head to head coverage, dig trenches 6 to 12 inches deep and connect your lateral lines to a good backflow preventer and smart controller.
Table of Contents
ToggleWhy Install a Lawn Sprinkler System?
An automatic sprinkler system does far more than save you manual labor. It distributes water with precise uniformity, which prevents the wasteful runoff and pooling typical of manual osculating sprinklers.
Data shows that a properly calibrated lawn irrigation system can reduce outdoor water waste by up to 30 percent while improving deep root growth. I see homeowners boost their long-term property market value because a healthy, green lawn creates immediate curb appeal. It changes your relationship with your yard from a chore into an asset.
Step 1: Plan Your Sprinkler System Layout
Before you buy a single pipe, you must calculate your home’s actual water capacity. Skipping this engineering step is why most DIY projects fail, resulting in weak water pressure that cannot pop up your sprinkler heads.
How Do I Calculate My Water Flow Rate and PSI?
To calculate your water flow rate, place a five-gallon bucket under your outdoor spigot and time how long it takes to fill completely. Divide five by the total seconds, then multiply by 60 to find your exact gallons per minute (GPM) capacity.
You also need to attach a pressure gauge to your spigot to read your static pressure in pounds per square inch (PSI). Write both numbers down because they dictate your entire sprinkler system layout.
Mapping for Head-to-Head Coverage
Once you have your GPM and PSI, you can design your watering zones. Never mix different types of sprinkler heads on the same pipe line because they apply water at completely different rates.
Your layout must achieve head-to-head coverage, meaning the spray radius from one sprinkler head must reach all the way to the base of the next head. This overlapping pattern ensures zero dry spots.
Step 2: Gather Materials and Tools
A professional-grade underground sprinkler system relies on durable components. Do not cut corners on cheap fittings, or you will be digging up your yard again next season to repair underground leaks.
The Essential Irrigation Parts Checklist
Schedule 40 PVC Pipe: Use 1-inch pipe for your main lines to handle constant pressure, and 3/4-inch pipe for your lateral lines.
Solenoid Valves: These electronic valves open and shut your individual watering zones on command.
Valve Manifold Assembly: The central plumbing distribution hub that holds your individual zone valves.
Pop-Up Rotor Heads: Best for large, open turf areas because they rotate slowly over long distances.
Fixed Spray Nozzles: Perfect for tight corners, narrow side yards, and curved flower beds.
Funny Pipe: A flexible, thick-walled polyethylene pipe used to connect sprinkler heads to rigid PVC pipes without cracking under soil stress.
Smart Irrigation Controller: The electronic brain that automates your schedules based on local weather conditions.
Backflow Preventer: A critical safety device required by local building codes to keep irrigation water from siphoning back into your clean household drinking water supply.
Tool Rental Advice
I highly recommend renting a dedicated power trencher from a local home improvement center. Hand-digging hundreds of feet of deep channels through compacted turf and rock will exhaust you within hours. A mechanical trencher finishes a full afternoon of manual shoveling in less than an hour.
Step 3: Call 811 and Dig the Trenches
Safety comes first whenever you break ground on your property. You must map out what lies hidden beneath your turf before you let a mechanical blade spin into the dirt.
Why Must You Call 811 Before Beginning Any Irrigation Digging?
Calling 811 connects you to local utility operators who will mark your buried gas, electric, water, and telecommunication lines for free. Digging without utility markings risks catastrophic property damage, severe personal injury, and expensive city fines for breaking public utility lines.
Always wait the required two to three business days for the technicians to place their colored marker flags before you touch a shovel.
Executing the Perfect Trench
Set your rented power trencher to a depth between 6 and 12 inches. In warm climates like Southern California, a 6-inch depth is usually sufficient for residential lateral lines.
If you live in cold regions, you must bury lines deeper or prepare to blow out the system with an air compressor before the winter freeze hits. As you run the machine, place the displaced topsoil cleanly on one side of the path to make backfilling easier later.
Step 4: Install the Water Supply Line and Valve Manifold
Connecting to your home water supply requires precision. I prefer installing a dedicated companion water meter if your city offers one, because it waives the sewer processing fees for your irrigation water.
Setting the Backflow Preventer
Cut into your main residential water line right after your home meter and solder a brass tee fitting. Run your main line directly into your backflow preventer.
Check your local municipal municipal codes for exact height restrictions. Most cities require the backflow device to sit at least 12 inches above the highest sprinkler head on your property to work reliably.
Assembling the Valve Manifold Hub
Dig an oversized hole next to your main line and drop in a heavy-duty plastic sprinkler valve box. Inside this protective box, assemble your valve manifold assembly using threaded connections and teflon tape.
Connect your individual solenoid valves to the manifold outlets. Each valve is responsible for sending water to one specific zone on your property.
Step 5: Lay the Pipes and Connect Sprinkler Heads
With your valve boxes secure, you can now roll out your main line and run your lateral zone lines down the open trenches.
Assembling PVC Pipes with Solvent Welding
Wipe the dirt out of every PVC fitting before applying glue. Apply a generous layer of purple PVC primer to the outside of the pipe end and the inside of the fitting socket, followed immediately by PVC cement.
Push the pipe into the fitting with a quick quarter-turn twist, and hold it firmly for 15 seconds to create a permanent, leak-proof solvent weld.
Installing Pop-Up Heads with Funny Pipe
Never thread a rigid PVC pipe directly into the bottom of a heavy sprinkler head. If a lawnmower tires runs over that head, the rigid plastic below will snap instantly.
Instead, thread a plastic elbow into your lateral PVC line tee, and run a 2-foot length of flexible funny pipe up to the base of your pop-up rotor heads.
This flexible link acts as a shock absorber under your turf. It allows you to adjust the final height of your fixed spray nozzles so they sit perfectly flush with your cut grass line.
Step 6: Install the Irrigation Controller and System Wiring
Now it’s time to connect the electronic brains to the mechanical valves underground. I always choose smart controllers that sync with local weather stations over traditional dials.
Running Underground Sprinkler Wire
Buy multi-strand, direct-burial sprinkler wire for your project. If you have a six-zone system, you need a cable with at least seven internal colored wires.
Unroll the wire along the bottom of your main line trenches from the valve boxes all the way into your garage or outdoor power outlet.
Splicing the Solenoid Valves
Inside each valve box, pick one universal wire color to serve as your common ground wire. Connect one lead from every single solenoid valve to this single common wire.
Connect the remaining unique colored wires to their respective individual zone leads. Always use waterproof, grease-filled wire nuts to protect these open splices from soil moisture and corrosion.
Mount your controller unit on your wall, strip the wire ends, and insert them into the matching zone terminals.
Step 7: Flush and Test the Entire System
Never twist your delicate spray nozzles onto your pipes before clearing out the construction debris. Dirt, rocks, and PVC shavings always find their way into open trenches during assembly.
The Essential Flushing Sequence
Leave your sprinkler head bodies open without their internal filter screens or nozzles installed. Walk over to your water main and slowly turn on the supply valve to pressurize your valve manifold assembly.
Manually twist the bleed screw on your first solenoid valve to open it. Let the rushing water geyser out of the open heads for 30 seconds until the stream runs perfectly clear.
Checking for Latent Leaks
Once the lines are clean, install your final pop-up rotor heads and nozzles. Turn the system on via your controller app and walk every single foot of your open trenches.
Look closely for pooling water, bubbling mud, or weeping joints around your PVC cement welds. Fix any line leaks now before you bury the evidence under hundreds of pounds of packed dirt.
Step 8: Backfill Trenches and Final Adjustments
With your hydraulic tests complete and successful, you can finally put your yard back together and restore your landscape.
Backfilling Strategy
Shovel your excavated topsoil back into the open trenches in shallow 3-inch layers. Tamp down each layer firmly with your boots or a hand tamper as you go.
If you skip tamping, the loose dirt will settle drastically after the first heavy rainfall, leaving dangerous, uneven ruts across your beautiful yard. Lay your saved sod strips back over the packed dirt paths and water them heavily by hand to jumpstart root recovery.
Calibrating Your Spray Radii
Turn on one zone at a time and use a small flathead screwdriver to adjust the top adjustment screws on your rotor heads. You can easily expand or narrow their rotation arc to prevent water from blasting your house siding, wooden fences, or concrete driveway.
Maintenance Tips for Long-Lasting Performance
An underground sprinkler system requires regular oversight to run at peak efficiency year after year. Neglect leads to clogged lines, wasted water, and expensive plant damage.
Conduct Spring Audits: Every spring, turn on each zone manually to check for sunken heads, cracked plastic nozzles, or blocked spray paths caused by overgrown turf.
Clear Debris Regularly: Twist off dirty nozzle caps and rinse out the small internal plastic mesh filters whenever you notice a weak or uneven spray pattern.
Adjust Schedules Seasonally: Lower your watering runtimes during cool spring and fall weeks, and increase them only when peak summer heat hits your turf.
Winterize Prior to Frosts: If your region experiences deep winter freezes, shut off your main irrigation valve and attach a commercial air compressor to your line to blow out all remaining water before ice expands and cracks your underground pipes.
Final Thoughts
Installing a lawn sprinkler system is one of the best ways to improve your yard’s health, cut down on water waste, and make lawn care more convenient. Whether you’re updating an older setup or starting fresh, the process from placing valves and pipes to connecting a Rain Bird controller is easier when you follow the right steps. It can be a simple weekend project, and the long-term benefits are well worth the effort. Using high-quality Rain Bird parts also ensures a durable and efficient system. For expert help with Lawn Installation Services in Whittier, CA, trust Robert’s Complete Care contact us today to get your sprinkler system installed the right way.
FAQs
1. Do I need a permit to install a lawn sprinkler system?
In many cities, a permit is required—especially if you connect to the main water line. Check your local regulations before starting the project.
2. How long does it take to install a sprinkler system?
Most DIY installations take 1–3 days, depending on yard size and how many zones you’re installing.
3. What tools are needed to install a sprinkler system?
Basic tools include a trench shovel, PVC cutter, tape measure, marking paint, and pliers. You may also need a trenching machine for larger yards.
4. Can I install a sprinkler system myself, or should I hire a professional?
You can install it yourself if you’re comfortable with digging, plumbing, and planning zones. However, professionals ensure proper water pressure, coverage, and long-term efficiency.
5. How many sprinkler heads do I need for my yard?
It depends on your lawn size and water pressure. Most zones use 4–8 sprinkler heads, spaced to ensure full, even coverage.