Lawn Care & Maintenance

Discover tips for mowing, fertilizing, and weed control to maintain a green lawn.

How to edge your lawn with a clean, sharp grass border along a concrete sidewalk in front of a well-manicured suburban home

How to Edge Your Lawn: A Complete Step-by-Step Guide

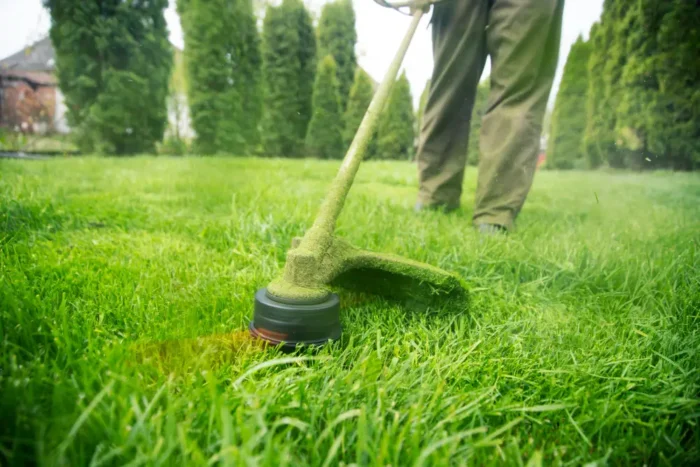
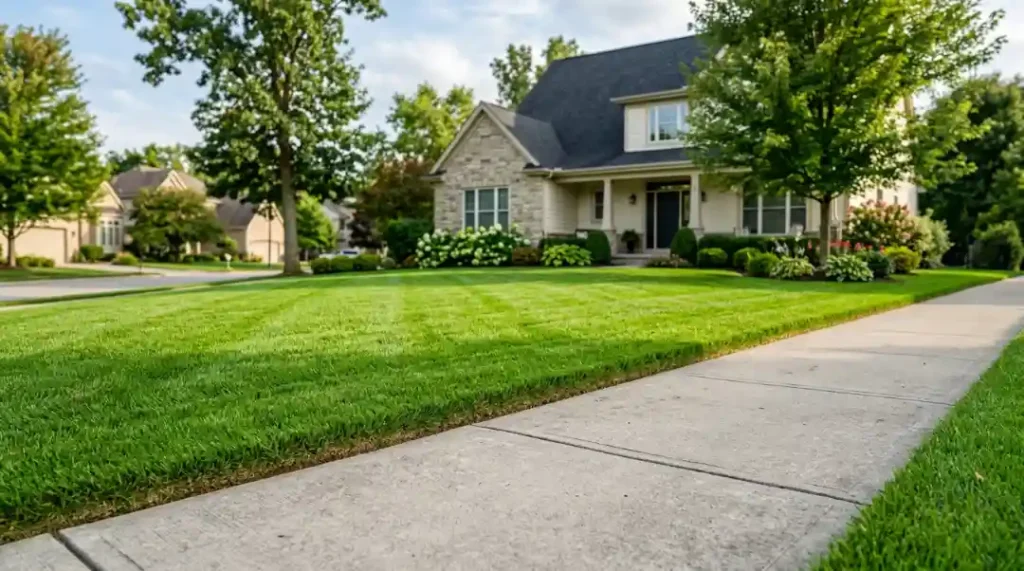
If you don’t clean up the margins, your grass will still look unfinished even if you mow it right. Most people spend hours cutting grass, yet they don’t do the one thing that makes a yard seem outstanding. If the boundaries of your lawn are blurry, too long, or not level, edging is the answer. Learning how to edge your lawn properly takes about 30 minutes and transforms the entire look of your outdoor space. In this guide, you’ll get the right tools, a clear step-by-step method, creative edging ideas, and answers to the most common questions. By the end, your lawn borders will look like a professional handled them. What Is Edging in Lawn Care? Edging in lawn care means cutting a clean, defined line between your grass and surrounding areas like flower beds, driveways, or sidewalks. It stops grass from creeping into places it shouldn’t be and gives your lawn a structured, finished appearance. Think of your lawn like a picture frame. Even the best painting looks messy without a clean frame around it. Edging is that frame. It draws the eye, separates spaces, and signals that someone actually takes care of this yard. How to Create a Lawn Edge: Right Tools First Choosing the right tool is half the job. The wrong tool wastes time and leaves a sloppy result. Manual Half-Moon Edger This is your go-to for precision work. It cuts deep, clean lines through tough turf and creates crisp transitions along walkways, patios, and garden beds. It’s slow but accurate, and it’s the best choice when you’re shaping a brand-new edge from scratch. String Trimmer (Weedeater) A string trimmer is fast and flexible. It handles curved areas, soft garden bed transitions, and weekly touch-ups well. Rotate the head vertically to cut downward along the border instead of trimming horizontally. Rotary / Power Edger A rotary edger uses a spinning blade to cut along long, straight edges quickly. It’s ideal for driveways and sidewalks where you need consistent depth across a long run. It also performs better in compact or clay-heavy soils where a manual tool struggles. Edging Shears and Flat-Backed Spade Edging shears handle the fine detail work. After the main cut, use shears to clip stray blades in corners and curves. A flat-backed spade helps lift and remove the turf strip after you’ve made your edge cut. Tool Comparison at a Glance Tool Best For Effort Level Cost Range Half-Moon Edger New edges, beds High $20 – $40 String Trimmer Curves, touch-ups Medium $50 – $150 Rotary / Power Edger Long straight lines Low $80 – $300 Edging Shears Detail finishing Medium $15 – $35 Learn How to Edge Your Lawn With the Right Tools Prior to using a tool, please ensure you understand its purpose in that specific situation. Prior to using a tool, please ensure you understand its purpose in that specific situation. A power edger is not the right tool for a curved garden bed. Using a manual edger on a 40-foot driveway is tiring. Use the right tool for the job. A rotating edger makes the smoothest edge along a sidewalk or driveway with the least amount of work. A string trimmer lets you go around shrubs and plants without hurting their roots. If you’re just starting to make a fresh bed, use the half-moon edger to set the line and then use a trimmer to keep it up. Keep the blades sharp. A dull blade doesn’t cut the grass; it shreds it, creating ragged edges that weeds love. After each use, clean your tools and check the blades before each session.   Easy Steps to Edge a Lawn With a Clean Finish Here’s the exact process used to get a sharp, professional-looking edge every time. Step 1: Mow Your Lawn First Always mow before you edge. Mowing reveals the natural fall of the grass and gives you a clear surface to work from. Edging on an unmowed lawn leads to uneven cuts and missed spots. Step 2: Mark Your Edge Line Use a garden hose, rope, or a chalk line to mark where you want the edge to fall. For straight edges, a taut string tied between two stakes works perfectly. For curves, a garden hose gives you flexibility to adjust the shape before committing to a cut. Step 3: Choose Your Edge Style Straight edges work best along driveways, sidewalks, and formal garden layouts. Curved edges feel more natural and soften the look around beds and foundation plantings. Walk around your yard and look at the overall shape before deciding. Step 4: Cut Along the Line Hold your edging tool vertical. A sloped blade creates a slanted edge that looks uneven and erodes faster. Work slowly in small overlapping passes. Avoid sawing motions — one smooth, deliberate push gets the cleanest result. The edge depth should be around 7.5 cm (3 inches). That’s deep enough to define the border and prevent grass from creeping back quickly. Step 5: Remove Excess Turf Slide a flat-backed spade under the cut turf strip and lift it away cleanly. This reveals the trench and creates strong visual contrast between the lawn and the bed. Compost the removed grass or stack it to rot down separately. Step 6: Clean Up Debris Sweep or blow away all clippings from the hard surface. A well-cut edge looks ten times better against a clean sidewalk or driveway. This final step makes the difference between “done” and “done right.” Step 7: Touch Up With Shears Go back over corners, curves, and tight spots with edging shears. Trimmers and power edgers miss fine detail. Shears give you control in narrow zones and leave a tidy finish throughout. Edging Ideas That Go Beyond the Basics Once your basic edge is clean, you can take the design further. Metal Edging: Low-profile and long-lasting. It holds bed shapes precisely and requires very little maintenance. Good for modern or minimalist landscape styles. Stone or Brick Paver Edging: Adds weight and permanence.

How to Edge Your Lawn: A Complete Step-by-Step Guide Read More »

what is non medical home care concept shown with organic vs chemical fertilizer lawn comparison

Organic Fertilizer vs Chemical Fertilizer: Which One Does Your Lawn Actually Need?

Choosing the wrong fertilizer is like putting diesel in a petrol car.. At first, it could look alright, but later you can see the harm. Most people who buy something from a store don’t know if it’s good for the plant, the soil, or neither. That’s where knowing the difference between organic fertilizer vs chemical fertilizer really comes in handy, not just as a fun fact about gardening. In short, organic fertilizers improve the health of the soil over time and release nutrients slowly. Chemical fertilizers, on the other hand, give instant results but might harm the soil over time. There is no clear winner between the two. The best decision for you relies on how your grass looks, what you want to do, and how patient you are. What Is Fertilizer and Why Does Your Soil Need It? Soil doesn’t stay nutrient-rich forever. Rain, grass growth, and foot traffic drain it of the three nutrients every lawn needs most: nitrogen (N), phosphorus (P), and potassium (K). Without them, grass turns yellow, roots weaken, and patches appear where thick turf used to be. Fertilizers, whether organic or synthetic, exist to replace what the soil loses. They’re not magic growth boosters. They’re more like a balanced diet for your lawn. What Is Chemical Fertilizer? Chemical fertilizer, also called synthetic or inorganic fertilizer, is manufactured in a lab or industrial facility. It’s made by refining raw materials like petroleum, rock phosphate, and ammonia into precise nutrient compounds. The result is a product with a fixed NPK ratio, such as 10-10-10 or 30-0-4, where each number tells you the percentage of nitrogen, phosphorus, and potassium. Because the nutrients are already in their mineral form, plants absorb them almost immediately after application. What is chemical fertilizer made of? Common ingredients include ammonium nitrate, urea, superphosphate, and muriate of potash. These are concentrated, water-soluble compounds with no organic matter included. What Is Organic Fertilizer? Organic fertilizer comes from naturally occurring materials that decompose over time. Think compost, manure, blood meal, bone meal, fish emulsion, seaweed extract, and worm castings. These materials contain nutrients bound up in organic molecules. Soil microbes have to break them down first before the nutrients become available to plant roots. That process takes time, but it also builds the soil itself, not just the grass growing in it. Define synthetic fertilizer vs organic in simple terms: Synthetic feeds the plant directly. Organic feeds the soil, which then feeds the plant. That one difference drives almost every other contrast between them. Organic Fertilizer Benefits: What the Science Actually Shows It improves soil structure over time Organic materials like compost and manure improve soil texture. In sandy soils, they improve water retention. In clay soils, they reduce compaction. Both outcomes mean deeper root growth and a more resilient lawn. It supports microbial activity Healthy soil is alive. Billions of bacteria, fungi, and other microorganisms live in one tablespoon of good garden soil. Organic fertilizers feed these organisms, and those organisms, in turn, release nutrients, fight pathogens, and improve the soil’s ability to hold moisture. Slow-release nutrients prevent burn Because organic fertilizers break down gradually, the risk of nutrient burn is very low. Roots receive a steady supply of what they need rather than a sudden surge that can damage them. Less runoff risk Organic fertilizers don’t leach as aggressively into nearby water systems. Synthetic fertilizer runoff is a known cause of eutrophication, where excess nitrogen and phosphorus cause algal blooms in lakes and rivers, depleting oxygen for aquatic life. Natural Fertilizer Disadvantages: The Honest Side Organic fertilizers aren’t perfect. If they were, nobody would use synthetic options. Slower results. Microbial decomposition takes time. If your lawn needs urgent help after a harsh winter or drought, organic fertilizer won’t green it up in a week. It can take weeks or even a full season to see meaningful change. Higher upfront cost. Organic fertilizer products are generally more expensive per bag than synthetic equivalents. The long-term savings on reapplication can balance this out, but the initial investment is real. Harder to apply evenly. Most organic fertilizers come in granular or bulk form. They’re heavier, bulkier, and harder to spread uniformly, especially on larger lawns. Uneven application leads to uneven results. Nutrient ratios are less precise. Unlike synthetic fertilizers where you know exactly what you’re getting, organic products can vary. A bag of composted manure won’t have a perfectly fixed NPK ratio the way a bag of 20-5-10 synthetic fertilizer does. Chemical Fertilizer Advantages: Where Synthetic Wins [Multimedia suggestion: Side-by-side time-lapse photo series showing lawn treated with synthetic fertilizer at Day 3 vs Day 14, and one treated with organic at the same intervals. This makes the speed difference visceral and real.] Fast, visible results. Synthetic fertilizers are absorbed within hours of application. If you’re hosting an outdoor event next weekend and your lawn looks tired, a quick application of a nitrogen-heavy synthetic product will green things up fast. Precise nutrient delivery. A soil test might show low phosphorus but normal nitrogen. With a synthetic fertilizer, you can apply exactly what’s needed, nothing more. Organic options make this level of precision much harder. Cost-efficient for short-term needs. Synthetic fertilizers cost less upfront. For homeowners on a budget who need a quick fix, they’re a practical option. Easy to mix with other treatments. Liquid synthetic fertilizers can often be combined with weed control or pest management products, saving time during lawn care sessions. Chemical Fertilizer Disadvantages: The Long-Term Cost Soil degradation over time. Synthetic fertilizers feed the plant but not the soil ecosystem. Over years of use, soil microbial activity drops, organic matter depletes, and the soil becomes increasingly dependent on artificial inputs. It’s a cycle that becomes harder and more expensive to break. Risk of nutrient burn. Over-application of concentrated synthetic fertilizers causes root burn. The high salt content draws moisture out of roots instead of delivering it. This can kill patches of grass quickly. Environmental pollution. Nitrogen leaching from synthetic fertilizer is a documented

Organic Fertilizer vs Chemical Fertilizer: Which One Does Your Lawn Actually Need? Read More »

Person removing clover weeds from a lawn with tools, showing how to get rid of clover grass on lawn naturally.

How to Get Rid of Clover Grass on Lawn (That Actually Works)

Clover doesn’t ask you whether it can take over your lawn. One season, it’s just a few patches here and there, then the next, it takes over your whole yard as it owns it. You’re not the only one struggling with this obstinate, spreading weed. The good news is that you can get rid of it without ripping up your whole grass. This tutorial will show you step-by-step how to get rid of clover grass on the lawn using tried-and-true ways, such as pulling it up by hand or using herbicides. You’ll also find out what makes it grow in the first place, so it doesn’t come back. The quickest way to get rid of clover is to use a broadleaf post-emergent herbicide that has triclopyr or 2,4-D in it. However, the best method for you will depend on the size of your lawn, the type of grass you have, and how bad the infestation is. How to Identify Clover in Your Lawn The most frequent type of clover weed in lawns is white clover (Trifolium repens). It has three circular leaflets, but sometimes four. There is a white or greenish V-shaped watermark on the leaflets called a chevron. It grows close to the ground and spreads through stolons (creeping stems), which makes it a quick colonizer of thin, nutrient-poor turf. Look for little, spherical flower clusters that are white or pink. These are called inflorescences. Each cluster has 20 to 40 tiny flowers that draw in bees. This is good for pollinators, but not so good if you want smooth grass. Clover and oxalis (wood sorrel) are not the same thing. Oxalis has heart-shaped leaves and yellow blooms. Clover leaves are more round and often have the watermark that makes them stand out. What Causes Clovers to Grow in Your Lawn? Clover isn’t just a random thing. It shows up for a reason, and resolving that reason is just as vital as getting rid of the weed. The main reason is low nitrogen levels. Clover is a legume that fixes nitrogen, which means that it makes its own nitrogen by working with Rhizobium bacteria in its roots. Your grass can’t do that. When nitrogen levels drop, clover does well, but turf does poorly. The earth being compacted is also very important. Most turfgrasses can’t grow roots correctly in compacted earth, but clover’s roots are all connected, so they can withstand it. If water collects on your grass when it rains, it’s probably because of compaction. Here are the other main causes: Unbalanced soil pH  Grass grows best at 6.0 to 7.0 pH. Clover tolerates a wider range, so it steps in when pH is off. Bare or thin patches  Any open space in your turf is an invitation for clover weeds in grass to move in. Irrigation issues  Overwatering washes out nitrogen; underwatering weakens turf. Either way, clover wins. How to Get Rid of Clover Grass on Lawn (7 Methods That Work) 1. Hand-Pull Clover (Best for Small Patches) Hand-pulling is the most natural way to remove clover from lawn areas with light infestations. It costs nothing and avoids chemicals entirely. The key is getting the roots to leave any root fragments behind and the clover will regrow within weeks. Moisten the soil first and wet soil makes pulling much easier. Use a garden spade to loosen the soil around the patch, then pull the entire clump out, roots and all. White clover has shallow roots, so this process is easier than dealing with dandelions. Wear gloves and work in sections. Dispose of the pulled clover in a bag  don’t compost it, as it may still spread seeds. 2. Smother It with Plastic Sheeting Covering clover with an opaque plastic sheet or garbage bag blocks sunlight and air  two things it can’t survive without. This method works best on large, concentrated patches rather than scattered clover weeds in grass mixed throughout your lawn. Place the sheeting over the clover patch and secure the edges with bricks or rocks. Leave it in place for 4 to 6 weeks. After removing it, reseed the area with grass seed to fill the gap. Don’t use this on small or irregular patches  you’ll kill surrounding grass too. 3. Apply a Post-Emergent Broadleaf Herbicide This is the most effective method for moderate to severe clover infestations. To kill clover in lawn areas that are already established, you need a systemic post-emergent herbicide  one that travels from the leaf down to the root system. Look for active ingredients like: Triclopyr Dicamba 2,4-D MCPP (mecoprop) Quinclorac Always read the label before buying. Some of these can injure certain grass types like St. Augustinegrass or centipedegrass. When to spray: Fall is the best time to spray broadleaf weeds. Clover is actively moving nutrients down to its roots to prepare for winter, so the herbicide gets carried deeper and kills more effectively. Spray when temperatures are between 65°F and 80°F, with no rain in the forecast and no wind. 4. Use an Organic or Pet-Safe Clover Killer If you have kids or pets on your lawn, chemical herbicides aren’t always the right call. Organic options exist, but they require patience and multiple applications to remove clover from lawn areas completely. Chelated iron (FeHEDTA) is one of the better organic options. It kills broadleaf weeds through iron toxicity while leaving grass unharmed; your turf may even green up a bit. Expect to spray 2 to 3 times per season for full results. A.D.I.O.S. (Advanced Development In Organic Solutions) uses salt-based compounds to dry out clover. It works, but use it carefully and it can damage surrounding plants if over-applied. Avoid straight white vinegar for lawn use. It’s a contact herbicide, so it burns the tops but doesn’t reach the roots. Clover regrows in days. 5. Fertilize with a Nitrogen-Rich Fertilizer Boosting your lawn’s nitrogen levels is one of the most underrated ways to naturally suppress purple clover in lawn and white clover alike. Since clover already makes its

How to Get Rid of Clover Grass on Lawn (That Actually Works) Read More »

Brown patch lawn repair process showing treatment steps for grass damage and brown patches in grass

What Causes Brown Patches in Grass?

You walk outside one morning, coffee in hand, and there it is: a ugly, spreading brown circle sitting right in the middle of your lawn. If you’ve been asking what causes brown patches in grass, you’re not alone. Millions of homeowners deal with this exact problem every summer, and the frustrating part is that the cause isn’t always obvious. The good news? Every brown patch has a reason, and most of them have a clear fix. This article covers the most common causes of brown patches, how to tell them apart, and what you can actually do to get your lawn looking green again. Whether it’s a fungal disease, heat stress, grubs, or watering habits, we’ll walk through it all step by step. What Causes Brown Patches on Your Lawn and How to Get Rid of Them   There are various reasons why grass can turn brown, and the first step to correcting the problem is to figure out what is causing it. Fungal infections (particularly brown patch disease), watering problems, heat stress, soil compaction, nitrogen burn from fertilizer, pet urine, insect damage, and even just normal wear and tear from foot activity are some of the most common causes. In the summer, you might discover that what makes the brown patches worse is an even worse problem. The mix of excessive heat, humidity, and stressed grass makes it easy for issues to happen. When you water your lawn too much, it might develop brown spots because the extra moisture helps lawn fungus spread. You might see brown areas in the grass, but if the green is still growing underneath, it usually implies the grass isn’t dead yet and can come back with the right care. This is not the same as brown patches in grass that are not dead. In this case, the grass has become brown, but the roots are still alive and healthy. Brown Patch Lawn Disease Description Brown patch disease is a fungal infection caused by Rhizoctonia solani, a soil-borne pathogen that attacks grass blades and sheaths. It thrives in hot, humid weather (75°F to 90°F nights) and spreads rapidly when lawns stay wet overnight. The patches it creates are typically circular, ranging from a few inches to several feet wide. This isn’t just cosmetic damage. The fungus attacks the base of the grass blade, cutting off nutrient flow. You’ll often see a dark, water-soaked ring called a “smoke ring” around the outer edge of the patch, especially in the early morning before the dew dries. The inside of the patch usually turns tan or straw-colored, while the border stays darker. In severe cases, the entire turf within the ring collapses. How to Spot Brown Patch Fungus Identifying brown patch fungus early gives you the best chance of stopping it before it spreads. Here’s what to look for: Circular brown spots: The patches usually appear as circular or irregular brown areas that can grow quickly. They often have a characteristic “smoke ring” or dark outer edge in the early morning when dew is present. Size and spread: Brown circles in yards caused by this fungus typically start small (a few inches) but can expand to 2-3 feet or more in diameter. In severe cases, the patches can merge together, creating large dead areas. Grass blade appearance: The affected grass blades often look water-soaked or greasy at first, then turn tan or light brown as they die. The grass may feel slimy when you touch it during early morning hours. Timing: Brown patch is most active during hot, humid weather in summer and early fall. If you see brown lawn spots caused by fungus appearing after several days of warm, muggy weather, brown patch is likely the culprit. Pattern: Unlike damage from insects or pet urine, brown patch in turf often appear in multiple spots across your lawn rather than just one isolated area. Will Brown Grass Turn Green Again? Yes, in most cases brown grass will turn green again once you identify and address the root cause. Grass damaged by drought stress, heat, or light fungal infection typically recovers within 2 to 4 weeks after conditions improve and treatment begins. Severely diseased or dead grass may need reseeding. If the grass blades are brown but the crowns (the base just above the soil) are still white and firm, the plant is likely dormant or stressed, not dead. Tug on the grass gently. If it resists pulling, there’s still root life. If it pulls out easily like a wet napkin, that section may be gone. Most Common Grass Types Impacted by Brown Patch Brown patch disease hits certain grasses harder than others. Here’s what’s most at risk: Tall fescue is highly susceptible, especially in humid southern climates. Perennial ryegrass can develop brown patch quickly during summer heat. Bermudagrass is somewhat resistant but can still develop patches under prolonged stress. St. Augustine grass is vulnerable to a related disease called large patch (Rhizoctonia solani AG 2-2). Kentucky bluegrass is moderately susceptible and often shows thinning rather than hard-edged rings. How to Treat Brown Patch Fungus Once you’ve confirmed that brown patch fungus is causing your lawn problems, it’s time to take action. Here’s your complete brown patch lawn care treatment plan: Immediate Actions Stop overwatering: Fungal illness loves wetness. Stop watering right after, and only do it in the early morning so the grass blades dry quickly. Don’t water in the evening because this keeps the grass damp all night, which is great for fungi. Improve air circulation: If you have thick grass, consider dethatching to improve airflow at the soil level. Better air movement helps grass dry faster and makes conditions less favorable for fungal growth. Adjust mowing: Keep mowing, but remove no more than one-third of the grass blade at a time. Bag your clippings instead of mulching them to avoid spreading fungal spores across your lawn. Treatment Options Fungicide application: Using a fungicide that is particularly designated for brown patch helps stop the disease

What Causes Brown Patches in Grass? Read More »

How to divide ornamental grasses by separating the root ball during garden planting and transplanting

How to Divide Ornamental Grasses?

Adding ornamental grasses to any landscape is one of the easiest ways to make it seem better all year long. These plants are tough and don’t need much care. They come in a range of styles, from gentle fountain grasses to bold zebra grass. But plants that are tough nevertheless need maintenance over time. If your grasses look crowded, thin in the middle, or not as healthy as they used to be, it may be time to learn how to divide ornamental grasses the right way. WHEN TO PLANT ORNAMENTAL GRASSES The best times to plant ornamental grasses are in the spring or early fall, when the weather is mild, and the soil stays moist. Planting during these times gives roots time to settle in before they have to deal with very hot or very cold weather, which is important for the health of the plant in the long run. Spring Planting (Best Overall Choice) Planting ornamental grasses in the spring offers them the longest growth season to make their roots strong. When the soil warms up, grasses start to grow more quickly, which helps them adjust to their new home. This scheduling also helps prevent transplant shock and enables you to take care of your ornamental grass from the outset. Early Fall Planting (Second-Best Option) If you can’t plant in the spring, early fall is a good time to do so. Try to sow 6 to 8 weeks before the first frost is forecast. This window lets the root ball settle into the soil before winter hibernation starts. Why Summer Planting Is Risky Planting ornamental grasses in summer can be challenging due to heat stress and increased watering demands. Newly planted grasses struggle to manage moisture during hot, dry conditions, which can slow root development and weaken the plant. WHEN TO CUT BACK ORNAMENTAL GRASSES Cutting back ornamental grasses at the correct time keeps them looking nice and gets them ready for healthy new growth. Cutting back most ornamental grasses in late winter or early spring, before new shoots come up, is the best time to do it. Why the Right Time to Prune Ornamental Grasses Is Important: Wait until late winter since the dried leaves provide interest to your garden in the winter. Those golden, tan, and bronze plumes look great in the winter, especially when there is a little snow on them. The old growth also keeps the plant’s crown safe from the harsh winter cold. If you see new green shoots coming up from the base, that’s your clue that it’s time to trim. This usually happens in March or April for warm-season grasses, although it depends on where you live. If you cut too soon, you could hurt new growth. If you wait too long to cut, you’ll have to clip around new shoots, which is a pain and can pull the plant. Grasses that grow in the cool season have their own rules. Many of them stay green all year and need to be cleaned up now and then instead of being trimmed back all the way. Take off dead blades as needed all year long. HOW TO TRIM ORNAMENTAL GRASS Properly cutting ornamental grass keeps your plants healthy and makes the task easier. This is the simple method that consistently produces positive results. Using your hands, gather the entire clump together or secure it loosely halfway up with a rope. This method of bundling keeps everything confined and improves the cleanliness of cutting. Use a power trimmer or sharp hedge shears to cut the entire bundle 4–6 inches above the ground. Hand pruners are good for tiny grasses. For larger specimens to effectively navigate the dense vegetation, motorised equipment is required. Wear gloves at all times since grass blades can be surprisingly sharp and cause injuries similar to paper cuts. WHEN TO DIVIDE ORNAMENTAL GRASSES Success with ornamental grasses depends on knowing when to divide them. Depending on the type of grass, the timing will vary, but your plants will give you clear signals. Signs Your Grasses Need Division The doughnut effect, which occurs when the centre of your grass clump dies off and leaves a hollow ring, is the most noticeable symptom. Although certain quickly growing types require division sooner, this usually occurs after three to five years. Smaller leaves, less flowering, or clumps that topple over rather than stand erect are other indicators. Through clump rejuvenation, division revitalises ornamental grasses that have lost their vitality. The Ideal Time to Divide by Season Warm-season grasses should be divided as soon as new growth appears in the early spring. As the soil warms, separated parts will have the full growth season to establish. In most climates, April through early May is ideal. When cool-season grasses are actively growing, they should be divided in the early fall or early spring. Because cooler temps lessen transplant stress, fall division is frequently used. In the sweltering summer months, avoid dividing grasses.  How Frequently Should You Divide Ornamental Grass? Every three to five years, most ornamental grasses need to be divided. This differs by species, though. While slower kinds can go five to seven years between divisions, fast growers, such as ribbon grass, may require attention every two to three years. Strict timetables are less important than your observation. No matter how long it’s been since the last division, it’s important to act when you see deteriorating performance or the unmistakable hollow core. DO ORNAMENTAL GRASSES NEED TO BE FED? In terms of feeding, ornamental grasses require very little care. Overfertilizing really makes matters worse rather than better. The majority of ornamental grasses do well without consistent fertilizing. They actually thrive on lean nutrients and have evolved to flourish in comparatively low soils. Fertilizer overuse results in weak, floppy growth that needs to be staked. When growth starts in early spring, apply a little amount of balanced, slow-release fertilizer if you must fertilize. It is sufficient to apply 10-10-10 fertilizer once at half the rate suggested

How to Divide Ornamental Grasses? Read More »

Cluster of mushrooms growing in grass showing how to get rid of mushrooms in yard naturally

How to Get Rid of Mushrooms in Yard?

You wake up one morning, step outside with your coffee, and there they are  a fresh cluster of mushrooms popping up right in the middle of your lawn. It feels like they appeared out of nowhere overnight. If that sounds familiar, you’re not alone. Millions of homeowners deal with this exact problem every season, and most don’t know whether to panic, pull them, or just leave them alone. The good news? Learning how to get rid of mushrooms in yard spaces is very doable  and most of the time, you don’t even need a professional. This guide breaks down exactly why mushrooms appear, which ones are dangerous, and the fastest and most lasting ways to remove them for good. How to Identify, Get Rid of, and Prevent Lawn Mushrooms in Your Home Garden You need to know what mushrooms are and why they pop up in the yard before you can figure out how to get rid of mushrooms in the yard. Mycelium, the root system of lawn mushrooms, spreads into the soil as the fungus grows, feeding on organic matter such as decaying roots, rotting wood, and heavy thatch. There is a considerably bigger system going on beneath the surface of the earth than just the mushrooms you can see above ground. The source is usually still active on Earth, even though they fade away fast. Common Varieties of Outdoor Mushrooms The majority of yard mushrooms are brown in colour and often pose no health risks; however, they have the potential to discolour your lawn. Due to the abundant moisture in the soil, little white or tan mushrooms often appear after a rain. Because of their spherical growth patterns, fairy ring mushrooms have the potential to deplete the grass of its nutrients and water supply. Most mushrooms on lawns grow quickly and go away after a day or two, but if you don’t water your lawn regularly, you might see them come again. Are Mushrooms Bad for My Lawn and Why Are They Growing There? Mushrooms are not bad for your grass. In fact, they often signal that your soil is biologically active and breaking down organic matter properly. The fungi feeding underground actually help decompose dead roots and wood, slowly returning nutrients to the soil. The real concern is whether they’re toxic to kids or pets. That said, a heavy mushroom outbreak can hint at underlying lawn problems  like poor drainage, compacted soil, or buried organic debris. So while mushrooms themselves aren’t hurting your grass, what’s causing them might be worth looking into. Why Mushrooms Keep Appearing Mushrooms are the fruiting bodies of underground fungi called mycelium. Think of them like apples on a tree  the tree (mycelium) lives underground, and the mushrooms are just what you see above the surface. They show up when conditions are right: moisture, shade, warm temperatures, and decaying organic matter beneath the surface. Common triggers include: Buried tree stumps or old roots Dead thatch buildup in the lawn Overwatering or poor drainage Recently laid topsoil containing wood chips or organic material Animal waste left on the lawn Lastly, are lawn mushrooms toxic? Most lawn mushrooms are not toxic to humans, but you should treat every wild mushroom as potentially dangerous until you can positively identify it. Some species that commonly appear in yards  like Amanita phalloides (death cap)  are deadly even in small amounts. If children or pets spend time in your yard, removal is the safest choice. Never let a child or pet chew on a backyard mushroom. Even seasoned foragers make misidentification mistakes. If you suspect someone has eaten a lawn mushroom, Common Lawn Mushroom Types Here are a few species you’re likely to encounter: Fairy ring mushrooms (Marasmius oreades)  appear in circular patterns, mildly toxic if ingested Inky caps (Coprinoid species)  dark, ink-like gills, not usually dangerous unless consumed with alcohol Puffballs  generally edible when young and fully white inside, but risky to identify without expertise Amanita species  some are deadly; wide variety of appearances, often white or tan The Mysterious Mushrooms in Your Yard: What Gives? (Science in a Nutshell) Mushrooms grow from fungal spores in soil. Subterranean mycelium networks are formed when spores detect food, shade, and moisture. The mushroom you see is just the fruiting body. As an analogy, consider an apple tree: Tree = mycelium Apples are synonymous with mushrooms. Removing only the mushroom doesn’t remove the problem. This is why learning how to get rid of mushrooms in lawn requires treating soil conditions, not just surface growth. Are Mushrooms Bad for Grass and Soil? In a nutshell, no. Mushrooms often do not damage dirt or grass. They can aid in soil improvement by decomposing organic materials and releasing nutrients back into the earth. On the other hand, a persistent mushroom problem could be an indication of deeper issues like excessive moisture, strong shadow, or poor lawn drainage. Over time, these factors can make grass weaker and make lawn diseases more likely to occur. Although mushrooms in and of themselves won’t harm your grass, neglecting the factors that generate them can result in more significant and expensive issues down the road. Quick Ways to Get Rid of Things (Fast Results) If you want them gone today, here are the most effective immediate approaches. 1. Hand-Pull and Dispose The fastest method. Pull mushrooms by hand or use a trowel, getting as much of the base as possible. Bag them in a sealed plastic bag — don’t compost them, as spores can spread. Do this before they open and release spores. Once a mushroom caps and opens, spores are already airborne. 2. Mow Them Down Mowing breaks up mushrooms before they fully sporulate. It won’t eliminate the mycelium, but it reduces spore spread and cleans up the appearance quickly. Run the bag attachment on your mower to collect the clippings. Don’t mulch mushroom clippings back into the lawn. 3. Dish Soap and Water Mix 2 tablespoons of dish soap per 3 gallons of water. Poke holes

How to Get Rid of Mushrooms in Yard? Read More »

When Is the Best Time to Water Your Lawn? A Complete Guide

When to Water Your Grass When it’s Best to Water Your Lawn for the Health of Your Grass Maybe it’s never really crossed your mind as you’ve been turning on your sprinklers, or dragging hoses around patchy areas of your lawn. Overwater your lawn but the grass will drown; under water your lawn but it will dry out and eventually die. If your turf or plants get hardly any rain, watering time under such conditions is a guess for certain. Too much, Too little or at the wrong time of day can waste water and injure your grass. In this Lawn Time to Water guide, we’re going to teach you when the best time of day to water your lawn is, how long should your water your grass for best results, and if watering your lawn in the evening are best or worst principles to follow. Why Watering Time Matters Grass needs water to grow profond, strong roots. Yet, watering schedule do make a difference regarding: How much of the water gets into the roots How much evaporates before it gets soaked in The risk of fungal disease Overall lawn appearance and health Watering at the wrong time can cause shallow roots, yellowing grass, and even lawn diseases. When Is the Best Time to Water Your Lawn? Watering your lawn should take place early in the morning between 4:00 AM and 9:00 AM is considered the best time to water your lawn. Why Early Morning Is Ideal Lower temperature means less evaporation Usually the Wind is less Enough time for drying grass before dark Water is more effective when it reaches the soil Early morning sprinkling encourages deeper soaking of ground moisture, leading to deeper root systems not more diseases. Best Time of Day to Water Lawn: Morning vs. Afternoon vs. Night To better understand why morning is best for watering, let’s review a few comparisons of watering times. Morning Watering (Best Option) Pros: Little water waste from evaporation Fast drying grass Reduced risk of disease Water is used efficaciously Cons: Needs to be scheduled early or sprinklers installed This is the advised option for almost all grass varieties. Afternoon Watering Pros: Grass may look refreshed temporarily Cons: High evaporation rates Water wasted Can stress grass during extreme heat Watering in the heat of the day is inefficient and should be avoided unless your lawn is under severe drought stress. Watering Lawn at Night Pros: No evaporation Convenient for some homeowners Cons: Grass stays wet overnight Increased risk of fungus and mold Attracts pests While watering lawn at night might seem water-efficient, it creates the perfect environment for disease. This makes nighttime watering a poor long-term choice. Is Watering Lawn at Night Ever Okay? There are a few exceptions where nighttime watering may be acceptable: Extreme heat waves when grass is severely stressed Temporary drought restrictions that limit watering times Emergency hydration for newly laid sod Even in these cases, water early evening, not late at night, and keep sessions short to allow some drying time. How Long to Water Grass for Healthy Growth How long to water the grass is as important as when to water it. General Rule You should expect to give your lawn around 1 to 1 ½ inch of water per week, rain included. Watering Duration Guidelines Sprinklers: 20-30 minutes for each zone Soaker hoses: 30 to 45 minutes Drip irrigation: 45-60 minutes Pressure, soil and sprinkler output will affect these times. Soil Type and Watering Time Not all soil types drain at the same rate. Clay Soil Slowly absorbs Water less but longer. Risk of runoff if watered too fast Sandy Soil Fast Draining Needs shorter stretches of watering, but more of them. Loamy Soil Perfect Balance Hold moisture well It requires moderate watering during the growing season How long to water for healthy grass with your soil is one of the easiest things to get right in lawn care. Seasonal Watering Tips Spring Water once or twice a week. Encourage root growth. Summer Water thoroughly 2 to 3 times per week. Change the length, not the amount, of watering. Fall Cut down on watering gradually. How to Prep Your Grass for Dormancy. Winter Only water during dry spells. Don’t let them freeze. Seasonal adjustments keep your lawn healthy all year long. Common Lawn Watering Mistakes Stay clear of the following mistakes: Water Splash every day Water on shallow depth Don’t water in the heat of the day. Don’t ignore rainfall. Water your trees too much! These errors can kill and weaken grass and certainly invite storms of disease and weed take-over. You may read How Much Does Lawn Care Cost? Tips to Improve Lawn Watering Efficiency Use a smart sprinkler timer Zones are individually watered Repair broken or misaligned heads. Determine the water output from your sprinkler with a rain gauge Modify the program for heat waves Saving these fees by watering efficiently also helps your lawn stay healthy and green. How to Tell If Your Lawn Needs Water The signs that your lawn is thirsty: Grass is turning bluish-gray Footprints are still visible Dry or crunchy texture Stop growing If you get these symptoms, water up early the next morning. Final Thoughts The best time to water your lawn is early morning, when cooler temperatures reduce evaporation and promote deeper root growth. Knowing when to water your lawn, how long to water lawn areas, and avoiding mowing right after watering helps prevent disease and stress. With consistent scheduling, your lawn stays greener and healthier while using less water. Strong lawns start with smart care and proper timing. Trust Robert’s Complete Care, your expert lawn care and maintenance service in Whittier CA, for professional results. Contact us today to keep your lawn thriving year-round. FAQs How many minutes should you water your grass for? Most lawns need 20–30 minutes per zone to allow water to soak deeply into the roots. Soil type and sprinkler output may affect timing. What is the best time to water grass in hot weather? Early morning between 4 a.m. and 9 a.m. is best to reduce evaporation and heat stress. This timing also helps prevent lawn disease. When not to water grass? Avoid watering in the afternoon heat or late at night, as it causes water loss and promotes fungal growth. Windy conditions also reduce efficiency. What is the best

When Is the Best Time to Water Your Lawn? A Complete Guide Read More »

Top 5 Lawn Care Tips for Homeowners in Whittier CA

Top 5 Lawn Care Tips for Homeowners in Whittier, CA

Keeping a healthy, vibrant lawn in So Cal can seem like trying to pinch water from stone, especially in Whittier with the hot, dry climate, little precipitation and watering restrictions. So, if you just purchased a home or want to make your front yard greener and cleaner following the right steps can make your lawn one of the best looking in the neighborhood. This guide will take you through Top 5 Lawn Care Tips for Whittier CA Homeowners, that is tailored to the local climate. Use these Southern California lawn care tips to help you combat the heat, save water, and nourish your soil — all while making your yard more earth-friendly and easier to maintain. Let’s begin! Choose the Right Grass Type for Whittier’s Climate Selecting the right type of grass is the key to a good lawn in Whittier, CA. Whittier has hot temperatures and mild winters with occasional droughts, so it is impossible for all types of grass to live without watering. Best Grass Types for Whittier Homeowners Bermuda Grass: Very drought-hardy, heat-loving, and foot traffic tolerant. Zoysia Grass:Dense growth, very low maintenance and excellent water efficiency Tall FescueThis is the best cool season choice with moderate heat tolerance. The correct grass type enables a reduction in water usage, prevents patchy growth and ensures that your lawn stays green and healthy for a longer time — so it’s no wonder that this is one of the most crucial tips for Southern California lawn care you can get. Water Smartly: Timing and Conservation Matter Drought is a common occurrence in California, and you don’t want inefficient watering to drain your wallet and your water supply just to keep your lawn green. Best Watering Practices for Whittier An early morning watering schedule (4-8 AM) will reduce the risk of evaporation. Once or twice a week deep watering promotes root growth. Don’t water shallow and often — this causes roots to become weak and disease prone. Eco-Friendly Watering Solutions For eco-friendly lawn care in Whittier, are your options: Installing smart sprinklers that respond to the weather With drip irrigation for vegetable and flower beds Mulch around plants to hold in moisture – Whittier residents are also required to adhere to local watering schedules in times of drought, so keep checking city updates to make sure you’re in line. Improve Soil Health With Regular Aeration and Fertilization Healthy soil means a healthy lawn. As the soil in Whitter is subjected to dry conditions and foot traffic over time, it becomes compacted, obstructing water and nutrients from accessing the grassroots. Aeration: Why It Matters Breaks up the soil Compaction: Reduced pressure Allows air, water & nutrients to flow Enables your lawn to withstand heat and drought Professionals advise to aerate once a year—typically in spring or late summer. Choosing the Right Fertilizer A Southern California lawn needs a balanced fertilizer with: Nitrogen (N):Encourages greening and growth of leaves Phosphorus (P): Aids root growth Potassium (K):Increases heat and drought tolerance. If you want the greenest, most lush grass that uses the fewest chemicals,_opt for organic or slow release fertilisers for eco-friendly lawn care Whittier. Not only will this best the environment, but you’ll be providing your lawn with slow release nourishment for much longer. You may read How Much Does Lawn Care Cost? Maintain Mowing the Right Way: Not Too Short, Not Too Tall Mowing is one of the easiest yet most confusing lawn care duties. Too many homeowners mowc their grass too shor, especially in the hot weather, causing stress on the turf and creating an invitation for weeds. Proper Mowing Heights for Whittier Grass Types Bermuda: 1-1.5 inches Augustine: 2.5-4 inches Zoysia: 1-2 inches Tall Fescue: 2.5-3.5 inches Never cut more than a third of the grass blade in one go.This prevents the grass from burning and lawns stay greener for longer during the summer. Additional Mowing Tips Dull blades tear grass Mow in different directions to minimize compaction of the soil Grass clippings also should be left on the lawn to serve as natural fertilizer In Whittier, CA, Proper mowing is an essential part of successful lawn care and grass maintenance. Hire Professional Whittier Landscaping Services When Needed While numerous homeowners enjoy doing yard work ourselves, there are certain tasks that are better left to the hired hands—irrigation repairs, weed control, or seasonal cleanups. Your lawn is in good hands with Whittier landscaping services as they understand how to manage the weather in the area. Benefits of Professional Lawn Care Services Personalized lawn care plans Experienced in drought-tolerant landscaping Safe use of fertilizer and weed control Regular schedules of maintenance Commercial equipment access Again, landscaping companies in Whittier understand the soils in Whittier, the rainfall patterns, the most water efficient lawn watering methods, and they know how to help you have a healthy, green lawn while being as water wise as you can be. And for owners of colder, less visually engaging yard spaces, the added professional input often has the strongest payoff. Bonus Eco-Friendly Lawn Care Tips for Whittier To the following are some other sustainable lawn care practices that will help your lawn grow strong and green with less impact on your community and our shared environment: Practice the use of native species in your lawn to use less water Mulch the grass clippings to recycle nutrients back into the soil Opt for permeable pathways to help prevent runoff Add shade trees to cool the soil Plant drought-tolerant bushes for a natural contrast to open grassy spaces The above techniques will enhance the sustainability of your lawn, all the while keeping it visually appealing year-round. Final Thoughts It’s not impossible to maintain a beautiful yard with professional Lawn Care Services in Whittier. By choosing the right grass, watering wisely, improving soil health, and mowing properly, homeowners can achieve a lush and durable lawn even in So Cal’s tough climate. These Top 5 Lawn Care Tips for Whittier, CA Homeowners help create a greener yard with less environmental impact and boost curb appeal year after year. For expert help and reliable results, contact Robert Complete Care today. FAQs Why is lawn care important for homeowners in Whittier, CA? Proper lawn care keeps your yard healthy, improves curb appeal, and helps your landscape withstand Whittier’s warm, dry climate. How often should I water my lawn in

Top 5 Lawn Care Tips for Homeowners in Whittier, CA Read More »

How Much Should Lawn Aeration Cost? Pricing Guide

How Much Should Lawn Aeration Cost?

Healthy soil needs to breathe. Heavy rain, foot traffic or layers of clay can cause the granules in your soil to compact, suffocating the roots. If you’ve got a thin, patchy lawn and are wondering how to improve it without burning a hole in your budget, you’re probably wondering: What Is The Cost Of Lawn Aeration?Professional lawn aeration usually costs somewhere between $104 and $202 for an ordinary suburban lawn. A single core aeration service can cost $35 for a small yard to $550 for a full-acre site, with the average property owner paying about $140 for a quarter-acre lot. The total cost may vary depending on the size of the land, any structural barriers and the aeration method you choose. What Is Lawn Aeration and Why Does It Matter Lawn aeration is the process of creating openings in the soil profile to relieve compaction and break up thick thatch layers. Heavy clay soils pack together tightly over time, cutting off the deep root zone from vital resources. By opening pathways, you allow water penetration, oxygen, and topdressed nutrients to reach the root system directly. This jumpstarts biological activity and creates a deeper, more resilient root structure. There are three primary methods used to loosen compacted turf, and each carries a distinct price point and success rate. Core Aeration Core aeration is the mechanical process where a machine uses hollow tines to penetrate the turf and pull physical soil plugs out of the ground. These soil cores are usually 2 to 3 inches long. They are left on the surface to break down naturally, returning organic material back to the upper dirt layer. This is widely considered the industry standard for severe compaction. Spike Aeration Spike aeration uses solid tines or wedge-shaped spikes to punch holes into the ground. While spike aeration cost looks attractive on paper, the physical mechanics are deeply flawed. Instead of removing dirt, the solid tine pushes the soil sideways as it enters. This action causes significant lateral compaction along the walls of the hole, making it much harder for roots to expand. Liquid Aeration Liquid aeration involves spraying a liquid solution containing advanced wetting agents and organic polymers across the turf. This mixture aims to break down minor surface tension and open micro-pathways in the soil structure. It requires zero heavy machinery, making liquid aeration cost relatively low, though it cannot break up thick thatch or heavy, deeply compacted clay. Factors That Influence Lawn Aeration Pricing Lawn care pricing isn’t a guessing game. Service providers calculate quotes using concrete metrics based on operational complexity and material usage. Total Property Size Property dimensions dictate the time spent on-site. Landscapers structure rates using specific square footage tiers rather than exact measurements. A flat baseline rate usually covers the first 2,000 square feet, with steady incremental price steps applied for every additional 1,000 square feet of turf. Turf Accessibility and Grade Steep slopes, terraced retaining walls, and narrow backyard gates raise labor requirements. Heavy commercial machines require flat footing and wide entryways. If a crew must use smaller, non-motorized equipment to safely navigate tight property layouts or extreme slopes, the extra labor hours will reflect on your final bill. Soil Type and Regional Demands Dense, compacted clay soil takes a heavy toll on machinery and requires slow, careful passes. Conversely, loose sandy soil processes quickly. Regional economic factors, local labor rates, and regional climate variations also cause baseline service charges to fluctuate across the country. Type of Aeration Method Used There are two basic styles of aeration: Core Aeration This is the most convenient method. The machine extracts plugs of soil and lays them on the surface. It is very effective, but you need special equipment. Spike Aeration This method drills holes in the soil, but without pulling out plugs. It is quicker but less effective on severe compaction. Since core aeration produces superior results in the long term, many professionals charge more to do it. Average Pricing You Can Expect To help you map out your property maintenance budget, we compiled national cost averages across various yard size tiers, common service configurations, and geographic regions. Lawn Aeration Cost by Yard Size Yard Size Tier Square Footage Equivalent Professional Cost Range Small Garden / Townhome Under 1,000 sq. ft. $35 – $75 Small Suburban Lot 1,000 – 5,000 sq. ft. $75 – $120 Standard Residential Yard 5,000 – 10,000 sq. ft. $120 – $185 Large Property (1/4 Acre) ~11,000 sq. ft. $150 – $220 Estate Lot (1/2 Acre) ~22,000 sq. ft. $180 – $300 Full Acre 43,560 sq. ft. $390 – $550 Cost Breakdown by Method Cost of core aeration: Expect to pay $95 to $230 for a professional service using a commercial mechanical aerator with hollow tines. Spike aeration cost: Typically ranges from $60 to $225, though it is usually bundled into budget cutting packages or low-end maintenance plans. Liquid aeration cost: Costs roughly $80 to $150 per application, often utilized as a secondary treatment between mechanical core extractions. Regional Cost Variations Northeast U.S.: $130 – $220 (Driven by dense clay content and high regional labor rates) Southeast U.S.: $95 – $180 (Slightly lower baseline, common with sandy coastal soils) Midwest U.S.: $110 – $210 (Standard rates, heavily tied to fall seasonal demands) West U.S.: $120 – $235 (Varies based on urban center pricing and local water conservation rules) Seasonal Demand Affects Cost Seasonal aeration spring and fall is in higher demand. More homeowners ask for the service during these months, and a few companies hike prices slightly because of schedule constraints. If you want to save money, inquire if your provider offers any off-season discounts or bundling with fertilization or mowing. You may read Average Lawn Care Cost. Additional Services That Affect Aeration Pricing Most property owners choose to maximize their yard budget by pairing soil extraction with complementary treatments. Open soil pathways create an ideal environment for systemic products to take hold. Overseeding Does bundling seed with aeration save money? Yes, pairing these services reduces overall labor costs because crews perform lawn

How Much Should Lawn Aeration Cost? Read More »

Average Lawn Care Cost – What Homeowners Should Know

Average Lawn Care Cost – What Homeowners Should Know

Property ownership demands sound financial judgments. A big element of the equation is keeping your grass healthy and green. For a basic maintenance visit, most homeowners pay $50 to $250. The average cost for lawn care services for a quarter acre lot is roughly $130 per service. What you really spend depends very much on the exact services your grass needs. A fast cut is far cheaper than a comprehensive seasonal treatment plan. This tutorial demystifies real market rates so that you can budget right. Let’s take a look at what you receive for your money. What Factors Influence Lawn Care Pricing? The size, shape and condition of yards directly impact the ultimate price a professional company will charge you. The biggest factor is size of the property because it controls the amount of time and material needed. It takes hours longer to service a large estate than a modest residential patch of turf. Your geographic location also changes local labor rates and seasonal demand quite a bit. Accessibility is a secret ingredient in your final estimate. Commercial mowers can’t fit heavy equipment into tight gates, steep hills and tiny pathways. Labor hours rise fast when workers have to operate smaller walk-behind equipment. Mature trees, intricate flower beds and built-in trampolines are just some of the obstacles that hamper trimming labor. The health of your turf now influences how much money you need to spend up front. A neglected yard overgrown with weeds requires intense recovery treatments before regular upkeep can begin. Thick crabgrass and compacted soil need to be corrected immediately. A healthy, well maintained lawn just costs less to maintain over time. Typical Pricing for Common Lawn Care Services Standard grass cutting is the baseline of residential property upkeep. Most companies charge flat rates per visit based on your total square footage. For a standard yard, expect to pay between $45 and $85 per mowing session. This service almost always includes edging along driveways and blowing debris off walkways. Mowing & Edging: $45 – $85 Fertilization Application: $65 – $120 Aeration & Overseeding: $150 – $350 Leaf Removal: $100 – $300] Core aeration breaks up compacted soils to allow roots to breathe freely. Standalone aeration services cost the average homeowner between $120 and $250. Overseeding with this will also fill in bare places before weeds get a chance to take root. The combined service often costs $200-$450 depending on seed quality. Targeted weed control and fertilizer keeps your lawn lush and your soil rich. The cost of single applications is normally between $60 and $110 per therapy appointment. Typical use in most regional climates is four to six focused treatments over a calendar year. Specialized spreaders are employed by professional workers to disperse evenly across your entire property. Seasonal or One-Time Cleanup Services The spring and autumn cleanups take longer since they also include leaf cleanups, tree branches, and other debris. These services may include leaf raking, tree pruning, clearing the beds, and preparing the lawn. The cost tends to be higher since the services involve longer periods. But the service offered has significant merits since it enhances the appearance and protects against the damage that might result from the weather conditions that occur during the stormy seasons. You may read How to Install a Lawn Irrigation System? How Much Should Homeowners Expect to Pay? Homeowners should expect to pay between $100 and $300 per month for ongoing professional property maintenance packages. Annual contracts for comprehensive care packages usually range from $1,200 to $3,500 total. These exact numbers shift based on your climate, yard size, and selected service frequency. Calculating your yearly lawn care cost helps prevent surprise expenses during peak growing seasons. Spring and summer demand consistent weekly visits to keep rapid growth under control. Fall focuses heavily on leaf clearance and preparing root systems for winter. Winterizing services protect your investment during freezing weather conditions. A monthly lawn care cost plan spreads your expenses evenly across the year. Many professional operations offer balanced budget billing options for long-term clients. This means you pay the same flat rate in January as you do in July. It keeps your household cash flow predictable and stable. What Is Worth Paying Extra For? While some yard services are needed on the property, others add long-term value. There may be some yard services that the homeowner wants, and the decision can remain up to the homeowner. Edging and Trimming Edging and trimming assist in sharpening the edges where the sidewalk, driveway, and flower beds are. These are some of the finishing touches needed in the yard in order to make the entire yard appear professionally landscaped. The edges and trimmings, in fact, may add some cost; however, they indeed make the yard appear much better. Precision Cutting and Premium Grass Care In some cases, lawns need specialty cuts. Some people need the ability to change the height setting. These upgrades are skilled work, and they need quality tools. Some areas also include extra costs when the yard has difficult-to-access areas or needs specialty tools. Homeowners sometimes reference local lawn cutting service cost charts to understand these additional pricing options. Aeration and Overseeding Aeration increases the likelihood of better soil conditions since it provides a means through which water, air, and nutrients are accessible to the roots of the grass. Overseeding the area increases the density of the turf since the patches are filled with seeds, leading to healthy turf. All the measures help in ensuring the health of the damaged turf. What Is Worth Paying Extra For? Not every premium service is worth the upcharge. Here’s a practical guide. Worth it: Organic fertilization programs. Costs 20 to 30% more than synthetic options, but builds long-term soil health and reduces chemical runoff. Pre-emergent weed control. One spring application can prevent dozens of late-season weeds. It’s cheaper to prevent than to treat. Annual aeration. The single best investment for a dense, healthy lawn, especially in compacted clay soils. Integrated pest management (IPM).

Average Lawn Care Cost – What Homeowners Should Know Read More »