Lawn Care & Maintenance

Discover tips for mowing, fertilizing, and weed control to maintain a green lawn.

Professional gardener performing lawn maintenance with a pressure washer in a well-kept garden, representing professional lawn care cost and quality landscaping services.

How Much Does Lawn Care Cost?

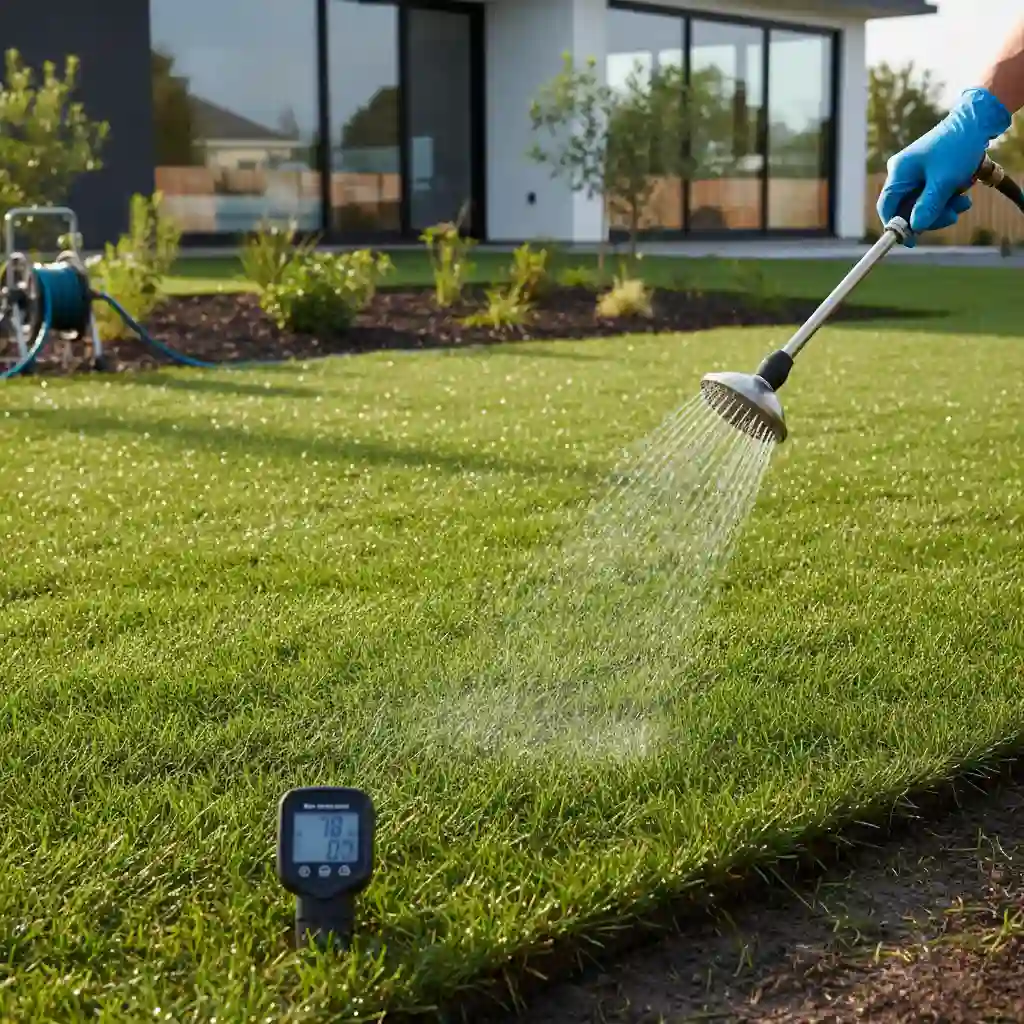
Most homeowners know their lawn needs attention, but few know what it actually costs until the invoice arrives. How much does lawn care cost? The honest answer: anywhere from $49 for a single mow to over $3,000 for a full sod installation. The price depends on your lawn size, the services you need, and how often you book them. Here’s the good news. Once you understand what drives the cost, you can budget accurately and avoid overpaying. This guide breaks down every major lawn care service, shows you real pricing by yard size, and helps you decide when hiring a pro actually makes financial sense. What Does Lawn Care Actually Cost in 2026? The cost of lawn care in 2026 will range from $42 for a single mowing visit to nearly $3,400 for full sod installation, depending solely on the service type and property size. Most U.S. homeowners spend between $100 and $410 a month on continuous lawn upkeep, including mowing, edging, pruning and cleanup. The average national cost to mow a lawn is $42 to $68 per visit. In Southern California and Los Angeles County you’ll often pay closer to $55-$95 per visit due to higher labor costs, longer growing seasons and higher demand for services. Lawn Care Cost by Service Type Not all lawn care is the same. Mowing is one thing. Fertilization, aeration, and sod installation are another conversation entirely. Here’s a breakdown of what each service typically costs in 2026. Service National Average LA County / Whittier Estimate Lawn Mowing $42 – $68 per visit $55 – $95 per visit Weed Control $50 – $210 $65 – $175 Fertilization $67 – $405 $80 – $200 Dethatching $65 – $165 $80 – $180 Core Aeration $107 – $202 $120 – $220 Leaf Removal $107 – $435 $120 – $450 Mulching $77 – $94 per cu. yd. $85 – $110 per cu. yd. Overseeding $427 – $1,514 $500 – $1,600 Sod Installation $2,028 – $3,394 $2,500 – $4,200 Yard Cleanup $216 – $462 $250 – $500 Tree Trimming $430 – $640 per tree $450 – $700 per tree Bush Trimming $46 per bush $50 – $75 per bush Sprinkler Repair $59 – $1,354 $75 – $1,400 Lawn Mowing Cost Lawn mowing typically costs between $49 and $147 per visit, with most homeowners paying around $32 to $68 per hour for a professional service. The final price depends on your yard size, grass height, and how often you schedule visits. If your grass is overgrown, expect a one-time clean-up fee on top of the standard mow. Most pros charge $10 to $30 extra for lawns that haven’t been cut in three or more weeks. Lawn Aeration Cost Aeration breaks up compacted soil so water, air, and nutrients reach the roots. You’ll pay between $107 and $202 depending on yard size. Most professionals recommend aerating once per year, ideally in fall for cool-season grasses and spring for warm-season varieties. Fertilization and Weed Control Fertilization runs between $67 and $405. Weed control sits in the $50 to $210 range. Booking both together as part of a lawn treatment plan is almost always cheaper than paying for each visit separately. Dethatching Cost Dethatching removes the layer of dead grass and organic debris sitting between your soil and turf. Thick thatch blocks water and fertilizer from reaching roots. A professional dethatching job costs between $65 and $165 for most yards. Lawn Care Cost Breakdown by Materials and Labor   When a lawn care business provides you a quote, the number is for two things: labor and materials. Knowing the split helps you recognize if a pricing is reasonable or overstated. For most simple tasks like mowing, edging and trimming, labor often runs 50% to 75% of the overall cost. Materials can make up 30% to 50% of the fee for services that do require chemicals or physical materials, such as fertilizer or mulching. Labor rates in LA County are higher than the national average because of California’s minimum wage legislation and cost of living. Generally, a qualified and insured team will charge $60 to $90 each visit for a 5,000 sq ft yard, most of it going to time on site. Always ask your provider for a breakdown of the quote. A good contractor will not hesitate to . Lawn Care Cost by Yard Size Lawn care pricing scales directly with square footage. A small yard under 1,000 sq ft may cost as little as $35 to $45 per mow, while a large 10,000+ sq ft property can run $120 or more per visit. Most pricing is calculated per square foot or per acre. Yard Size Approx. Mowing Cost (National) Approx. Mowing Cost (LA County) Up to 1,000 sq ft $35 – $45 $45 – $60 1,000 – 3,000 sq ft $45 – $55 $55 – $75 3,000 – 5,000 sq ft $55 – $70 $65 – $90 5,000 – 8,000 sq ft $70 – $90 $85 – $110 8,000 – 10,000 sq ft $90 – $115 $100 – $135 10,000+ sq ft (1/4 acre+) $115 – $150+ $135 – $175+  If you don’t know your lawn’s square footage, measure the length and width in feet, then multiply the two numbers. That gives you the total area. Most lawn care providers can also estimate it using aerial property data before arriving. Key Factors That Affect Lawn Care Service Cost Lawn care pricing isn’t one-size-fits-all. Several variables can push your quote higher or lower than the averages above. Grass Type Bermuda grass, St. Augustine grass, and drought-tolerant varieties all require different mowing heights and maintenance schedules. Some grass types grow faster and need more frequent cuts. Drought-tolerant species common in LA County may require less mowing but more specialized fertilization. Lawn Condition and Overgrowth If the grass is over 10 inches tall, most providers charge a first-cut fee — often double the standard rate. Overgrown lawns take more time, can dull equipment, and require extra cleanup. Keeping your lawn on a regular maintenance

How Much Does Lawn Care Cost? Read More »

How Do I Get Rid Of Clover In Grass?

How Do I Get Rid Of Clover In Grass? Simple Steps That Actually Work!

People looking for a permanent solution for lawn weeds are most concerned about knowing for sure that the solution will not destroy their perfect lawn. Nobody wants a patch of dead brown dirt to trade for a patch of green weeds. To rank high under Google’s 2026 quality guidelines, an article must offer real “Information Gain” with firsthand field experience and scientific distinctions not found in general summaries. That’s what this guide is for. We’re going to skip the generic, repetitive advice you find all over the web, and give you an actionable, field-tested strategy for safely cleaning up your turfgrass. What Is Clover? Clover is a low-growing, perennial broadleaf weed belonging to the legume family, characterized by its ability to extract nitrogen from the air and store it in the soil. Unlike typical weeds, it functions as a natural fertilizer factory, which is why it rapidly dominates lawns lacking proper While many people view it purely as an eyesore, it’s actually an indicator plant. Its very presence tells a specific story about what’s missing beneath your turf. How to Identify Clover In The Lawn Clover has low-creeping stems (stolons) that produce distinct trifoliate leaves, meaning the leaves have three oval leaflets. These patches produce small, round flower heads, usually white, pink, yellow or purple, from late spring to early autumn. High-resolution infographic, close-up, white clover leaf structure, white V-shaped ‘watermark’ lines on leaflets, compared with oxalis, yellow woodsorrel, and black medic, to avoid misidentification. The grass itself grows in thick mats that look like tufts, which allows it to easily mimic the height of your grass from afar. But take a good look and you’ll see creeping nodes that take root into the soil as they spread horizontally across your property. What Causes Clovers to Grow in Grass? Clover grows in grass because of low soil nitrogen levels, compacted soil, incorrect soil pH, or chronic underwatering, which weaken turfgrass and allow resilient weeds to take over. Because it fixes its own nitrogen from the atmosphere, it thrives in depleted soils where traditional grasses starve. Nitrogen Depletion: Your grass requires regular nitrogen to stay thick and competitive. Clover doesn’t care if the soil is starved; it manufactures its own food via symbiotic root bacteria. Compaction and Foot Traffic: Heavy foot traffic crushes delicate grass roots. The hardy root systems of broadleaf legumes easily tolerate dense, oxygen-poor ground. Drought and Shallow Watering: Daily, light watering keeps grass roots shallow and weak. When summer heat waves arrive, the grass dies back, creating bare dirt patches that seeds eagerly colonize. How to Get Rid Of Lawn Clover Eradicating this weed permanently requires a dual approach: immediate mechanical or chemical elimination combined with long-term soil adjustment. 1. Hand-Pulling and Root Digging For minor problems, manual removal is highly effective. You must extract the entire crown and horizontal runners, or the plant will regenerate from the remaining pieces left behind. 2. High-Nitrogen Fertilization Since the plant thrives in nutrient-deficient earth, applying a slow-release nitrogen fertilizer tilts the playing field back to your grass. The sudden surge of nitrogen feeds the turf, allowing it to naturally crowd out the weed. 3. Selective Broadleaf Herbicides When dealing with larger infestations, chemical intervention is often necessary. Look for post-emergent selective liquid sprays containing active ingredients like 2,4-D, dicamba, MCPP (mecoprop), or triclopyr. These specific compounds disrupt the growth cells of broadleaf plants while leaving your grass blades completely unharmed. 4. Natural Alternatives (Horticultural Vinegar) If you prefer an organic approach, you can spot-treat patches with 20% horticultural vinegar (acetic acid). Be aware that this is a non-selective liquid; it will scorch and kill any green grass it touches, so precise spot-application on a calm, windless day is mandatory. Controlling Small Patches of Clover vs. Widespread Infestations You can get rid of small patches of clover by hand-pulling them or using targeted organic spot-treatments, but if you have a lot of clover you’ll need to use broadcast applications of selective herbicides along with aggressive lawn overseeding. Tactically, there is a big difference between treating a lawn that has gone completely to seed and one that has just a few weeds to treat. If your yard is more than 30% weed cover, spot treating individual weeds becomes impractical. In the worst-case scenarios, you’ll need to treat the entire area during the active fall growing window, wait three weeks, then aggressively spread new seed to fill in the resulting structural voids. Prevent Clover Growth With A Healthy Lawn The most effective weed control is a dense, choking canopy of healthy turf grass. When your lawn forms a thick mat, sunlight cannot reach down to the soil surface to jumpstart weed seeds. Correct Chemical Application Safety Always review your product labels before spraying chemicals. Applying triclopyr to a warm-season grass like St. Augustine will completely ruin your yard, turning your green turf into a dead zone. Stick to formulas specifically rated for your exact grass variety. Managing Air Temperatures Never apply chemical liquids when outdoor temperatures exceed 90°F. High heat causes chemical liquids to volatilize into a gas, which can drift into nearby garden beds and destroy prized ornamental flowers. How to Prevent Clover in Your Lawn Long-Term Shifting your regular maintenance routines can drastically cut down on future outbreaks without requiring constant chemical treatments. Raise Your Mower Blades Set your mowing height to 3.5 inches or higher. Taller grass blades naturally cast deep shade across the soil surface, blinding weed seeds from the sunlight they require to establish themselves. Shift to Deep, Infrequent Irrigation Stop watering your grass with quick, daily sprinkles. Instead, supply one inch of water once or twice a week, soaking the soil down to a depth of six inches to force your grass roots to grow deep, resilient networks. Utilize Corn Gluten Meal Apply corn gluten meal in early spring as a natural pre-emergent barrier. This organic byproduct stops newly germinated seeds from building their primary root systems, causing them to wither away before they ever

How Do I Get Rid Of Clover In Grass? Simple Steps That Actually Work! Read More »

How to Clean Artificial Turf

How to Clean Artificial Turf | A Complete Homeowner’s Guide

Synthetic grass is supposed to be lush and green all year without much work, but “low maintenance” doesn’t mean “no maintenance.” Dust, dust mites, pet waste, spills, and heavy foot traffic may also have an impact on how it looks and smells. Turf fibres can flatten, odours can develop, and drainage efficiency may be reduced if it is not well-maintained. Knowing how to Clean Artificial Turf the right way helps retain its appearance, lengthen its life, and keep your outdoor environment healthy. If your turf is in a backyard, playground, rooftop, or commercial space, this guide will teach you the best tools, methods, and maintenance habits to help keep it looking great and performing well for years. Why Regular Artificial Turf Maintenance Matters Regular maintenance of turf is important as it undergoes continual exposure to weather and wear with outdoor use. Dust, pollen, leaves , and other airborne debris slowly accumulate between the fibres, making the turf look dull and, if left for too long, can impact the drainage. Cleanliness is a major part of hygiene, apart from looking nice. When turf is used by pets or children, it can harbor bacteria and odors if not cleaned correctly. Routine care of the material also prevents buildup and reduces allergens, which means a safer surface for daily use. Regular maintenance will not only preserve the attractiveness of your lawn but will also pay for your investment. The artificial turf is strong enough, but neglect can cause the turf mats, infill displacement, and premature wear-off. Simple, regular cleaning can help maintain the turf structure and keep it looking almost new. Essential Tools and Supplies for Turf Cleaning Cleaning synthetic turf is easy and cheap without needing any special tools. Most homeowners can easily do their routine maintenance with simple equipment that’s small enough to fit in a closet and for which they can find daily use. A stiff broom or turf rake is needed to raise the matted-down fibers and to remove the loose debris on top. A garden hose with a gentle stream is perfect for rinsing dirt, pollen, and small stains from grass blades without damaging the turf’s back. For most synthetic turf cleaning simple soaps, vinegar solutions, or the like will suffice. Avoid harsh chemicals, chlorine, or abrasives as these can strip the color and damage the fibres and/or the structural integrity of the turf. Step-by-Step Guide: How to Clean Artificial Turf Properly Knowing how to clean ensures you get the best results for your turf without damaging it. Maintenance is straightforward and achievable when you stick to a routine. Remove Loose Debris and Organic Matter Start by removing loose debris such as leaves and twigs. Rake, broom, or blow leaves and other debris, then repeat this a few times from different directions; don’t crush the blades of grass. Removal of organic material at an early stage prevents mulling and drainage problems. This is required weekly in high-use areas and seasonally or as required in low-use areas. Keeping the debris cleaned off the artificial turf not only keeps the artificial turf surface breathable, but also keeps it looking great. Rinse the Surface Thoroughly When all debris is removed, hose down the turf. Wet and dry by hand. Dust, spills, and pet residue tend to build up in certain places. Water acts as a vehicle for transporting contaminants from the surface through the drainage system and keeps debris from accumulating under the turf. Do not use high-pressure washers unless the manufacturer specifically advises so. Too much pressure can push out infill or unglue seams, making the turf less stable. Spot Clean Stains and Odors For food, drink, or pet waste stains, use a soft-bristle brush to apply a solution of mild soap and water. Gently rub the area and rinse well. The technique is excellent for routine artificial turf cleaning that won’t harm fibers. Long-lasting odors can be treated with enzyme cleaner or diluted vinegar solutions. They neutralize smells, rather than covering them up, so the turf stays fresh and clean for everyday use. You may read How Much Does Lawn Care Cost? Managing Pet Waste and Hygiene on Artificial Turf Maintaining cleanliness on pet turf is necessary to avoid penicillin or bacterial buildup. It is a good idea to clean up solid waste promptly, as you would on natural grass. After removal, rinse the area with water to get rid of residue. For households with multiple animals, periodic deep cleaning will help the home stay fresh and keep odors from becoming ingrained. Pet-safe enzyme cleaners used from time to time enhance the sanitation as well as the synthetic turf cleaning effectiveness without putting your pets at risk from dangerous chemicals. Understanding Turf Flattening and Fiber Recovery With time, the persuasion of the feet to the ground tends to make the fibres tired and liedown so to speak, giving it a more worn-out look. This is a routine process and is not indicative of turf failure. Brushing the turf against the nap repositions fibers. The process evenly redistributes the infill and brings the turf back to its natural look. Regular brushing also promotes better drainage and foot comfort. Often described as synthetic turf reblooming, this fiber renewal process is an important element in both immediate and long-term turf care. Artificial Turf Reblooming | Restoring a Like-New Appearance Reblooming is an important upkeep procedure for aged or heavily trafficked turf fields. Artificial turf reblooming means the artificial grass fibers are brushed upright, and the infill that has become compacted over time is redistributed. In certain applications, a supplemental infill may be applied to help support fiber structure and cushioning. This treatment ensures that the turf keeps its natural look and that you don´t get an early wear out. Although professional reblooming services can be hired, light reblooming is something many homeowners can do themselves if they have the right tools and a bit of patience. Seasonal Cleaning Tips for Long-Term Turf Care There are various challenges for turf maintenance in each season. Changing the cleaning strategy with the time of year guarantees a uniform execution and appearance. More leaf debris is falling in autumn, so you need to sweep more regularly to stop solids from building up. In the summertime, dust and pollen may need to be rinsed off regularly to keep colors

How to Clean Artificial Turf | A Complete Homeowner’s Guide Read More »

How to Install Landscape Fabric

How to Install Landscape Fabric Right | Step by Step Guide

Most individuals lay down the landscape fabric, walk back and think the job is over. Two seasons later weeds are pushing up and it appears worse than it did before. It’s not the landscape fabric itself, it’s how it was rushed or poorly prepped before it was installed. Knowing how to properly install landscape fabric from the start saves you money, time and a lot of frustration in the long run. This tutorial covers everything: the tools you need, the specific methods to follow, fabric types, unusual use cases and the blunders that silently undermine even the best installations. By the time you get through this, you will know precisely what to do and what to avoid, whether you are putting fabric under gravel, in a garden bed, or along a walkway What is Landscape Fabric Landscape fabric also called weed barrier fabric or weed barrier is a sheet of woven or non woven material placed over the soil to block sunlight and reduce weed growth. Some people call it garden liner or geotextile fabric. It is mostly used under mulch gravel or rocks. It works as a weed control cloth but still allows water to pass through. Pros and Cons of Landscape Fabric Is landscape fabric worth it? The answer depends entirely on your surface cover and the specific site conditions. +——————————————————–+ | LANDSCAPE FABRIC UTILITY TEST | | | | [ Surface Material ] | | | | | +—> Rock / Gravel / Decorative Stone | | | | | | | +—> [ HIGH UTILITY ] | | | Prevents stone sinking, separates | | | soil, highly recommended. | | | | | +—> Organic Wood Mulch | | | | | +—> [ LOW UTILITY ] | | Mulch decomposes into soil on top | | of fabric; weeds grow above barrier.| +——————————————————–+ The Pros Long-Term Soil Separation: Beneath decorative gravel, river rock, or unpaved paths, a heavy-duty barrier stops stone from sinking into raw dirt. It keeps your clean rock installations from turning into muddy messes during heavy rain. Initial Weed Suppression: It completely blocks sunlight from reaching the soil surface. This process stops dormant weed seeds from germinating in the early spring. Moisture Conservation: The material slows down surface evaporation, keeping root zones cool and saving water in arid climates. The Cons The Mulch Breakdown Trap: Organic wood mulch breaks down into rich compost directly on top of the fabric. Windblown weed seeds land in this new organic layer and root right through the top of the material, making them incredibly difficult to pull. Soil Suffocation Risk: Cheap, plastic-like barriers choke the ground. They restrict the natural flow of oxygen and water, which starves beneficial earthworms and destroys soil microbiology over time. Maintenance Is Still Required: No fabric provides a zero-maintenance yard. Dust, dirt, and organic matter accumulate on top of the barrier every single year, creating a seedbed for new weeds. Tools and Materials Needed Getting set up properly before you start makes the whole job go faster. Here’s what you need on-site before you begin. Tools: Flat-head spade or hoe (for clearing and edging) Garden rake (for smoothing soil surface) Tape measure Utility knife or heavy-duty scissors Rubber mallet or hammer Kneeling pad (your knees will thank you) Materials: Landscape fabric roll (sized to your project area, plus 10% extra) Landscape staples or U-pins (at least one bag per 100 sq. ft.) Mulch, gravel, or decorative rock for top cover Garden edging (optional but recommended for clean borders) Non-selective herbicide (optional, for persistent perennial weeds  apply 2–3 weeks before installation) How much fabric do you need? Measure length x width of the area. Add 10% for overlaps and edges. For example, a 10 ft x 20 ft bed = 200 sq. ft. of base area. Buy at least 220 sq. ft. to be safe. Step by Step Installation Guide This is the core of knowing how to install landscape fabric right  and most guides skip the details that actually matter. Step 1: Clear and Prepare the Area Remove all existing weeds  roots and all. If you skip this, weeds grow right back under the fabric. For perennial weeds with deep root systems (like bindweed or nutsedge), apply a non-selective herbicide at least 2–3 weeks before installation. Once weeds are gone, remove rocks, sticks, and debris. Use your rake to smooth the soil to a flat, even surface. Any lumps or bumps will show through the fabric and cause uneven coverage. Step 2: Define and Edge Your Borders This step gets skipped constantly, and it leads to messy, uneven edges. Dig a shallow trench (about 2–3 inches deep) along the perimeter of the area. This is where the fabric edge will tuck in and get buried, giving you a clean line. If you’re installing edging material (metal, plastic, or stone), set it in place now. It holds the fabric border down and gives your beds a defined look. Step 3: Choose the Right Fabric for the Job Not all landscape fabric is the same. There are two main types: Woven polypropylene fabric is the stronger option. It handles heavy top materials like gravel and rock well. It’s more durable under foot traffic and in high-sun areas. Look for UV-stabilized versions if the fabric will be exposed. Non-woven (spunbond) fabric allows better water and air flow. It’s the better pick for planted beds where you still want some soil breathing. Lighter weight, easier to cut, but less durable under heavy rock. For driveways, paths, and gravel areas, always go woven. For garden beds with plants, non-woven is the safer choice  though many experienced landscapers skip fabric altogether in these areas. Step 4: Roll Out and Cut the Fabric Start at one end of the area and unroll the fabric across the length. Keep it taut but don’t stretch it — stretching causes it to pull back and create gaps later. If your area is wider than one roll, overlap adjacent sheets

How to Install Landscape Fabric Right | Step by Step Guide Read More »

How Long Does Sod Take to Root

How Long Does Sod Take to Root? (Full Timeline + Care Guide)

You’ve just put down some fresh sod and you’re looking at it thinking, is it really accomplishing anything? That’s the bit they don’t tell you about, the waiting. For good reason, one of the most common questions new lawn owners ask is how long does sod take to root. Get the timing wrong and you could be left with dead areas, wasted money and a lawn that looks worse than it did before. Here’s the good news: If you get the correct care regimen, most sod starts growing shallow roots within 10 to 14 days. Full deep root establishment takes about 30 to 45 days. This guide will lead you through each step in the rooting process, what to watch out for and what to do week by week so your lawn does not only survive, it thrives. What Does Rooting Mean for Sod? Rooting is the process where the pre-grown grass beneath the sod pieces sends new roots down into the native soil beneath it. Until those roots connect, the sod is essentially sitting on top of the ground  alive but not anchored. Full rooting means the grass is drawing water and nutrients from your soil independently. Think of it like a transplanted tree. The tree looks fine in the ground on day one, but it won’t truly “take” until its roots spread into the surrounding soil. Sod works the same way. Unlike grass seed which germinates from scratch over weeks  sod arrives with an established root mat already attached. That’s its biggest advantage. But that root mat still needs to bond with your soil before it can sustain itself without daily watering. How Long Does Sod Take to Root? Shallow roots will begin to grow on most sod within 10 to 14 days of placement. Given sufficient care, the deep roots take 30 to 45 days to fully emerge. The average sod establishment window from install day to a completely self-sustaining lawn is generally 6 to 8 weeks. These are based on perfect watering, good soil preparation and installation at the right time of year. Skip any of those phases, and the timeline stretches out. Here’s the straight scoop: Your sod starts to take hold of the soil at the 10-14 day mark. It’s really hanging around the 30-45 day range. But “fully established” as in can withstand normal foot traffic, mowing and less watering is more like week 6 or 8. Sod Root Growth Stages Sod doesn’t root all at once. It happens in two distinct phases, and each one requires different care from you. Stage 1: Shallow Root Formation (Days 10–14) During the first two weeks, the grass pushes fine, shallow roots down into the top layer of soil. These roots are delicate. They dry out fast, and any disruption can break them off before they have time to strengthen. This is the most critical stage of the sod establishment timeline. Daily watering is non-negotiable here. Keep the soil beneath the sod consistently moist  not soaked, not dry. Stay off the lawn during this period. Even light foot traffic puts downward pressure on roots that haven’t gripped anything yet. Stage 2: Deep Root Development (Days 30–45) Once the shallow roots are in place, the grass starts pushing deeper  down through the soil in search of moisture. This is actually how you train a healthy root system: by watering less frequently but more deeply, you force the roots downward. At this stage, you can shift from daily watering to every other day. Each session should run longer than before so water penetrates deeper into the soil. This encourages the roots to follow the moisture down rather than staying shallow. By day 45, a properly cared-for lawn should have a root system that’s genuinely anchored. You can test this yourself  we’ll cover that below. How to Tell If Your Sod Is Rooting (The Tug Test) Gently lift one corner of a sod piece. If it pulls up with little to no resistance, the roots haven’t connected yet. If it resists and feels like it’s attached to the ground, rooting is underway. The more resistance you feel, the more established the root system. This simple tug test is the most reliable way to check progress without any equipment. Do it around day 10 to 12 for your first check, then again at day 30. You can also look for color. Healthy, rooting sod stays a rich green and lies flat against the soil. Sod that’s struggling often shows yellowing at the edges, slight lifting at the seams, or a spongy feel underfoot. How to Water New Sod Watering is the single biggest factor in how fast  or how slowly  your sod roots. Too much water causes fungal growth and root rot. Too little causes the roots to dry out and die before they ever connect. Here’s a practical week-by-week watering schedule: Week Frequency Duration Per Session Goal Week 1 3–4x daily 5–10 minutes Keep sod and top 1–2″ of soil moist Week 2 2x daily 10–15 minutes Maintain moisture, begin tapering Week 3 Once daily 15–20 minutes Encourage shallow roots to deepen Week 4–5 Every other day 20–25 minutes Push roots deeper into soil Week 6+ 2–3x per week 25–30 minutes Standard lawn maintenance schedule Always water in the early morning. Afternoon watering loses significant moisture to evaporation. Evening watering leaves the grass wet overnight, which promotes mold and fungal disease. Don’t hand-water if you can avoid it. An automated irrigation system gives more consistent coverage and prevents the dry patches that often appear near buildings, concrete edges, or asphalt where reflected heat pulls moisture out faster. How Long Does Sod Take to Root in Hot Weather? In hot weather  soil temperatures above 85°F  sod roots faster but also dries out faster. Shallow roots can form in as little as 7 to 10 days during summer. The trade-off is that the sod needs more frequent watering and is more vulnerable to heat stress in the first two weeks.

How Long Does Sod Take to Root? (Full Timeline + Care Guide) Read More »

Watering new turf lawn with a sprinkler to show how much to water new turf properly

How Much to Water New Turf? The Complete Guide to a Healthy Lawn

It’s fun to lay new turf, but most homeowners make mistakes when it comes to keeping it alive. If you’ve recently laid down new sod or had a lawn put in by a contractor, you might be wondering how much to water new turf for the best chance of living. It dries out if you don’t give it enough. It drowns if it becomes too much. Getting this properly in the first few weeks is the most important thing. This book explains in simple terms how much water fresh grass requires, when to water it, what to do each season, and the mistakes you should never make. Why Proper Watering Is Critical for New Turf A new lawn is not the same as an old one. When you lay sod, the roots are just approximately half an inch to an inch deep. The grass needs you for water until their roots reach the ground below. The lawn establishing period is the first few weeks after planting. It can run from 2 to 6 weeks, depending on the species of grass and the time of year. The top inch of soil must keep wet throughout this period. If there isn’t any water farther down, the roots can’t chase it. You could lose sections of grass for good if the soil dries up even once during this time. Think of it this way: new turfgrass sod is like a person who has just had surgery. It needs careful, regular care right after the surgery, not neglect, and not too much work. The Role of Root Establishment Root establishment is the process where the new grass sends roots down into your native soil, anchoring itself and becoming self-sustaining. Until this happens, watering is your number one job. Once roots are 2–3 inches deep and you can no longer easily lift a corner of sod, you’re entering the maintenance phase where watering becomes less frequent but deeper. When to Water New Sod What Is the Best Time to Water New Turf? The optimal time to water fresh grass is in the morning, between 5 and 9 AM. The weather is cool right now, the wind is usually calm, and the sun hasn’t started to speed up the evaporation rate yet. Instead of evaporating off the surface, water soaks into the ground. Don’t water in the middle of the day. Because of the heat and bright sun, most of the water evaporates before it can get into the ground. You squander water and don’t give the roots enough to drink. People typically worry about watering in the evening. If the grass stays wet all night, it can get fungal diseases, which is an easy way to damage a young lawn that is otherwise healthy. Quick Tip: If you absolutely must water during the day due to extreme heat in the first 24–48 hours after installation, do it. Heat stress can kill new sod faster than fungal risk in that critical window. How to Water New Sod Proper technique matters just as much as timing. Here’s how to do it right. Step 1  Water Immediately After Installation The moment new sod goes down, it needs water. Don’t wait until the next morning. Apply water within 30 minutes of laying each section. The first watering should saturate the soil 3–4 inches deep. Step 2  Check Soil Moisture Daily Every morning for the first two weeks, lift one corner of the sod. The dirt below should feel like a wet sponge, but not too wet. If it’s dry and crumbly, do it more often. If water is pooling or squishing, stop. Step 3  Water in Overlapping Passes Whether you’re using a sprinkler or an irrigation system, make sure your sprinkler coverage overlaps by about 30%. This prevents dry spots where the sprinkler patterns don’t quite reach; those are the brown patches you’ll notice in week two if you’re not careful. Step 4  Reduce Frequency as Roots Establish Slowly cut back on how often you water after the first two weeks. In week 3, stop watering every day and start watering every other day. In weeks 4–6, water 2–3 times a week. This makes the roots grow deeper, which is what you want because they are looking for water. How Much Water Does a New Turf Need? The Daily Water Target New grass needs around 1 to 1.5 inches of water every day for the first two weeks. This sounds like a lot, but keep in mind that the idea is to keep the top 3–4 inches of soil wet all the time while the roots are growing. After the establishment stage (weeks 3–6), cut back to 1 inch of water per week, which is the usual amount of water for most varieties of grass. Is 30 Minutes of Watering Grass Enough? This relies only on the sort of sprinkler you have and how much water pressure you have. A regular oscillating sprinkler might provide you with approximately 0.5 inches in 30 minutes, which isn’t enough during the establishment phase. A well-installed in-ground irrigation system with rotor heads might give you 0.75 inches in the same amount of time. You can only be sure by measuring. For more on that, see the How to Measure Water Accurately section below. New Turf Watering Schedule Here’s a practical week-by-week watering new sod schedule for most climates: Week 1–2: Heavy Establishment Phase Water 2–3 times per day, with sessions of 15–20 minutes each. Focus on morning watering, adding a mid-afternoon session only if temperatures are very high. The goal is to keep the top 3–4 inches of soil moist at all times. This is the most critical window of the entire new lawn watering guide. Week 3–4: Tapering Phase Reduce to once per day in the morning, extending each session to 20–30 minutes. By this point, roots should be starting to anchor into the soil 4–6 inches deep. You’ll notice the sod feels more firm underfoot. Week 5–6: Transition to Maintenance

How Much to Water New Turf? The Complete Guide to a Healthy Lawn Read More »