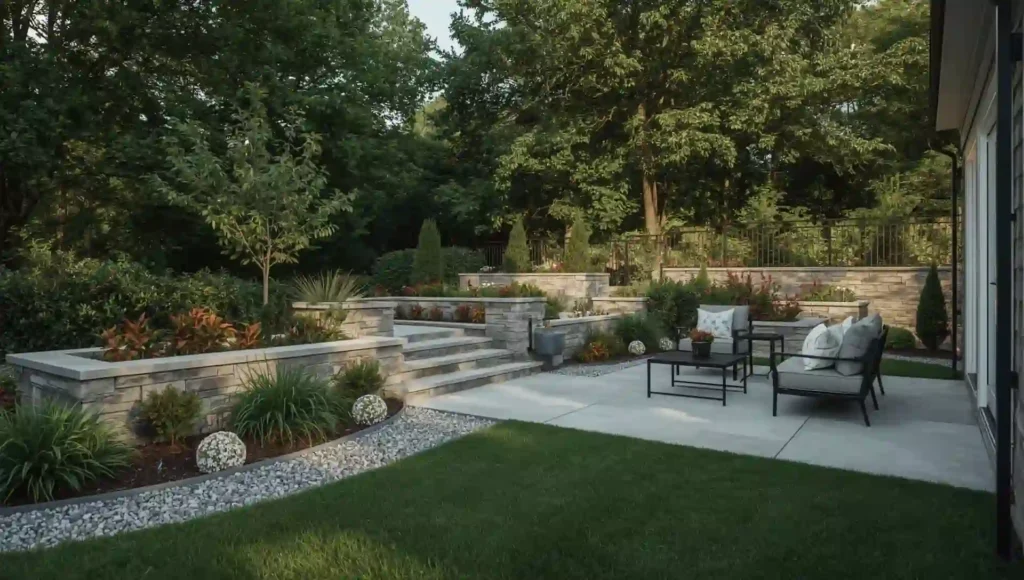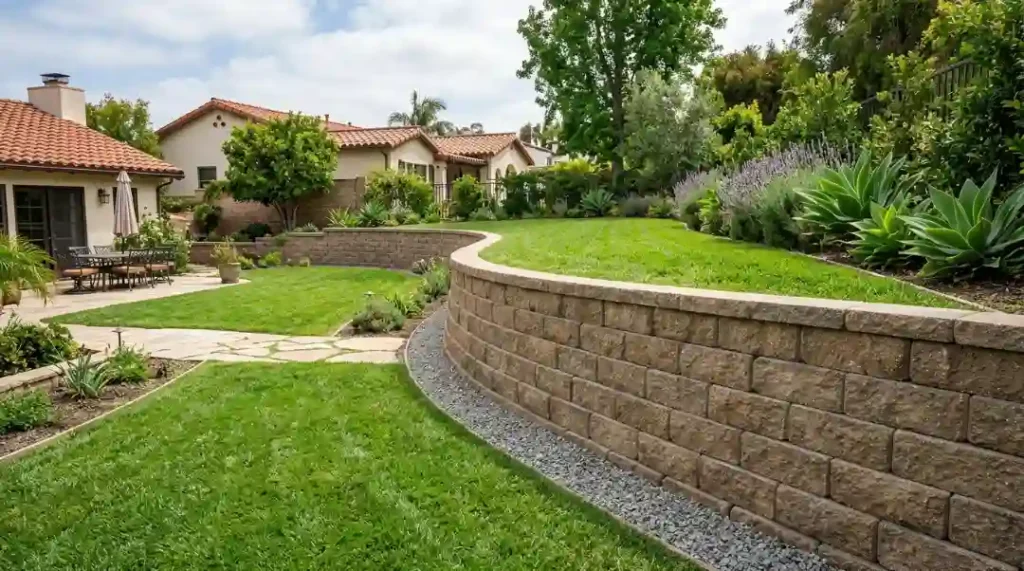
How to Construct a Retaining Wall with Block
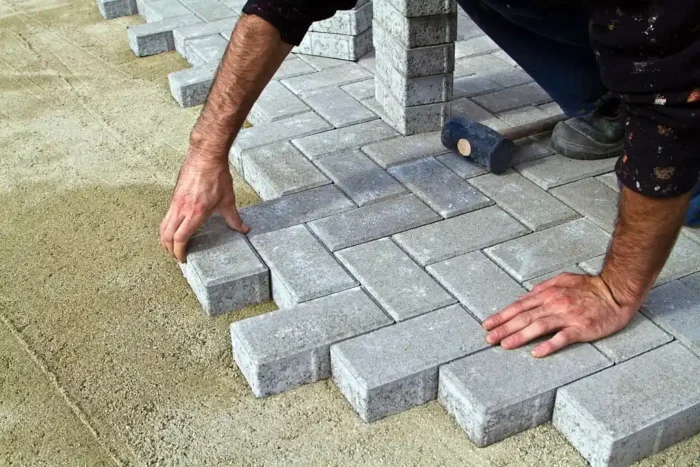
It’s not just ugly to see a retaining wall that leans, breaks, or falls after one wet season; it’s also a waste of time and money. You already know the problem if you want to develop one: soil erosion, yards that aren’t level, and slopes that make outdoor spaces unusable. Learning how to construct a retaining wall with blocks the right way means your wall stands firm for decades, not just a few seasons. Here’s the good news. When done right, building concrete block retaining walls is one of the easiest hardscaping jobs to perform yourself. We’ll show you how to do everything in this guide, from excavating the base trench to putting the cap blocks in place. The main ideas remain the same, no matter how tall your wall is, whether it’s 2 feet or 6 feet. What Is a Block Retaining Wall? A block retaining wall is a structure built from concrete or masonry units designed to hold back soil on a sloped or graded surface. It prevents erosion, creates level outdoor areas, and adds structural definition to a landscape. Most residential block walls range from 2 to 6 feet in height. Think of it like a dam for soil. Without it, gravity pulls everything downhill: your garden beds, your lawn, your topsoil. A well-built retaining wall keeps all of that in place while giving your yard a clean, finished look. Block walls are preferred over timber or poured concrete for most DIY projects because they’re modular, affordable, and forgiving to install. Types of Retaining Wall Blocks Before starting your retaining wall block installation, you need to pick the right block. Not all blocks work the same way. Concrete Segmental Blocks are the most popular option. They come with a locking lip or pin system that keeps each course from sliding forward under soil pressure. Allan Block is one of the most widely used brands in this category. Dry-Stack Natural Stone works for shorter decorative walls but lacks the structural locking features of manufactured blocks. It’s not ideal for walls holding significant soil loads. Tumbled or Textured Concrete Blocks offer a natural stone appearance with the strength of concrete. They’re great for walls where aesthetics matter. For any wall over 3 feet, always choose a block with a built-in locking feature either a back lip, tongue and groove, or locking pin configuration. Do You Need a Permit to Build a Retaining Wall? Most places don’t need a permit for retaining walls that are less than 4 feet tall. You usually need engineering permission and a building permit for walls that are more than 4 feet high. Before you start, always check with your local government. Requirements vary by city, county, and soil type. Some places lower this limit to 3 feet, especially close to property lines or public easements. If you get this wrong, you could have to knock down the whole wall. A straightforward call to your local building department takes 10 minutes and saves you months of trouble. Step-by-Step Guide to Construct a Retaining Wall with Block This is the core of what you came for. Following these retaining wall construction steps carefully skipping any of them is how walls fail. Step 1: Mark and Excavate the Area Start by staking out the wall’s front edge. Use marking paint or a string line to define the full length. For curved walls, a garden hose is a practical layout tool. Excavate all surface vegetation and organic material from the area. Organic matter compresses over time it cannot be used as backfill. For walls 3 to 4 feet or taller, cut back into the hillside as far back as the wall is tall. Step 2: Dig and Prepare the Base Trench The base trench is where your wall either succeeds or fails. Dig it 24 inches wide and at least 6 inches deep, plus an extra 1 inch for every 1 foot of wall height. For walls under 4 feet, an 18-inch wide by 4-inch deep trench is acceptable. Compact the trench with a minimum of two passes using a plate compactor. If you’re dealing with heavy clay or previously disturbed soil, remove it and replace it with compacted granular material in 8-inch lifts. Step 3: Install the Gravel Base Place a minimum of 6 inches of 3/4-inch crushed gravel (wall rock) in the trench. Rake it smooth and compact it with two passes of the plate compactor. Check the entire length for level before moving on. This is your block retaining wall footing. It’s the foundation everything rests on. A level gravel base means every course above it stays manageable. Step 4: Set the First Course of Blocks The initial course of blocks is the most significant section of the whole wall. Every course following it follows its lead. If one is off, the whole wall is off. Put each block down with the raised front lip facing up and out. Always check the level from side to side and front to back. Use a dead blow hammer to make little changes to blocks. Put up to 1/2 inch of coarse sand under a block if it is low. The first course should be buried about one block height below the finished grade. Tilt the bricks back just a little bit toward the hill. Not a lot, just enough that the wall leans into the earth’s load instead of away from it. Step 5: Install the Perforated Drain Pipe Water is a retaining wall’s worst enemy. Saturated soil creates hydrostatic pressure that can push a wall over from behind. Place a 4-inch perforated drain pipe directly behind the first course at the lowest point of the trench. Run the pipe to daylight every 50 feet and wrap it in non-woven filter fabric. Never use woven filter fabric here it restricts water flow and acts like a dam. Step 6: Stack Blocks and Backfill Per Course Stack each new course so the vertical seams are offset from