Most individuals lay down the landscape fabric, walk back and think the job is over. Two seasons later weeds are pushing up and it appears worse than it did before. It’s not the landscape fabric itself, it’s how it was rushed or poorly prepped before it was installed. Knowing how to properly install landscape fabric from the start saves you money, time and a lot of frustration in the long run.
This tutorial covers everything: the tools you need, the specific methods to follow, fabric types, unusual use cases and the blunders that silently undermine even the best installations. By the time you get through this, you will know precisely what to do and what to avoid, whether you are putting fabric under gravel, in a garden bed, or along a walkway
What is Landscape Fabric
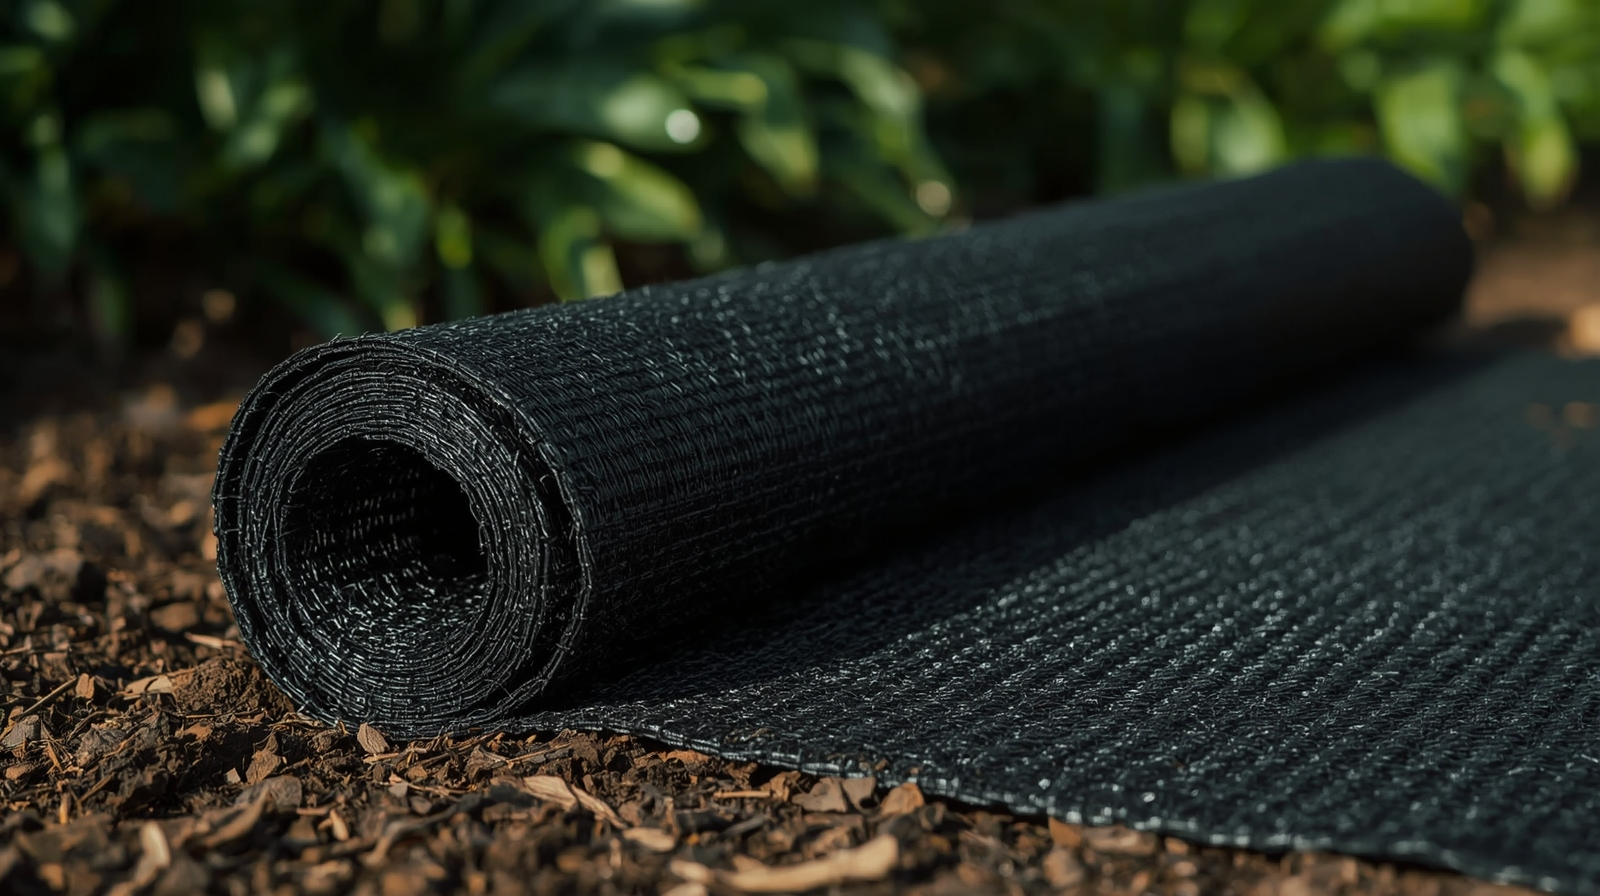
Landscape fabric also called weed barrier fabric or weed barrier is a sheet of woven or non woven material placed over the soil to block sunlight and reduce weed growth. Some people call it garden liner or geotextile fabric. It is mostly used under mulch gravel or rocks. It works as a weed control cloth but still allows water to pass through.
Pros and Cons of Landscape Fabric
Is landscape fabric worth it? The answer depends entirely on your surface cover and the specific site conditions.
+--------------------------------------------------------+
|             LANDSCAPE FABRIC UTILITY TEST              |
|                                                        |
|  [ Surface Material ]                                  |
|     |                                                  |
|     +---> Rock / Gravel / Decorative Stone             |
|     |        |                                         |
|     |        +---> [ HIGH UTILITY ]                    |
|     |              Prevents stone sinking, separates   |
|     |              soil, highly recommended.           |
|     |                                                  |
|     +---> Organic Wood Mulch                           |
|              |                                         |
|              +---> [ LOW UTILITY ]                     |
|                    Mulch decomposes into soil on top   |
|                    of fabric; weeds grow above barrier.|
+--------------------------------------------------------+
The Pros
Long-Term Soil Separation: Beneath decorative gravel, river rock, or unpaved paths, a heavy-duty barrier stops stone from sinking into raw dirt. It keeps your clean rock installations from turning into muddy messes during heavy rain.
Initial Weed Suppression: It completely blocks sunlight from reaching the soil surface. This process stops dormant weed seeds from germinating in the early spring.
Moisture Conservation: The material slows down surface evaporation, keeping root zones cool and saving water in arid climates.
The Cons
The Mulch Breakdown Trap: Organic wood mulch breaks down into rich compost directly on top of the fabric. Windblown weed seeds land in this new organic layer and root right through the top of the material, making them incredibly difficult to pull.
Soil Suffocation Risk: Cheap, plastic-like barriers choke the ground. They restrict the natural flow of oxygen and water, which starves beneficial earthworms and destroys soil microbiology over time.
Maintenance Is Still Required: No fabric provides a zero-maintenance yard. Dust, dirt, and organic matter accumulate on top of the barrier every single year, creating a seedbed for new weeds.
Tools and Materials Needed
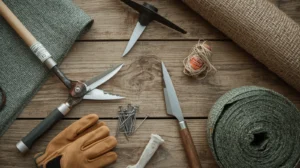
Getting set up properly before you start makes the whole job go faster. Here’s what you need on-site before you begin.
Tools:
- Flat-head spade or hoe (for clearing and edging)
- Garden rake (for smoothing soil surface)
- Tape measure
- Utility knife or heavy-duty scissors
- Rubber mallet or hammer
- Kneeling pad (your knees will thank you)
Materials:
- Landscape fabric roll (sized to your project area, plus 10% extra)
- Landscape staples or U-pins (at least one bag per 100 sq. ft.)
- Mulch, gravel, or decorative rock for top cover
- Garden edging (optional but recommended for clean borders)
- Non-selective herbicide (optional, for persistent perennial weeds apply 2–3 weeks before installation)
How much fabric do you need? Measure length x width of the area. Add 10% for overlaps and edges. For example, a 10 ft x 20 ft bed = 200 sq. ft. of base area. Buy at least 220 sq. ft. to be safe.
Step by Step Installation Guide
This is the core of knowing how to install landscape fabric right and most guides skip the details that actually matter.
Step 1: Clear and Prepare the Area
Remove all existing weeds roots and all. If you skip this, weeds grow right back under the fabric. For perennial weeds with deep root systems (like bindweed or nutsedge), apply a non-selective herbicide at least 2–3 weeks before installation.
Once weeds are gone, remove rocks, sticks, and debris. Use your rake to smooth the soil to a flat, even surface. Any lumps or bumps will show through the fabric and cause uneven coverage.
Step 2: Define and Edge Your Borders
This step gets skipped constantly, and it leads to messy, uneven edges. Dig a shallow trench (about 2–3 inches deep) along the perimeter of the area. This is where the fabric edge will tuck in and get buried, giving you a clean line.
If you’re installing edging material (metal, plastic, or stone), set it in place now. It holds the fabric border down and gives your beds a defined look.
Step 3: Choose the Right Fabric for the Job
Not all landscape fabric is the same. There are two main types:
Woven polypropylene fabric is the stronger option. It handles heavy top materials like gravel and rock well. It’s more durable under foot traffic and in high-sun areas. Look for UV-stabilized versions if the fabric will be exposed.
Non-woven (spunbond) fabric allows better water and air flow. It’s the better pick for planted beds where you still want some soil breathing. Lighter weight, easier to cut, but less durable under heavy rock.
For driveways, paths, and gravel areas, always go woven. For garden beds with plants, non-woven is the safer choice though many experienced landscapers skip fabric altogether in these areas.
Step 4: Roll Out and Cut the Fabric
Start at one end of the area and unroll the fabric across the length. Keep it taut but don’t stretch it — stretching causes it to pull back and create gaps later.
If your area is wider than one roll, overlap adjacent sheets by at least 6 inches. Overlap at seams is critical. A 3-inch overlap leaves a gap that weeds will find within one season.
Cut the fabric at the end of the row with your utility knife. Leave 3–4 extra inches at the edges so you can tuck the ends into your perimeter trench.
Step 5: Cut Openings for Existing Plants
If you have existing shrubs or perennials in the bed, cut an X-shaped slit in the fabric at each plant’s base. Fold back the flaps and place the fabric around the plant stem, then fold the flaps back down.
Do not cut large holes. Big openings let weeds through and defeat the whole purpose. An X-cut keeps the opening small and tight against the plant crown.
Step 6: Secure the Fabric with Landscape Staples
This is where a lot of DIY installs fail. People use too few staples and the fabric shifts under the top cover material.
Place a staple every 10 inches along all edges. Add staples every 2–3 feet across the interior of large sections. At seams (where two pieces overlap), add a row of staples down the full length of the overlap.
Use a rubber mallet to drive staples flush with the fabric surface. If a staple sticks up, it’ll snag on tools, shoes, and mulch during maintenance.
Special Applications
In flower beds I prefer using fabric under mulch. In driveways or paths I switch to heavy duty landscape fabric under gravel. For decorative rock areas you will find landscape fabric under rocks helps stop weeds but still drains water. In vegetable gardens I sometimes avoid it because mistakes to avoid with landscape fabric include trapping soil too tightly.
Landscape Fabric Under Gravel and Rock
This is the single best use case for woven landscape fabric. Lay it over fully prepped soil, secure with staples, then add 3–4 inches of crushed gravel, decomposed granite, or river rock on top. The fabric prevents the rock from sinking into the soil and stops weeds from pushing up through the surface.
For driveways or heavy-traffic gravel paths, use commercial-grade woven fabric at 4+ oz/yd². Lighter fabric will compress and tear under wheel load within a couple of years.
Slope and Erosion Control
On slopes, lay the fabric horizontally across the hill (not up-and-down). This prevents water from running along the length of the fabric and carrying top cover material downhill. Use extra staples on slopes — at least one every 8 inches along the upper edge of each row.
Around Trees and Large Shrubs
Cut a circle in the fabric at least 4–6 inches away from the trunk. Pressing fabric tightly against tree bark traps moisture and can cause rot and pest problems. Leave breathing room around the base of all woody plants.
Vegetable and Annual Beds
Skip the fabric in vegetable gardens. Soil biology matters here. Use 3–4 inches of straw, wood chip mulch, or compost instead. You’ll get better drainage, healthier soil over time, and you won’t fight tangled fabric when it’s time to till or replant.
Choosing the Best Landscape Fabric
There are many options on the market. If you want long life choose a heavy duty landscape fabric. For small gardens simple weed barrier fabric is fine. If you are shopping you will find garden weed barrier rolls of weed barrier fabric and other types. The best landscape fabric for weed control is the one that matches your soil type and project.
Mistakes to Avoid and Alternatives
Even small errors during installation can create major headaches down the road. Avoid these common installation traps.
The Five Most Common Installation Errors
Installing the Wrong Side Up: Many commercial fabrics feature a fuzzy textured side and a smooth side. The fuzzy side must face down against the dirt to grip the soil, while the smooth side faces up to shed water efficiently.
Pulling the Material Too Tight: Taut fabric splits or tears when heavy rocks are dropped on top of it. Leave a little slack so the material can adjust to the natural curves of your subgrade.
Skimping on Seam Overlaps: Skimping on your seams allows dirt to push through. Always maintain a full 6-to-8-inch overlap.
Leaving the Material Exposed to the Sun: UV rays degrade synthetic landscape fabrics within a few months. Always cover the material with a 2-to-3-inch protective layer of stone or mulch within five days of rolling it out.
Using Dull Cutting Tools: Dull blades pull and fray the synthetic threads of woven fabrics. Keep a supply of fresh, sharp utility blades on hand.
Expert Hardscaping in Whittier: Let Robert’s Complete Care Handle It
Knowing how to install landscape fabric right is one thing doing it across a full property with multiple bed types, slopes, and hardscape zones is another. At Robert’s Complete Care, we install landscape fabric as part of complete hardscaping and lawn installation services in Whittier and the surrounding areas.
Our team preps the soil properly, uses commercial-grade materials, and gets the edges and seams right the first time. Whether you’re putting in a new gravel path, a clean rock garden, or a full front yard makeover, we handle everything from ground prep to final cover material.
We’ve seen what happens when fabric is installed over live weeds, left without enough staples, or covered with only an inch of mulch it’s a mess that costs more to fix than to do right from the start.
If you’re ready to get it done right, reach out to Robert’s Complete Care today. Contact us here for a free estimate on hardscaping, landscape fabric installation, and lawn care services in Whittier.
Professional Landscape Installation
Get expert help with fabric, mulch, rock, and garden bed installation in Whittier for a weed-free, beautiful yard.
FAQs related to Landscape Fabric
Does landscape fabric actually stop weeds?
Landscape fabric effectively stops weeds from below the soil from reaching the surface. However, weed seeds that blow in on top of the mulch will still sprout in the cover material. It’s not a 100% solution — it significantly reduces weeds but doesn’t eliminate them entirely.
Which side of landscape fabric goes down?
The rougher, darker side goes face-down against the soil. The smoother side faces up toward the mulch or gravel. Most fabric is labeled check the roll before you unroll it.
How long does landscape fabric last?
Quality woven polypropylene landscape fabric lasts 10–20 years when properly installed and covered with mulch or gravel. Cheap non-woven fabric exposed to sunlight can degrade within 2–3 years. UV stabilization and cover material are the two biggest factors in lifespan.
Can you plant through landscape fabric?
Yes cut an X-shaped slit, fold back the flaps, plant, then fold the flaps back around the stem. Keep the opening as small as possible to limit weed exposure.
Do you need landscape fabric under mulch?
Not always. In planted garden beds, organic mulch alone at 3–4 inches depth does a good job suppressing weeds without the downsides of fabric. Fabric is most valuable under rock, gravel, and hardscape materials where mulch isn’t used.