Landscape & Outdoor Services

Get expert advice and DIY tips on landscaping and outdoor projects in Whittier, CA from design to installation and maintenance.

How to install low voltage landscape lighting in a modern front yard with LED path lights, tree uplighting, and a clean, professional layout at dusk.

Easy Guide to Low Voltage Lighting Setup

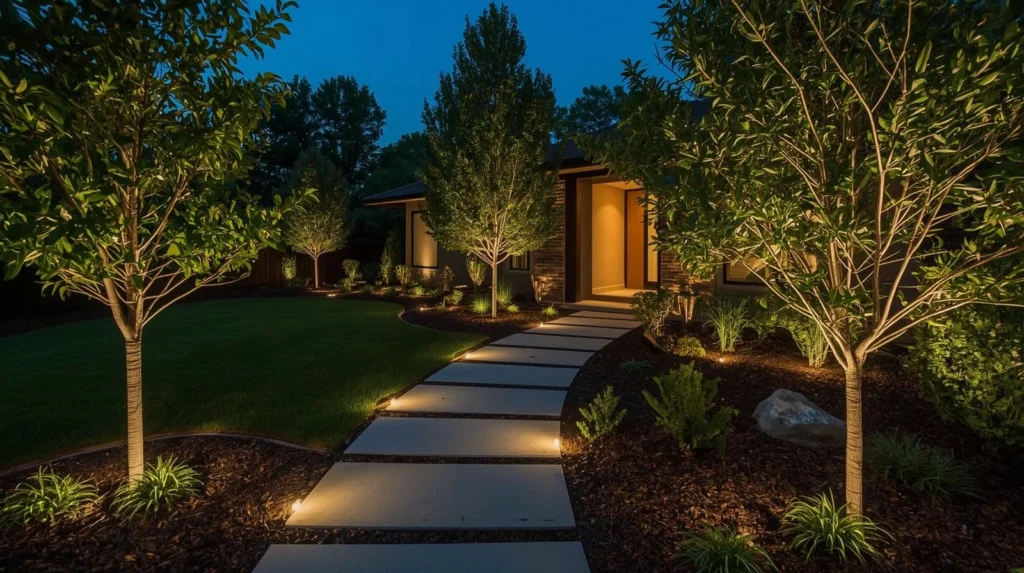
There’s something deeply satisfying about stepping back at dusk and seeing your yard come alive with soft warm glows. I’ve done dozens of landscape lighting projects over the years both as a professional and DIYer and I can tell you that low voltage outdoor lighting isn’t just about beauty it’s about safety, curb appeal and smart home function. If you are wondering exactly how to install low voltage landscape lighting this guide will discuss the entire process from planning your layout to wiring everything properly using a low voltage landscape lighting wiring diagram. Why Choose Low Voltage Outdoor Lighting? Before jumping into tools and wire connectors let’s talk about why you’re making this choice. Low voltage lighting installation uses a transformer to reduce the standard 120V current down to a safer 12V, making it perfect for homes with kids, pets or heavy foot traffic. Unlike high voltage systems installing low voltage outdoor lighting is safer more energy efficient and doesn’t require professional electrical licensing in most states with smart low voltage lighting system options and dusk to dawn landscape lighting setup you can automate your yard lighting completely. Planning Your Landscape Lighting Layout Trust me the biggest mistakes I’ve seen happen before a single fixture is installed. Spend time upfront to plan your landscape lighting layout thoughtfully. Walk your yard at night with a flashlight. Highlight areas like walkways, trees, water features and architectural elements. Then sketch a rough design. Think in terms of three light types: Path lighting using LED low voltage path lights Accent lighting for trees, shrubs, or statues Ambient lighting around patios or fences A good rule is to start small. You can always add more lights later using splitters or extending wires with cable connectors for landscape lighting. What You’ll Need: Tools & Materials Here’s what’s usually in my toolkit for a landscape lighting installation: Fixtures (path lights, spotlights) Transformer for landscape lights 12-gauge direct burial wire for landscape lighting Low voltage cables (check landscape lighting wire gauge) Cable connectors for landscape lighting Wire stripper/cutter Multimeter (for checking outdoor lighting voltage drop) Don’t forget your outdoor low voltage transformers should be rated for at least 20% more wattage than your total lighting load. Which brings us to… Understanding Wattage and Wire Runs Knowing the wattage requirements for low voltage lighting is key. Add up the wattage of all your fixtures. For example, ten 5W lights = 50W. If your transformer is 75W, you’re in the safe zone. When it comes to wiring the longer your wire run the more voltage drop you’ll get. Use a heavier landscape lighting wire gauge (like 12 AWG) for longer distances to keep your lights evenly bright. Wiring and Connection Tips If you’re asking yourself how to wire landscape lighting you’re not alone this is where most people hesitate. But wiring is easier than it looks. Use a low voltage landscape lighting wiring diagram (you can find free ones online or in product manuals). Start from the transformer and run the wire along your planned route. Use wiring for low voltage landscape lighting rated for outdoor use. Wiring low voltage lights means creating parallel circuits daisy-chaining the lights together while keeping consistent polarity. That’s critical. When using cable connectors for landscape lighting make sure they are waterproof and designed for direct burial. Installing the Lights: Step-by-Step Now we’re into the fun part installing landscape lighting. Place your fixtures where you want them. Run the wires loosely from the transformer to each light. Strip the wire ends and use connectors to join them to each fixture. Mount your transformer for landscape lights on a wall near a GFCI outlet. Connect the wires to the transformer, observing polarity (+ to +, – to -). Test the system before burying anything. Install outdoor lighting by burying wires at least 6 inches deep (especially direct burial wire for landscape lighting). I always recommend keeping a printed landscape lighting wiring diagram in your garage it’ll save you headaches if you troubleshoot later. Testing, Troubleshooting, and Adjustments Once everything’s connected flip the switch. If some lights are dim or flickering you may have a voltage drop issue. Use a multimeter to measure voltage at the farthest fixture. You can split your run into two shorter branches if needed. This is why how to connect low voltage lights properly using sealed watertight connectors is crucial. Bonus: Automate with Smart Lighting Want to take it a step further? Add dusk to dawn landscape lighting setup using timers, photocells, or smart home integration. A smart low voltage lighting system lets you control your entire yard from your phone. Final Tips & Safety Reminders Always follow outdoor lighting safety tips. Avoid overloading your transformer, keep connections dry, and regularly inspect buried wires. Installing low voltage landscape lighting may feel overwhelming at first, but once you’ve done it, it becomes second nature. Whether you’re doing a diy low voltage landscape lighting project or simply adding new fixtures to an existing system, it’s one of the most satisfying upgrades you can do to your home. Bring Your Outdoor Space to Life Let our experts handle your landscape lighting installation with precision and care.  Call (562) 208-0148 Book Lighting Service

Easy Guide to Low Voltage Lighting Setup Read More »

How Long Does Sod Take to Root

How Long Does Sod Take to Root? A Comprehensive Guide to Ensuring a Healthy Lawn

When you install sod in your yard, one of the most common questions homeowners have is, “How long does sod take to root?” While the answer can vary depending on several factors, it’s necessary to understand the rooting process to ensure your sod establishes itself properly. In this article, we will explore the key elements that influence how long it takes for sod to root, how to care for it, and tips to speed up the rooting process for a healthy and vibrant lawn. What Does Rooting Mean for Sod? Rooting refers to the process where the sod’s roots penetrate into the soil beneath it, forming a connection between the grass and the earth. This crucial stage allows the grass to take in nutrients, water, and air, helping it grow strong and healthy. So, how long for sod to establish its roots? Typically, the rooting process can take anywhere from 2 to 3 weeks under ideal conditions. How Long Does Sod Take to Grow? After you lay the sod, it’s essential to understand that the grass won’t grow at the same pace as other plants or seeds. While sod comes pre-grown, it still requires time to settle in and start growing. On average, it can take up to 2 to 3 weeks for new sod to take root. However, several factors like climate, soil quality, and maintenance play a role in determining the exact time it will take for sod to grow and become established. How Long for Sod to Take Root? The time it takes for sod to take root depends on several factors, including soil temperature, moisture levels, and the type of grass you’re using. Generally speaking, how long until sod takes root can range from 2 weeks to 4 weeks. During this time, the roots are growing into the soil, forming the base for healthy lawn development. However, in hot weather, this process may be slower unless proper care is taken. How Long Does It Take New Sod to Root? New sod requires careful attention to ensure it roots properly. The initial rooting period can take up to 3 weeks, but if the weather is too hot or the soil isn’t ideal, it might take longer. The key is to provide the best way to water sod and ensure it receives adequate sunlight and nutrients during this period. How to Help Sod Root To help sod root effectively, you need to focus on providing the right conditions. Regular watering, proper soil preparation, and adequate sunlight all contribute to faster root development. In addition to watering, how to get sod to grow more efficiently includes making sure the soil is well-aerated and free from any debris that could hinder root penetration. How to Water New Sod Watering is a critical factor in helping your sod take root. The first step after installation is to water thoroughly, soaking the sod and the soil beneath it. How long to water sod after installation depends on the weather, but it’s typically recommended to water the sod twice a day for the first few weeks. In hot weather, you might need to increase watering frequency to prevent the sod from drying out. How Long Should You Water New Sod? Generally, you should water your new sod for about 15-20 minutes per session for the first few weeks. This ensures the water penetrates deep into the soil and encourages the roots to grow deeper. During the initial stages, ensure that the soil beneath the sod stays moist but not soggy. Watering New Sod in Hot Weather Watering new sod in hot weather requires extra attention. In high temperatures, sod can dry out quickly, so you may need to water more frequently. Consider watering your sod early in the morning or late in the evening to minimize evaporation and ensure the roots have enough moisture to develop. What to Do After Sod is Laid After sod installation, it’s essential to keep sod moist and make sure the grass receives the right nutrients. The sod after 1 week should show signs of root development, and you should start to see the grass growing as it becomes more established. It’s important to avoid walking on the sod during the first few weeks to prevent damaging the fragile roots. Can You Walk on Sod Right Away? It’s advisable not to walk on sod immediately after installation. Can you walk on sod right away? While it’s tempting to admire your new lawn, it’s best to avoid walking on it until the roots have had a chance to establish themselves. Walking on freshly laid sod can disrupt the roots and slow down the rooting process. How Long Does Sod Take to Root in Hot Weather? If the temperatures are high, rooting will take longer. How long does sod take to root in hot weather can extend to 4 weeks or more, depending on how well you manage watering and care. High heat and direct sunlight can stress the sod, making it harder for the roots to establish. During hot weather, ensure you water more frequently, especially in the early morning or late evening. Signs That Sod Has Taken Root As the sod roots into the soil, there are a few signs that sod has taken root. One of the first indicators is when you try to lift a piece of sod and feel resistance, showing the roots are attached to the soil. Additionally, healthy sod will begin to show signs of growth, and the grass will become greener and more vibrant. How to Speed Up Sod Rooting If you’re wondering how to speed up sod rooting, there are several tips that can help. First, ensure you are consistently watering the sod, but avoid over-watering. Additionally, make sure the sod gets adequate sunlight and doesn’t sit in overly shaded areas. You can also use a fertilizer designed for new sod to give it a boost. Factors Affecting Sod Rooting Time Several factors can influence how long for turf to

How Long Does Sod Take to Root? A Comprehensive Guide to Ensuring a Healthy Lawn Read More »

how much does landscaping cost

How Much Does Landscaping Cost? | Average Pricing Guide for Landscaping Services

Last spring, my yard looked like a wild jungle if I’m being honest. Overgrown grass, decrepit bushes, nothing but dirt. So I did the usual: I called over three landscapers to come help me out. The first guy gave me a bid of $2,100. The second was $800. The third was for $4,500. I didn’t know what was fair. That’s when I started really looking into how much does landscaping cost and decided there’s no one answer. Landscaping costs vary widely, and if you don’t know what the numbers represent, you could end up paying too much — or too little and wishing later you’d paid more. Average Landscaping Cost: Why the Numbers Vary So Much The majority of the landscapers I have talked to have said that the typical landscaping cost for a non-custom, average-sized home ranges from the low end of $1,400 to the high end of $3,650. But that range means almost nothing without context. Basic sort of clean or little deck can be $800 to $1,200. Tree removal alone can reach $2,000. A full yard makeover? Oh that’s $5,000 and definitely upwards. Every quote will be influenced by the size of the project, the time and materials that are required, and the complexity of your yard. What’s Really Eating Your Landscaping Budget Here’s the part that most people don’t realize: labor is the largest cost. Typically, landscaping labor costs account for 70 to 80 percent of the total bill, rather than plants and materials. A small crew of two workers can charge $50–$100 per hour and can accumulate: $400–$800 in labor every day $2,000+ in just a few days And that’s why even “simple” projects can add up in no time. Landscaping Cost Breakdown: Labor vs Materials Here’s a landscaping cost breakdown that’s more realistic based on what I learned: Labor: 70–80% Plant and materials: 20–30% Plants can actually be less expensive than you think. It’s the time, the expertise, and the manual labour that makes things expensive. Landscaping Cost Per Square Foot Explained Some landscapers calculate the cost of projects by the landscaping square foot price, which, I found helpful. Typical pricing: $4 to $12 a square foot To give an example: 1,000 sq ft × $8 = $8,000 total This approach is clear and straightforward, so it’s particularly effective for high-budget projects where you don’t want to be left wondering what you are exactly paying for. Other contractors opt for flat-rate pricing, in which they come to your yard and give you an overall figure. This works best for complex or custom jobs. Residential Landscaping Pricing for Small Yards Here is something surprising: per square foot small yards are frequently more expensive. My front yard is about 500 square feet. I got quotes ranging from: $800 for the basics sod and mulch $2,200 for intricate, exact work One contractor said small spaces are no place for error. It all needs to be perfect which leads to further labor. Typical costs for residential landscaping: Small front yard: $500–$2,500 Back yard projects: $800–$3,500 The upside? Smaller yards usually get finished faster. Landscape Design Costs: The Hidden Expense I didn’t see this part coming. Many landscapers charge extra for designing. Landscape design fees vary widely, depending on the community and complexity of the project: $75–$150 per hour $1,900–$6,800 for full plans Sometimes free (with plant markup) Design services can be something as simple as a consultation, or can involve detailed blueprints with specifically mapped plant placement, drainage and materials. I initially thought design was an unnecessary expense-until I found out how much money poor planning wastes. Improper drainage, bad plant selections, and design errors are much more expensive to correct down the road. Robert Complete Care also offers landscape installation services in Whittier including design consultations, which can save thousands up front. What Specific Landscaping Services Actually Cost These are a few real-world numbers I rounded up: Lawn mowing and cleanup: from $150 to $350 for each visit. Lay new sod: $1-$2 per sq ft. Mulch: $75-$200 a yard in volume. Shrubs: $25 to $150 each. Trees: $700 to $1,000 installed. Patios and walkways: $50 and $100 per square foot. Sprinkler systems: $2,500 to $5,000. Ditch irrigation range:300-800 per zone. Now that explains why my quotes were so different — each contractor was quoting me on a completely different job. 8 Real Ways I Saved Money on Landscaping Here’s what actually worked: Finished the job in increments rather than all at once Used native plants that required less water and attention Purchased smaller plants that mature over time Passed on paying for a professional design for a straightforward job Did some of the work myself planting and mulching Recycled materials we already had, like bricks and stone Received multiple quotes to find the outliers Teamed up with your accountant to ensure that certain costs involved with the plants were taken care of when it made sense to buy them yourself. Each time, I was whittled down by hundreds from my final bill. You may read Does Landscaping Increase Home Value? What Factors Change Landscaping Costs the Most If you’re trying to figure out how much does landscaping cost, these are the things that matter most: Yard size Existing conditions (grading, drainage) Materials selected Difficulty of the project Location (California is more expensive than rural areas) Time of Year (Spring/Summer is more expensive than Fall/Winter) Even the timing of your project could save you money — contractors tend to be more negotiable in the off-season. Why Quality Installation Is Worth Paying For Poor landscaping can be a false economy and end up costing you more. Good contractors: Understand drainage Select the right plants Construct buildings properly Stand behind their work Robert Complete Care is all about the right installation in Whittier, That means your landscapes last years — not months. Additional Costs No One Tells You About Extra Costs Nobody Warns You About Watch out for: Permits: $20–$700 soil tests: $15–$100 Site cleanup: $1,150–$3,680 Debris hauling Water features: $2,000–$30,000 They add up if you’re not planning ahead. Ongoing Maintenance Costs Most homeowners spend the following after installation:  From $200 to $300 a month to maintain it Or acquire money to purchase time by doing it yourself. Landscaping is a recurring expense, not a one-and-done. Final Thoughts: So, How Much Does Landscaping Cost? Landscaping costs between $1,400 and $3,650 for most homeowners, but it varies by yard size, materials, design, and location. Start with a clear budget, know what you want, and get multiple quotes — because

How Much Does Landscaping Cost? | Average Pricing Guide for Landscaping Services Read More »

how much to water new turf

How Much to Water New Turf | 2025 Guide

If you’ve recently installed new turf in Whittier, California, one of the most important questions you’re probably asking how much to water new turf. Proper watering is the key to healthy turf establishment and long-term lawn success, especially in Southern California’s warm and dry climate. Why Proper Watering Matters for New Turf   Water is essential to help new sod develop strong roots and thrive in your yard. Underwatering can cause brown patches, while overwatering can lead to fungal growth or turf that never properly roots. Finding the right balance is critical. How Much Water Does New Turf Need? In general, new turf needs about 1 to 1.5 inches of water per day for the first week after installation. This typically means watering 2 to 3 times per day, ensuring the soil stays moist but not soggy. Watering Schedule for New Turf: Week 1: Water 2-3 times per day (morning, midday, early evening) Week 2: Reduce to 1-2 times per day as roots begin to establish Week 3-4: Water deeply 1 time per day or every other day After 4 weeks: Transition to a regular lawn watering schedule (2-3 times per week) Whittier Turf Watering Guide In Whittier, where summers are hot and dry, it’s especially important to water in the early morning or late afternoon to reduce evaporation. Pay attention to any Whittier water restrictions that may limit watering days or times. Local Tips: New Turf in Whittier CA Choose drought-resistant grass varieties – These grasses require less water and perform better in Whittier’s dry climate. Use a smart irrigation controller – It automates watering and adjusts based on weather conditions to avoid overuse. Check the City of Whittier’s water department website – Stay informed about local watering guidelines and drought regulations. Signs You’re Watering Correctly Soil is moist but not puddled – This indicates water is reaching the root zone without causing saturation. Turf is green and springy – Healthy turf will bounce back when you walk on it. Footprints disappear quickly – A well-watered lawn recovers its shape quickly after being stepped on. Signs of Overwatering New Turf Squishy or soggy soil – Too much water prevents proper root development. Yellowing or wilting turf – Can be a sign of water stress caused by overwatering. Algae or mold growth – Indicates excess moisture and poor drainage. Signs of Underwatering New Turf Dry, brittle blades of grass – A clear indicator that your turf isn’t getting enough water. Brown or grayish patches – These areas signal dehydration and turf stress. Turf edges lifting up from the soil – Shows that roots aren’t anchoring properly due to insufficient moisture. Conclusion Knowing how much to water new turf in Whittier can make or break your lawn’s success. Stick to a proper watering schedule, adjust for Southern California’s climate, and watch for signs of over or underwatering. With the right care, your new lawn will thrive in no time. Looking for professional turf installation or lawn care services in Whittier? Contact our local landscaping expert who understands the unique needs of turf in this area. FAQs About Turf Watering in Whittier How long should I water new turf in hot weather? In hot weather, water more frequently and deeply to prevent the turf from drying out. Each session should last 10–15 minutes, depending on your sprinkler system. Can I overwater new turf? Yes. Overwatering prevents roots from growing deep and can lead to fungus or rot. What time of day is best to water new sod in Whittier? Early morning is best before 9 a.m. to reduce evaporation and fungal risks. How often should I water new turf in Whittier, California? In the first week after installation, water your new turf 2-3 times a day to ensure the soil remains moist but not soggy. After that, gradually reduce watering to once per day or every other day as the grass establishes its roots.

How Much to Water New Turf | 2025 Guide Read More »