Low Cost Fire Pit Landscape Design: Transform Your Backyard Without Breaking the Bank
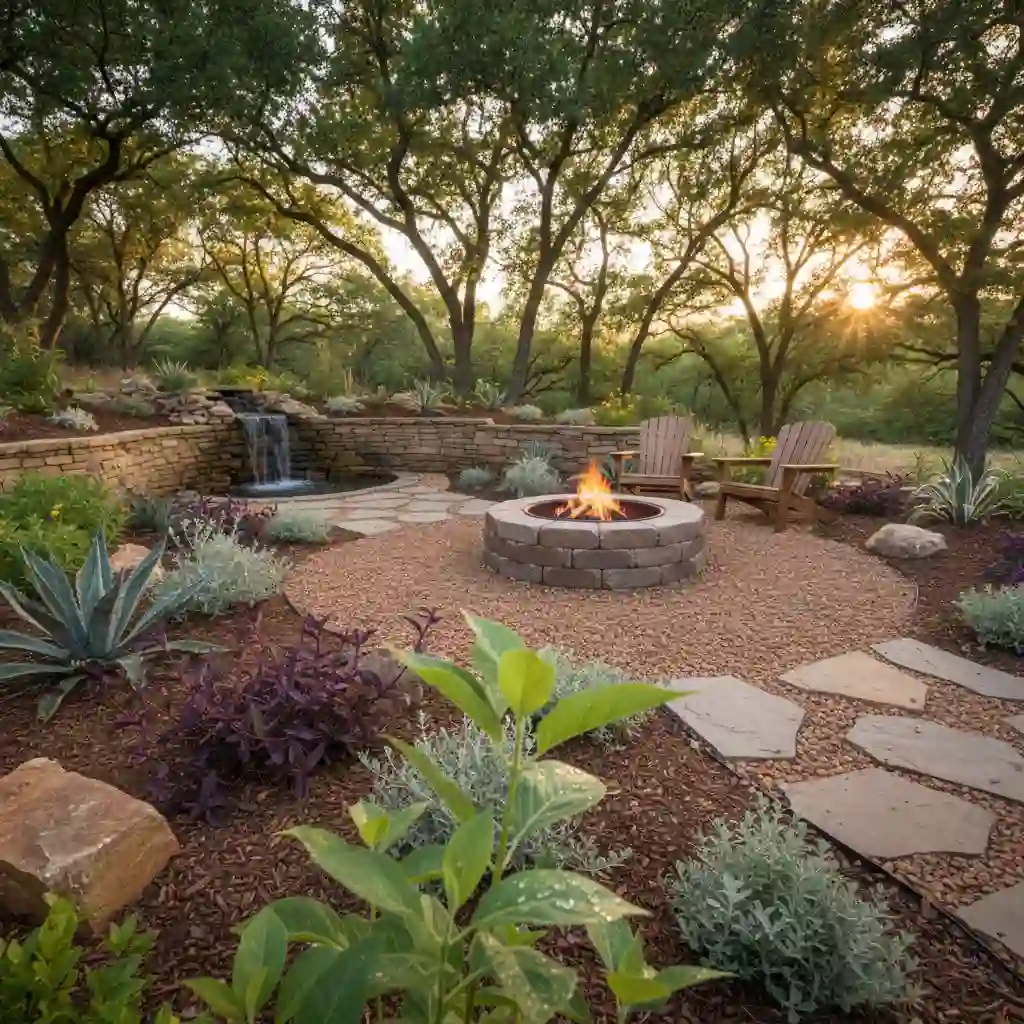
We can all agree on one thing: practically every homeowner wants a pleasant backyard with a fire pit where they can relax, have friends around, and enjoy chilly evenings without leaving home. The problem is that a lot of people don’t go through with it because they think fire pit landscaping is too expensive, too hard, or too full of permission problems. It’s really frustrating, especially when you’re already trying to decide between outdoor enhancements and comparing them like you would enamel and latex paint, trying to get the greatest finish without spending too much. The good news is that you can have a low-cost fire pit landscape design, and it’s one of the best ways to improve your outdoor space. This guide will show you step by step how to make a fire pit area that is safe, beautiful, and cheap. You’ll find out about true costs, material options, DIY processes, and layout ideas that will help you make a fire pit arrangement that appears expensive but doesn’t cost much. What Is Low Cost Fire Pit Landscape Design? A low cost fire pit landscape design is simply a planned outdoor setup that centers around a fire pit while keeping both construction and material costs as low as possible without sacrificing safety, function, or curb appeal. It’s not about cutting corners. It’s about being smart with your choices. This means selecting affordable hardscaping materials like gravel, concrete pavers, or recycled brick. It means using a fire pit design that works with your existing yard layout rather than fighting against it. And it means knowing which parts of the project you can DIY and which ones actually save you money in the long run when done by a professional. Hardscaping vs. Landscaping: When you plan a fire pit area, you’ll hear both of these words used. Hardscaping is the part of the yard that isn’t alive, including gravel walks, patio pavers, stone edging, and the fire pit structure itself. Plants, grass, shrubs, and trees are all part of landscaping. Hardscaping is your best friend if you want to build a fire pit on a budget. Many hardscaping jobs are great for DIY, and the cost is usually only once and lasts for years. Knowing the difference between these two things can help you decide how to spend your money. First, use your cash to choose hardscaping materials that will last. Then, add low-maintenance plants around the edges to finalise the effect. Why Learn How to Design an Outdoor Fire Pit for Your Backyard? A well-designed backyard with a fire pit does more than just look nice. It extends your outdoor living space into a true second living room, a place where family gathers, where guests linger, and where the evening doesn’t have to end when the sun goes down. From a real estate standpoint, outdoor fire pits consistently rank among the most desired backyard features for homebuyers. Realtors frequently note that a well-landscaped yard with a fire feature can increase perceived home value and reduce time on the market. More practically, a thoughtfully designed fire pit area gives you a return on investment every single weekend you use it. And from a purely personal standpoint? There’s something deeply satisfying about creating a space with your own hands that your whole family actually uses. How Much Does a Budget Fire Pit Really Cost? One of the most common questions is: “How much does a fire pit cost?” In 2026, the national average for a professionally installed fire pit is around $850, but a savvy DIYer can get the job done for much less. Depending on your choice of materials and the size of the area, you can expect to spend between $200 and $500 for a solid, safe, and beautiful setup. Feature Estimated DIY Cost (2026) Pro Installation Cost Basic Metal Fire Pit $50 – $150 N/A (Portable) Gravel Base (100 sq ft) $100 – $200 $300 – $600 Stone/Paver Surround $150 – $300 $500 – $1,200 Seating (Thrifted/DIY) $0 – $150 $500+ Total $300 – $800 **$1,300 – $2,300+** Is a DIY fire pit worth it? Absolutely. Most of the cost in professional landscaping goes toward labor and site prep. If you are willing to spend a weekend le veling the ground and hauling some gravel, you can save over $1,000. For residents looking for expert guidance, our Landscape Design Whittier CA Service can help you plan the perfect layout that fits your budget perfectly. Choosing the Right Materials for Your Fire Pit Material selection is the single biggest factor controlling your project cost. Here’s how to make smart choices. Cheapest Materials for Fire Pit Landscaping Gravel Fire Pit Base: A gravel fire pit base is the most affordable and practical foundation you can choose. Pea gravel or crushed stone costs roughly $3–$5 per square foot and provides excellent drainage, heat resistance, and a clean, finished look. Spread it 2–4 inches deep across your fire pit area and you’re done. Concrete Retaining Wall Blocks: You can find these at any home improvement store, and they cost between $1 and $3 each. Put them in a circle to make a fire pit ring that works properly and looks surprisingly good. You don’t need any mortar for a basic construction because the bricks fit together naturally. Recycled Brick: Check local salvage yards, Facebook Marketplace, or Craigslist for free or cheap used bricks. Recycled brick has a warm, rustic look that actually looks better than many expensive alternatives. Concrete Pavers for the Seating Area: A simple circle of concrete pavers around your fire pit creates a defined patio area. Budget pavers run $1–$2 each and can be laid directly on compacted gravel with no concrete foundation required. Pressure-Treated Landscape Timbers: For edging or raised platform seating, landscape timbers are inexpensive and easy to work with. Cut them to length, secure with rebar, and you have clean, defined borders for your fire pit zone. DIY Fire Pit Landscaping: Step-by-Step Ready to get your hands
Low Cost Fire Pit Landscape Design: Transform Your Backyard Without Breaking the Bank Read More »