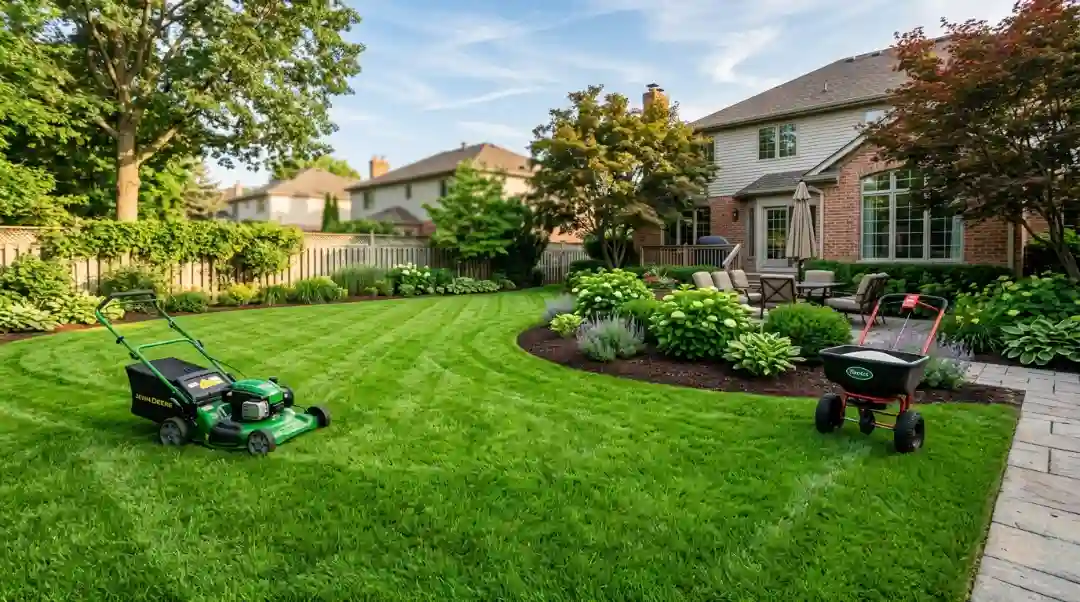
Watering your lawn by hand every day gets old fast, especially in summer. If you’re tired of dragging hoses around or watching your grass go brown during a dry spell, you’re already halfway to deciding you need a smarter solution. Learning how to install a lawn irrigation system isn’t as complicated as it sounds, and the payoff, a healthy lawn that basically waters itself, is absolutely worth the weekend effort.
Here’s the quick answer: you plan your layout, dig trenches, lay PVC pipe, install valves and sprinkler heads, wire everything to a controller, and set your schedule. This guide walks through every step clearly, including gaps most tutorials skip, like water pressure calculation, winterization, and troubleshooting.
Table of Contents
ToggleWhat Is a Lawn Irrigation System?
A lawn irrigation system is a network of underground pipes, valves and automatic pop-up sprinkler heads that deliver water to a landscape. It is hard wired into your primary water line or a secondary utility meter. The brain of the system is the central electronic controller that instructs particular valves to open and close according to a programmed schedule.
Unlike manual sprinklers, an underground system offers targeted hydration through pressurized lines, meaning no waste of resources. It divides your yard into different areas called zones to keep the pressure correct for operation. Modern systems employ smart Wi-Fi controllers that automatically adjust watering times based on local weather forecasts.
Is DIY Irrigation Installation Right for Your Yard?
DIY irrigation installation is right for your yard if you have a property under a half-acre, flat terrain, and a basic comfort level with physical tools. Large properties with complex slope changes or heavy stone retaining walls require heavy commercial machinery and specialized engineering. If you are willing to handle intense physical labor like trenching and pipe assembly, a self-installed project is highly practical.
Consider your personal schedule and physical limits before buying materials. Digging hundreds of feet of trenches by hand or operating a heavy walk-behind trencher strains your back and shoulders. However, managing the project yourself gives you total familiarity with your property’s plumbing, making future troubleshooting and repairs simple.
Why Install a Sprinkler System?
A sprinkler system will keep your deep soil moist all over, keep from overwatering, add to the value of your home and get rid of the daily manual labor. An automated system delivers the exact amount of water your root zones need to thrive.
Modern systems also use less water, so you may notice a decrease in your monthly utility bills. Water loss from evaporation and wind drift will be minimized by scheduling irrigation for the early morning hours. It also protects your costly investments in sod, ornamental trees and fragile flower beds in the middle of the brutal summer heat waves.
Calculate Water Pressure and Flow Rate
You measure the water pressure by connecting a pressure gauge to an outdoor spigot, and you measure the flow rate by timing how quickly a bucket fills. These two metrics determine the maximum number of sprinkler heads that can be on a single valve at the same time. Too many nozzles in a zone and the operating pressure drops and the heads will not pop up or spray properly.
Be sure that all indoor faucets, washing machines, and showers are turned all the way off so that you can measure your static water pressure. Screw a standard $PSI$ (pounds per square inch) gauge onto the outdoor faucet nearest your water meter. Open the valve all the way. The normal range of pressure for a residential home should be between $40\text{ and }65\text{ PSI}$.
Now do the bucket test to find out the $GPM$ (gallons per minute) capacity of your system. Place a clean 5-gallon bucket under the open spigot and time the exact number of seconds it takes to fill to the brim using a stopwatch. Use this math equation to figure out your ability:
How to Install a Lawn Irrigation System: Step-by-Step
1. Plan Your Layout and Zones
Never guess where to place your sprinkler heads. Draw a map of your property to scale on graph paper, marking the location of the house, driveway, sidewalks, and major trees. Divide the yard into square or triangular grids to ensure total head-to-head coverage.
Head-to-head coverage means the spray from one sprinkler head must physically reach the base of the neighboring head. This overlapping design prevents dry patches caused by wind distortion or natural spray drop-off. Group your heads into separate zones based on your calculated $GPM$ limit and the sun exposure of each area.
2. File for Permits and Call 811
Before your shovel touches the dirt, you must contact your local building department regarding building codes and required plumbing permits. Most municipalities require a certified backflow preventer to stop non-potable lawn water from siphoning back into your clean domestic drinking supply.
You must dial 811 at least a few days before digging to have your local utility lines marked for free. Utility technicians will spray paint or place small flags over buried gas, electric, and fiber optic lines. Striking an underground power cable or gas main is incredibly dangerous and carries massive financial liabilities.
3. Dig the Trenches
Mark your planned pipe paths across the lawn using white landscape spray paint or string lines. Rent a walk-behind power trencher from a local tool supply yard for approximately $100 to $200 a day to save your back. These machines are heavy and vibrate intensely, so pull the unit backward slowly along your painted lines.
[Image Idea: Real photo of a homeowner operating a rented mechanical walk-behind trencher, showing the machine carving a clean 8-inch deep trench in a front yard while leaving the churned dirt neatly piled on one side.]
Dig your main line trenches to a depth of 8 to 12 inches to protect the pipe from lawn aerators and heavy traffic. Run your secondary zone lines at a minimum depth of 6 inches. When working near utility flags or tree roots, put away the power machinery and dig carefully by hand with a trenching shovel.
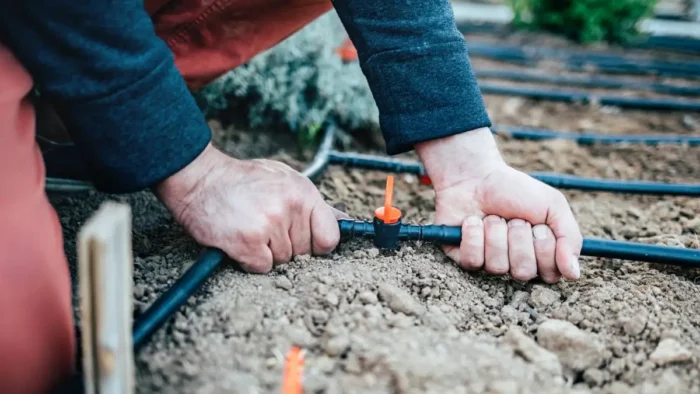
4. Assemble the Valve Manifold
The valve manifold acts as the central distribution hub for your water supply. Dig out a large hole near your main water connection point that is slightly larger than your protective rectangular plastic valve box. Assemble the manifold using 1-inch threaded PVC fittings, securing the connections with Teflon tape wrapped clockwise around the threads.
Install your automated solenoid valves onto the manifold, ensuring the small arrow stamped on the plastic body faces the direction of the water flow. Place the plastic valve box over the completed assembly, lining the bottom with two inches of crushed gravel. This gravel bed keeps dirt from burying the valves and allows water to drain away from the electrical parts.
5. Lay and Connect the Pipes
Lay out your rigid 1-inch PVC pipe along the main trench and $3/4\text{-inch}$ PVC pipe along the secondary zone branches. Use a ratcheting pipe cutter to make perfectly square, burr-free cuts through the plastic lines. Wipe the outside of the pipe end and the inside of your PVC coupling with a clean rag to remove loose dirt.
Apply a generous layer of purple PVC primer to both mating surfaces to soften the plastic, followed immediately by blue PVC cement. Push the pipe firmly into the fitting, give it a quick quarter-turn twist to spread the glue evenly, and hold it tight for 30 seconds. Work steadily along the trench lines, keeping dirt out of the open pipe ends as you build the grid.
6. Install Sprinkler Heads
At each marked landscape flag, splice a threaded tee fitting into your lateral PVC zone line. Screw a flexible 1/2-inch swing pipe elbow into the tee, then run a short 1-to-3-foot section of flexible swing pipe to your pop-up head. This flexible “funny pipe” cushions the sprinkler head, preventing it from cracking if a heavy lawnmower drives over it.
[Diagram Idea: Technical cross-section illustration showing a buried 3/4-inch PVC line with a threaded tee, a flexible swing pipe curving up, and a pop-up sprinkler head sitting perfectly flush with the top of the soil line.]
Position the top of each pop-up sprinkler head so it sits perfectly level with your lawn’s final soil line. If you bury the head too deep, grass clippings will clog the nozzle; if it sits too high, your lawnmower blade will tear it off. Keep the internal flushing caps on the heads instead of the final spray nozzles for the next phase.
7. Wire the Smart Controller
Mount your automated controller box on an interior garage wall near an accessible electrical outlet. Run multi-conductor underground sprinkler wire from the controller through the garage wall and down into your main valve box trench. Strip away two inches of the outer plastic jacket to expose the individual color-coded strands inside the cable.
Connect the white strand to the “Common” terminal slot inside your controller, then attach it to one of the two wires on every single valve solenoid. Take the remaining colored wires and wire each one to its own individual zone terminal slot in the controller. Connect these colored wires to the second wire on their matching valve solenoids using waterproof, grease-filled wire nuts.
8. Flush the System and Test
Before screwing on your final spray nozzles, you must clear the system of any dirt, PVC shavings, or gravel that entered the lines during assembly. Turn on your main water shut-off valve slowly to pressurize the manifold and check for immediate leaks around your plumbing joints.
Manually open the first zone valve to flush a stream of water out of the open tops of the sprinkler heads. Once the water runs crystal clear, shut off the valve and twist your final spray nozzles into the pop-up bodies. Turn the zone back on to adjust the spray patterns, rotation arcs, and radius screws to prevent water from blasting your house walls or driveways.
How to Winterize Your Irrigation System
To winterize your irrigation system, turn off the main water valve and use a commercial air compressor to blow all the water out of the underground lines. If you live in an area where winter temperatures fall below freezing, water left in the plastic pipes will expand into ice. This ice growth will crack the PVC walls and shatter your expensive brass valves.
Attach an air compressor that can deliver $20\text{ to }50\text{ CFM}$ (cubic feet per minute) of air volume to the blowout port just beyond your backflow preventer. Set the compressor pressure regulator for plastic PVC piping systems to never exceed $80\text{ PSI}$. Blow air through each watering zone individually until the sprinkler heads start to mist, keeping each cycle to less than two minutes to avoid friction heat that can melt the plastic parts.
Troubleshooting Common Problems
Low water pressure across an entire watering zone is typically caused by a hidden underground pipe leak, a partially closed main valve, or too many heads running simultaneously. Look for unusually soggy patches of lawn or bubbling mud holes along your trench lines while the system runs. If the soil is dry, check the filter screens located inside the base of each individual pop-up nozzle for organic debris clogs.
If a specific watering zone refuses to turn on from your controller, the issue is usually an electrical failure rather than a plumbing break. Use a digital multimeter to check the resistance ($ohms$) across the terminal screw slots for that zone. A reading of infinity or zero indicates a broken copper strand along your underground wire line or a burned-out solenoid coil that requires replacement.
Final Thoughts
The process of installing lawn irrigation systems can be complex, but with proper planning, you can successfully handle it yourself. When you understand zones, sprinkler heads, and water flow, your installation becomes smoother and more effective. A well-set system ensures your lawn stays greener and more lush throughout the year. For homeowners looking for expert support, professional Irrigation System Services in Whittier, CA can make the process even easier. If you want guaranteed precision, reliability, and long-lasting results, contact Robert Complete Care today for expert assistance!
FAQs
1. Do I need a permit to install a lawn irrigation system?
Permit requirements vary by city or county. Many municipalities require permits for backflow prevention devices or for tapping into the main water line. Always check local regulations before installing.
2. What tools and materials are needed for installation?
Common essentials include PVC or polyethylene pipes, sprinkler heads, valves, connectors, trenching tools, Teflon tape, a timer/controller, backflow preventer, and basic plumbing tools.
3. How do I know how many sprinkler heads I can use?
Your available water pressure and flow rate determine how many heads you can run per zone. Conduct a flow test (using a pressure gauge and bucket test) and use the sprinkler manufacturer’s charts to design your zones properly.
4. What is a backflow preventer, and do I need one?
A backflow preventer stops contaminated water from entering your home’s potable water supply. Most building codes require one for irrigation systems.
5. How deep should I bury the irrigation pipes?
Typically 6–12 inches deep, depending on your climate, soil type, and pipe material. Deeper burial helps protect pipes from damage and freezing.