Knowing how to install artificial turf is the secret to having a green, beautiful yard without the upkeep of real grass. Artificial turf has grown in popularity for both residential and commercial applications as a solution to drastically reduce water consumption, stop mowing, and maintain a clean, uniform landscape all year long.
This all-new guide to the artificial turf installation process will help you understand what it takes to make your turf look real, drain well, and perform for years. Whether you are hiring a professional or doing a DIY artificial turf installation yourself, these tips will help you install your turf easily and effectively.
How To Install Artificial Turf In A Small Yard
Putting down turf in a small area is more about planning than strength. You have less space to cover, but every cut and seam is easier to see. The first thing you should do is clear the space. You need to dig up at least 3 inches of dirt, even in a small yard.
This depth makes it possible to have a strong base of crushed stone. Your turf may soon sag or get “potholes” if you don’t have it. A weed barrier is needed as soon as the dirt is out. It keeps wayward sprigs from getting through your new green carpet. If you don’t have a lot of space, roll out the turf and let it rest in the sun for two hours. This “relaxes” the backing, which makes it much easier to cut around fences and edges.
Planning and Site Evaluation
Measuring the Area Accurately
Planning is essential prior to installation. Measure the area where you will be laying artificial grass to the length and width, considering of curves, slopes, walkways, trees and any other obstacles. Precise measurements also allow you to calculate the quantity of turf, edging and base material that you need, which minimizes waste and unexpected costs.
Doing the site evaluation properly also assists in identifying any drainage problems. These issues can be dealt with prior to installation, preventing problems like water pooling or uneven settling down the road.
Artificial Turf Base Preparation
Removing Existing Grass and Soil
Among the most critical steps in the whole installation process is proper artificial turf base preparation. All grass and all the roots of the weeds or whatever you have, need to be removed. Leave organic material beneath the turf and you can have sinking, uneven surfaces and weeds growing through them over time.
Typically, the earth is dug out to a depth that provides room for the base materials, plus the thickness of the turf. This digging out provides a firm base and makes the artificial lawn sit flush with neighboring surfaces.
Installing and Compacting the Base Layer
After digging, a crushed stone or decomposed granite base has been laid out and evenly leveled over the space. That material is also compacted so that the end result is a firm, flat surface. A well-compacted base is critical to the success of the artificial turf installation process, stability and drainage can’t be stressed enough.
Pro installers usually use a plate compactor to get a compact and even base. For the at home job work, you should definitely rent the right compaction equipment, and if do not want to deal with IRS on you in the future.
You may read How Much Does Artificial Turf Cost ?
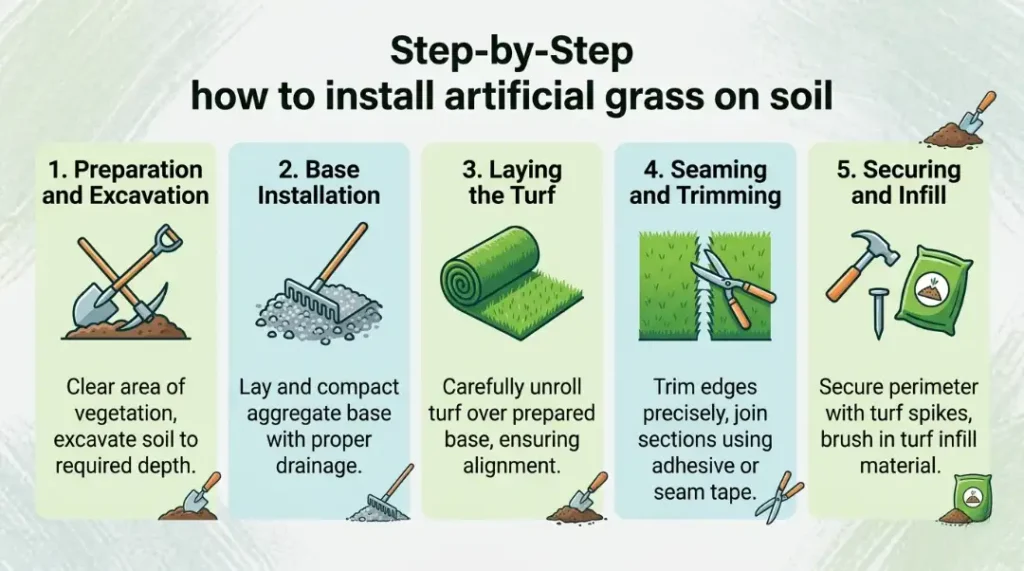
Step-by-Step how to install artificial grass on soil
Following a specific order is the only way to get a professional result. Here is how I handle every project to ensure it looks natural and stays put.
1. Preparation and Excavation
Remove the existing sod and soil. Aim for a depth of 3 to 4 inches. I always check for underground utilities or irrigation lines first. You don’t want to accidentally slice a sprinkler pipe while digging.
2. Base Installation
Spread your crushed stone evenly. Use a rake to create a slight slope away from your home. This prevents water from pooling against your foundation. Wet the stone slightly, then run the plate compactor over it until it’s rock hard.
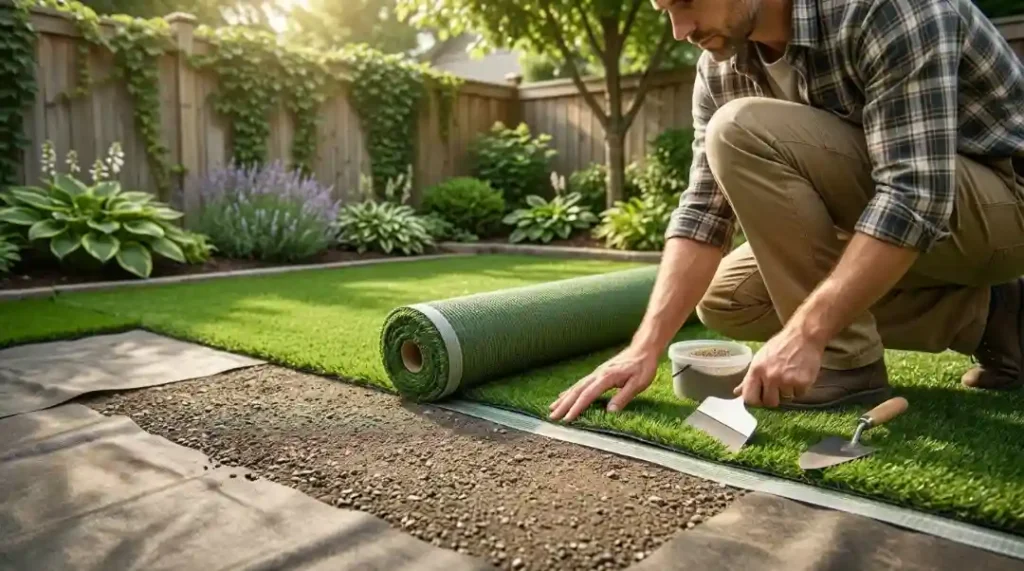
3. Laying the Turf
Unroll your grass. One of the most important things I can tell you is to look at the “grain” or pile direction. All of the blades should point toward the main viewing area, which is like your back porch. This helps the grass look fuller and cuts down on glare.
4. Seaming and Trimming
If you’re putting artificial grass in a wide area, you’ll have seams. Line the pieces up so they touch but don’t overlap. Use your utility knife to trim the edges from the backside. Apply glue to the seam tape and join the sections. Press firmly to ensure a bond.
5. Securing and Infill
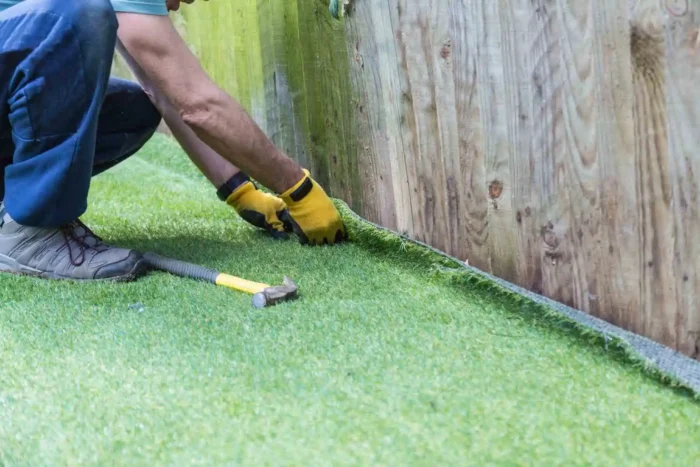
Every 6 inches along the outside, drive your 6-inch nails. Once it’s safe, spread your infill. I use a drop spreader to make sure the layer is even. This sand keeps the turf from wrinkling when the temperature changes by weighing it down.
Installing the Artificial Turf
Positioning and Aligning the Turf
After the base is installed, the synthetic grass is laid on top. Be sure all turf pieces are oriented the same way so the blades look uniform and natural. Bad seaming can cause noticeable color banding across the lawn.
The grass is cut exactly to the edges, curves and corners. Accuracy at this stage also contributes to a seamless look and eliminates gaps between borders and hardscapes.
Joining Seams and Securing the Turf
When more than one piece of turf is needed, seams are joined with special tape and adhesive. The right seam placement and bonding hides the joints in seams and ensure they will remain solid, hidden and reliable for many years.
The grass is secured along the perimeter and also along seams with landscaping nails or staples. This step ensures that the turf will not move, not even under heavy foot traffic, pets, or garden furniture.
Artificial Turf Infill Installation and Finishing Touches
Applying Infill Material
Artificial turf infill installation is a pivotal final step that improves the appearance and functionality of the lawn. Infill products, like silica sand or rubber granules, are dusted evenly onto the turf. The infill raises the turf blades, aids drainage and adds weight to the carpet to help keep it still.
Without adequate infill, artificial turf can compress and become less comfortable to walk on. The right amount of infill applied will give a more natural look and longer life to the turf.
Brushing and Final Inspection
Once the infill has been added, a power broom or stiff-bristle broom is used to brush the turf. This action raises the blades and mixes the infill thoroughly into the turf’s fibers, leaving the lawn looking shiny and natural.
A final inspection is made to verify that seams are tight, edges are correctly fastened, and the drainage is working as expected. This is critical, particularly when laying turf over ground where natural grass used to grow.
DIY Artificial Turf Installation vs. Professional Installation
Many people who own a home think DIY artificial turf installation will be a big money saver. While it’s possible for a DIY project to turn out well, they often go awry without proper planning, tools, and know how. Errors such as under compacted base, insufficient drainage or exposed seams can be very expensive to rectify later on.
Experienced installers possess knowledge and equipment specific to the industry, which helps them avoid common pitfalls. A turf lawn that is professionally installed normally has a longer lifespan, looks more natural, and holds up better under heavy wear.
Benefits of Proper Artificial Turf Installation
If installed properly, artificial grass has many benefits. It is low maintenance, cuts down on water usage, and stays green all year long. Proper installation will allow the turf to drain well, to hold up to wear and to keep its look over time.
Knowing how to install artificial turf the right way will also help homeowners make better decisions about the process and prevent them from taking shortcuts that could reduce the performance and longevity of their turf.
Final Thoughts
Homeowners can better understand the importance of careful planning, proper ground preparation, and precise finishing touches by learning how to install artificial turf. Every step—from synthetic grass installation to placing artificial grass and completing the infill is essential for a durable, natural-looking lawn. Whether starting from bare soil or installing turf over an existing lawn, professional installation ensures long-lasting results. For trusted Whittier lawn installation services, Robert’s Complete Care delivers expert craftsmanship tailored to local landscapes. Our team ensures flawless installation, superior drainage, and a polished finish. Contact Robert’s Complete Care today to schedule your Whittier artificial turf installation and transform your lawn with confidence.
FAQs
How do you prepare ground for artificial turf?
Take out the grass to a depth of 3–4 inches, grade the soil to help it drain, compact the native soil, put down a weed barrier, and then add 3–4 inches of compacted crushed aggregate base. The finished installation will be level and will survive a long time if the ground is prepared correctly.
What do you put under artificial turf before laying?
You put the weed barrier fabric right on top of the compacted native soil, and then you put a 3–4 inch layer of crushed aggregate base (road base or decomposed granite) on top of that. This base layer helps with drainage and stability, and gives the turf a smooth place to sit.
Can I install artificial turf myself?
Yes, this is a realistic DIY project for most homeowners. The main requirements are physical effort, the right tools, and attention to base preparation. Most installs in small to medium yards can be completed in a single weekend.
Why are people getting rid of artificial grass?
Some homeowners remove artificial turf due to heat retention (it gets significantly hotter than natural grass in direct sun), concerns about microplastic infill, or changes in drainage patterns. Others find the upfront cost too high. These are legitimate tradeoffs worth considering before installing.
What is the downside of artificial turf?
The main downsides are surface heat in summer, higher upfront cost compared to seeding natural grass, and the fact that it eventually needs replacing (usually after 15–20 years). It also doesn’t support the same level of soil biology or biodiversity as a natural lawn.