It’s okay to skip winterizing your sprinkler until spring comes and you see broken pipes and a repair bill that is anywhere from $300 to $1,500. If you live in an area where the temperature drops below freezing, one of the best things you can do for your property is to learn how to winterize irrigation system before the bad weather strikes. It only takes a few hours, saves you a lot of money, and your future self will thank you.
This article tells you all you need to know, when to do it, which approach works best for your system, and the mistakes that most homeowners make. You can find a clear, useful answer here, whether this is your first time or you want to make sure you’re doing it right.
What Does It Mean to Winterize an Irrigation System?
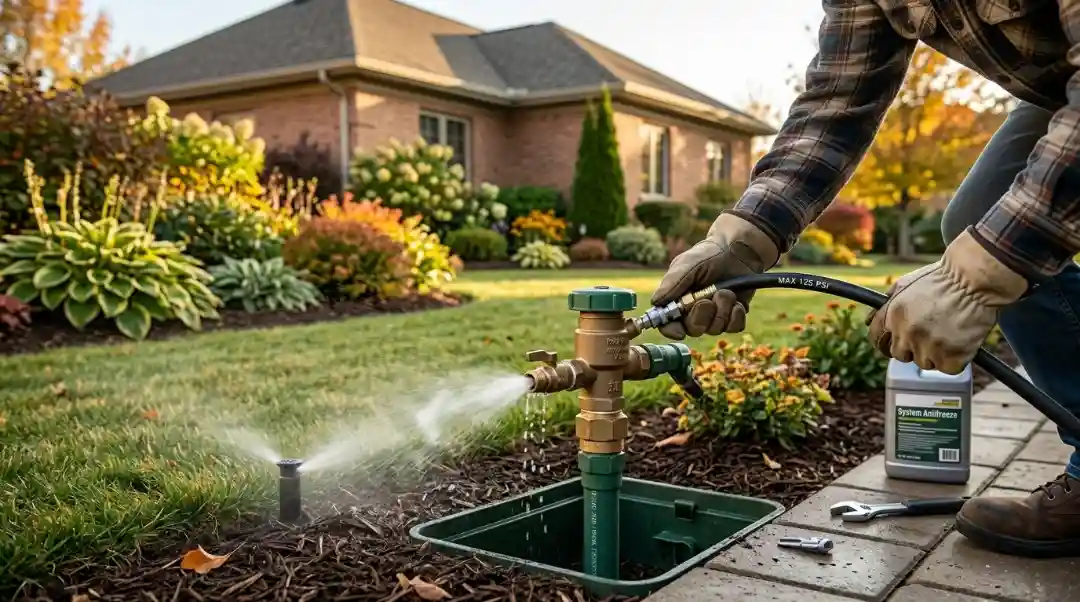
Winterizing an irrigation system means removing all water from pipes, valves, sprinkler heads, and backflow preventers before freezing temperatures arrive. The goal is simple: no water left inside means nothing to freeze, expand, and crack. It protects every component from frost damage.
Water expands by about 9% when it freezes. That doesn’t sound like much, but inside a rigid PVC pipe, that pressure is enough to split it wide open. Even a flexible polyethylene pipe, which handles cold better, will rupture if water sits inside it long enough.
When Should You Winterize Your Irrigation System?
You should winterize your irrigation system before the first hard freeze in your region, typically when nighttime temperatures are consistently near 32°F (0°C). Waiting too long is the most common and costly mistake homeowners make.
Here’s a general timing guide by region:
- Northern states (Minnesota, Wisconsin, Colorado): Late September to mid-October
- Mid-Atlantic and Midwest: October through early November
- Southern states (Texas, Georgia, Tennessee): Late November to early December
- High-altitude areas: Even earlier than northern states due to rapid temperature drops
Don’t wait for a freeze warning on the news. By then, every irrigation company in your area is booked solid for weeks.
What You’ll Need Before You Start
Before touching anything, gather your supplies. This step is something most guides skip entirely.
Tools and materials:
- Air compressor (for blowout method: 20–50 CFM for residential systems)
- Foam insulation tape or foam insulating tubes
- Insulated covers for backflow preventers
- Flathead screwdriver
- Irrigation controller manual
Know your pipe type before you start. PVC pipe (rigid, white) has a strict pressure limit. Polyethylene pipe (flexible, black) is more forgiving but still needs full drainage.
3 Main Methods to Winterize a Sprinkler System
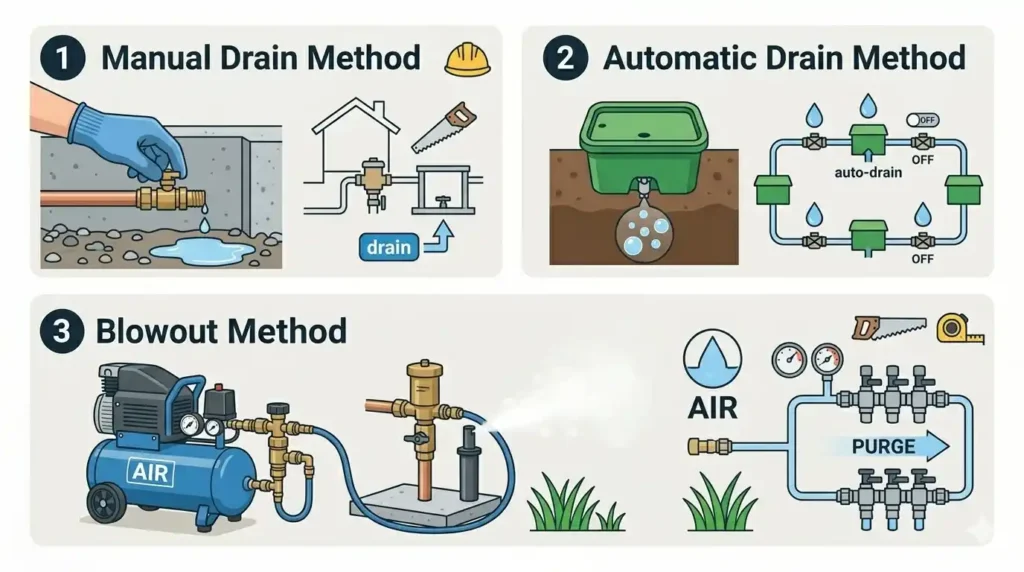
Manual Drain Method
This strategy works if your system has manual drain valves at the lowest positions. You turn off the main water supply, open all of the manual drain valves, and then run a full controller cycle with the water off. That cycle lets off pressure and opens automated valves, which push the rest of the water toward the drain points.
It’s cheap and doesn’t need any special tools. The bad part is that water can collect in low locations you didn’t think about, and you might miss a whole area.
Automatic Drain Method
Some systems have automatic drain valves that open when pressure drops below a set level. Once you cut the water supply, these valves do most of the draining on their own.
The catch is they only handle the lateral lines and sprinkler heads, not the main supply line. You still need to drain that manually. Also, check valves can trap water, so inspect those too.
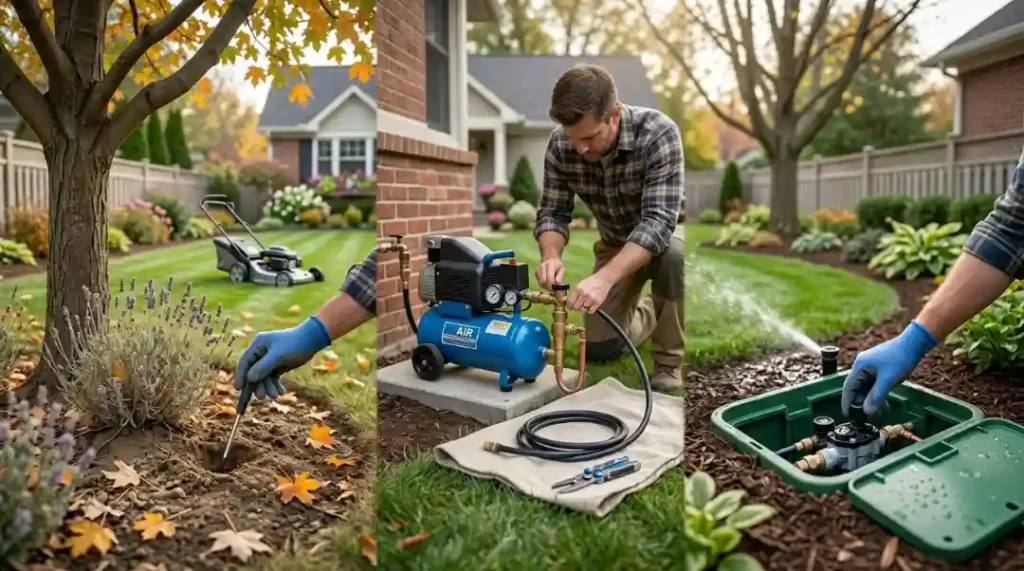
Blowout Method (Most Thorough)
This uses a large air compressor to force compressed air through each zone, pushing every drop of water out through the sprinkler heads. It works in any climate and on any system type.
You need the right compressor specs: 30 to 50 CFM for poly pipe systems, 50 to 100 CFM for larger PVC systems. Pressure should stay under 50 PSI for polyethylene and under 80 PSI for PVC. Too much pressure and you’ll damage the very pipes you’re trying to protect.
Step-by-Step Guide to a Sprinkler Blowout
If you’re doing this yourself, follow each step carefully. There’s real risk involved if you rush it.
Step 1: Shut off the main water supply to the irrigation system. Not the hose bib, the actual main shut-off valve, usually found in your basement or utility room.
Step 2: Turn off the irrigation controller or switch it to rain mode.
Step 3: Connect the air compressor to the blowout port on your system using the correct adapter.
Step 4: Start with the zone farthest from the compressor or at the highest elevation.
Step 5: Slowly open the compressor valve. Watch the sprinkler heads. You’ll see a heavy spray of water first, then it’ll thin out to a light mist. That light mist means the zone is clear.
Step 6: Move through each zone one at a time. Run each zone twice to be thorough.
Step 7: In the final zone, leave one sprinkler head open as you shut the compressor down. This releases residual air pressure safely.
Step 8: Disconnect the compressor and close all valves.
How to Winterize a Drip Irrigation System
Most guides stop at sprinkler systems, but drip irrigation needs attention too.
To winterize a drip irrigation system, flush the lines, shut off the water supply, and drain all emitters and tubing. Because drip systems run at low pressure, they often don’t need a full blowout, but leaving water in the lines in a freeze zone will still damage them.
Here’s what to do:
- Flush the lines by running the system one final time
- Remove and store any above-ground emitters and tubing if possible
- Open the end caps on drip lines to let remaining water drain out
- Insulate any above-ground connectors or filter housings
- If lines are buried, gravity drainage is usually enough in moderate climates
In climates with sustained freezes below 20°F, consider a partial blowout on drip zones as well.
DIY vs. Hiring a Professional
Hiring a professional to winterize your irrigation system costs between $75 and $150 for a standard residential property. That price covers the labor, equipment, and the peace of mind that comes with knowing everything was done correctly.
DIY saves money upfront, but the risks are real. Using the wrong PSI can burst pipes. Missing a zone means you won’t know there’s damage until April. Some manufacturer warranties also require professional maintenance to stay valid.
If you’re in the Los Angeles area and want this handled properly, Robert’s Complete Care offers professional Irrigation System Services in Whittier and surrounding areas. Their team handles the full winterization process efficiently, so you’re not guessing whether it’s done right. If you haven’t set up your system yet, check out our previous guide on How to Install a Lawn Irrigation System before winter prep becomes your priority.
How to Reactivate Your Irrigation System in Spring
Once the last freeze has passed, here’s how to bring your system back online without causing pressure shock.
- Slowly open the main shut-off valve, not all at once
- Check every zone manually for sprinkler head damage or misalignment
- Test the backflow preventer before full system pressure is restored
- Reprogram your controller with your spring lawn maintenance schedule
- Inspect any insulated components you wrapped in the fall
Starting your system slowly prevents a water hammer, which is a sudden pressure surge that can crack pipes even in warm weather.
Common Winterization Mistakes to Avoid
Forgetting a single zone is the most costly mistake. One zone with standing water is all it takes for a serious problem.
Using a small shop compressor won’t deliver enough CFM to properly clear the lines. Renting the right equipment matters.
Ignoring the backflow preventer is expensive to learn the hard way. It needs to be drained and insulated separately, and replacement costs can top $300.
Waiting until the freeze warning means you’re calling irrigation companies at the same time as every other homeowner. Schedule early.
Not double-checking low points after the initial drain. Water settles. Walk the zones and confirm.
Winterization Checklist (Quick Reference)
- Main water supply shut off
- All zones drained or blown out
- Backflow preventer drained and insulated
- Above-ground pipes wrapped with foam insulation tape
- Controller set to rain mode or powered down
- Garden hoses disconnected and stored
- Outdoor faucets covered with insulated caps
- All valves and end caps closed
Final Thoughts
One of those things that takes a Saturday morning but saves you from a spring nightmare is learning how to winterize irrigation system. Choose the correct way for your system, don’t overlook the backflow preventer, and if you’re not sure, consult a pro. It’s always cheaper to stop something from happening than to fix it.
Want to skip the trouble and get it right? Robert’s Complete Care is here to serve you. We take care of all the winterization work for residents in Whittier and the nearby regions, so you don’t have to worry about your system at all this winter.
Contact us today to schedule your sprinkler winterization before the first freeze hits. Don’t wait until the last minute because spots fill up fast this time of year.
FAQs About Winterizing Your Irrigation System
Can you winterize your own irrigation system?
Yes, you can winterize your own irrigation system using the manual drain or automatic drain method if your system supports it. The blowout method is riskier for DIY because incorrect pressure levels can damage pipes. If you’re not confident with the equipment, hiring a pro is worth the cost.
What is the 30-30 rule for irrigation?
The 30-30 rule means watering for 30 minutes, then waiting 30 minutes before watering again. It prevents runoff by letting water soak into the soil between cycles. It’s especially useful on slopes or clay-heavy soil that absorbs water slowly.
How to turn off an irrigation system for the winter?
Turn off the main water supply, drain the pipes anyway you like, insulate any parts that are exposed, and set your controller to rain mode. That order covers the main processes for winterizing most home systems.
Will my sprinkler system freeze if the temperature drops to 32 degrees?
A short drop below 32°F might not hurt anything right away. Still, if the temperature stays at or below freezing for a long time, the water inside pipes and valves will freeze and expand. It’s best to finish the winterization process before the temperature drops below freezing all the time.
What temperature will pipes used for irrigation freeze?
Irrigation pipes typically begin to freeze when temperatures stay at or below 32°F for several hours. PVC pipe is more likely to break than polyethylene pipe since it doesn’t bend. Pipes that are underground are usually safer, although parts that are above ground and backflow preventers might still be damaged by mild freezing conditions.