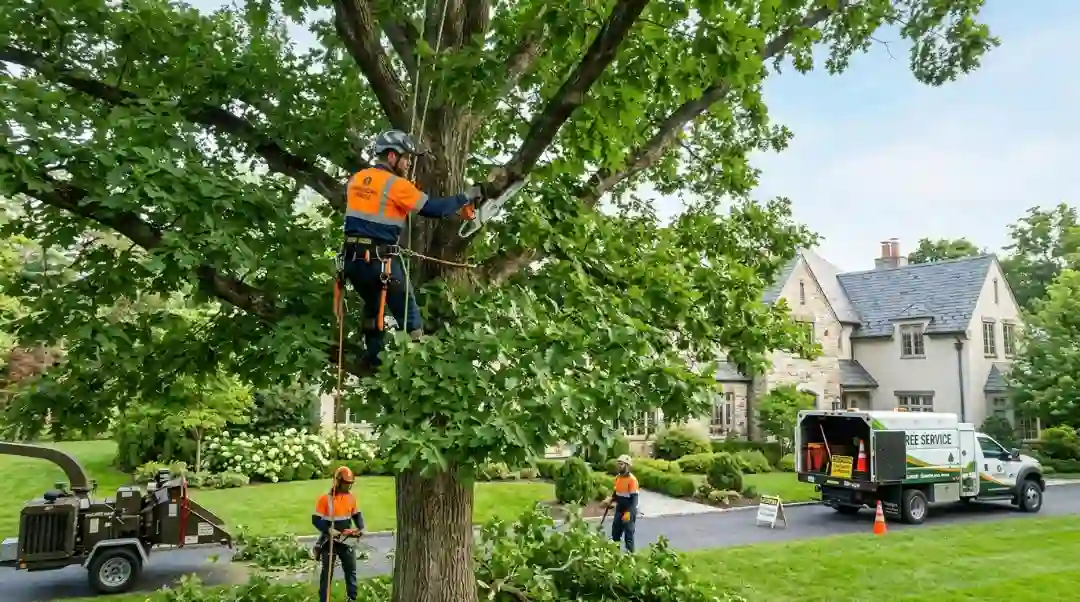
It seems easy to cut down a tree, but it’s not when you’re standing next to a 40-foot oak with a chainsaw in your hands. A lot of people don’t realize how much planning, the correct tools, and the right way to do things go into it. If you make a mistake while cutting, the tree could go through your fence, your car, or worse.
This guide shows you step by step how to cut down a tree safely, from figuring out what to do to cleaning up the wood. If you have a tiny problem in your backyard or a big leaning tree that could be dangerous, you’ll know what to do and when to call someone else.
Should You Cut Down the Tree Yourself or Hire a Pro?
Before picking up a chainsaw, you need to be honest about the situation. Trees under 20 feet with clear fall zones are generally safe for DIY removal. Anything taller, leaning toward a structure, or near power lines should go straight to a certified arborist. Getting this wrong puts lives and property at serious risk.
Here’s a simple size guide:
| Tree Height | Recommendation |
| Under 20 ft | DIY is typically safe |
| 20–40 ft | DIY with experience only |
| Over 40 ft | Hire a professional |
| Near power lines | Always hire a professional |
| Dead or diseased tree | Always hire a professional |
Signs the tree is too risky for DIY:
- Dead or hanging broken branches (called “widow makers”)
- Heavy lean toward a building, fence, or road
- Visible rot or fungal growth at the base
- Any proximity to electrical lines
If any of these apply, skip to the expert help section below.
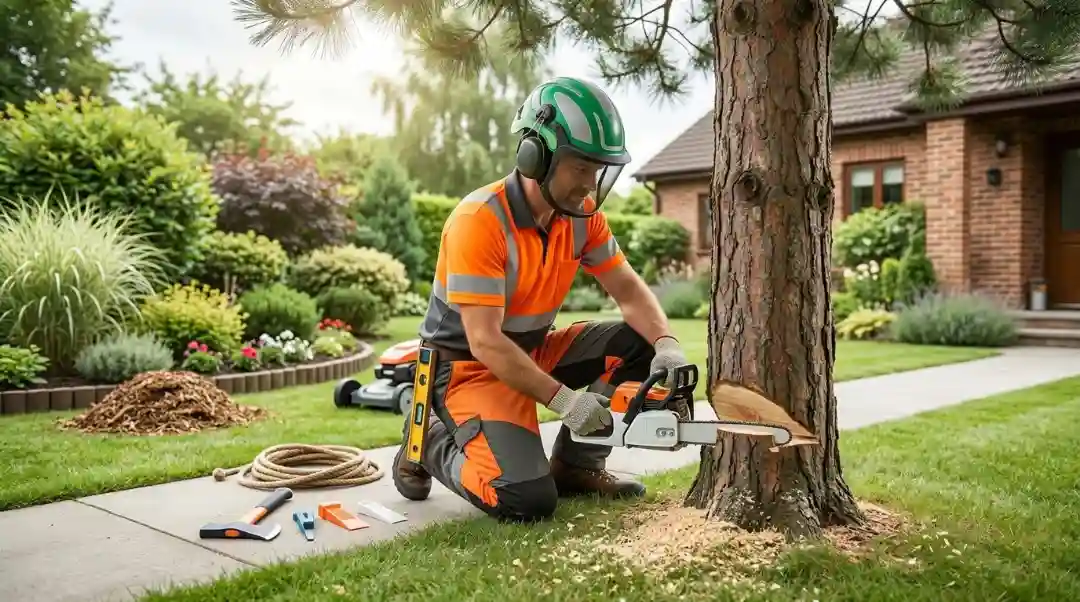
What You Need Before You Start
Safety Equipment Checklist
Don’t skip this step. Tree felling sends debris flying fast and from unexpected directions.
- Logger’s hard hat
- Face screen and safety glasses
- Noise-suppressing earmuffs
- Kevlar chainsaw chaps
- Steel-toed boots
- Heavy work gloves
Tools Required
- Chainsaw (bar length should exceed the tree’s diameter)
- Plastic felling wedges (at least two)
- Sledgehammer or maul to drive wedges
- Measuring tape
- Chalk or marking spray
Do You Need a Permit?
In many cities and counties, cutting down a tree without a permit is illegal, especially for trees over a certain diameter or on protected species lists. Check with your local municipality before you start. Some HOAs also have strict rules about tree removal.
A quick call to your city’s public works department or a 10-minute search on their website can save you a hefty fine.
How to Cut Down a Tree: Step-by-Step
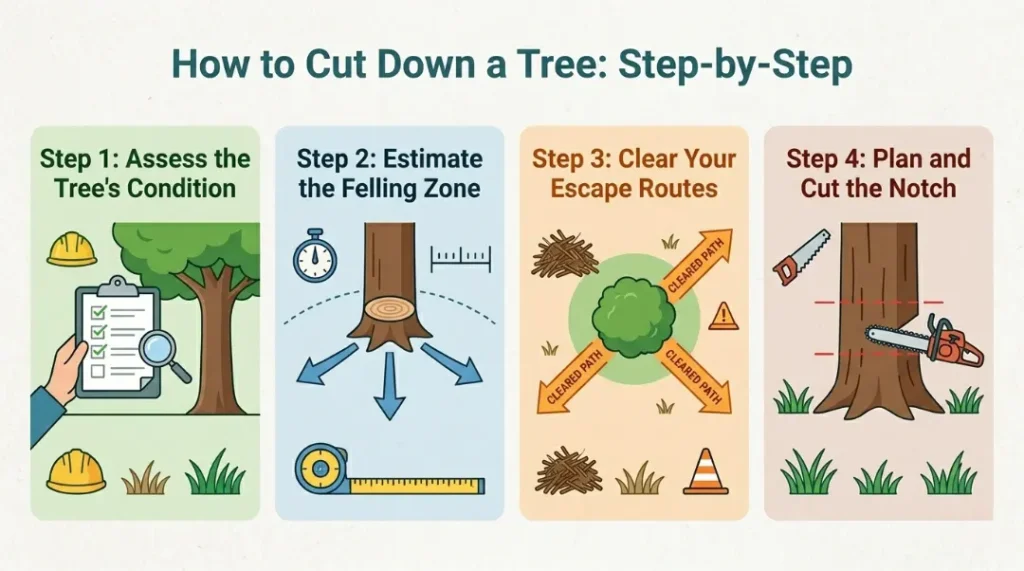
Step 1: Assess the Tree’s Condition
Walk completely around the tree. Look at the canopy, the trunk, and the base. A tree that’s heavier on one side, visibly diseased, or has a natural lean will fall in that direction regardless of your plans. Work with the tree’s natural tendency, not against it.
Step 2: Estimate the Felling Zone
Use the ax handle trick to estimate where the top of the tree will land. Hold an ax at arm’s length, close one eye, and back up until the top of the ax aligns with the treetop and the bottom aligns with the base. Where you’re standing is roughly where the treetop will hit the ground.
Always add extra buffer space. Trees are almost always taller than they look.
Step 3: Clear Your Escape Routes
Clear two escape routes on the opposite side of the fall direction, angled roughly 45 degrees apart. Remove brush, rocks, and anything you could trip over. When that tree starts moving, you need to walk away fast without looking at the ground.
The rule: Never run. Walk quickly and keep your eyes on the tree.
Step 4: Plan and Cut the Notch
The notch cut goes on the “fall side” of the tree, the side facing where you want it to land. The notch depth should be about one-fifth of the trunk’s diameter.
Here’s how to cut it:
- Make the top cut at a 60-degree downward angle
- Make the bottom cut horizontal
- The two cuts should meet cleanly, releasing a wedge of wood
Mark the notch with chalk before cutting so you stay accurate.
Step 5: Insert Felling Wedges (For Trees Over 18 Inches in Diameter)
Start cutting the felt from the other side when you’ve cut the notch. Stop as soon as the cut is deep enough and pound in two plastic felling wedges behind the bar. This keeps the tree from settling back and pinching your saw. Then finish the cut.
Step 6: Make the Felling Cut
Move to the back side of the tree, directly opposite the notch. Start the felling cut about one inch above the bottom of the notch. Cut toward the notch but stop before you reach it, leaving a strip of uncut wood called the hinge.
The hinge controls the fall direction. Never cut through it.
The moment the tree starts leaning, pull the saw out, engage the chain brake, and walk your escape route. Keep your eyes up on the falling tree the whole time.
Step 7: Limbing and Bucking
Once the tree is on the ground, the work isn’t over.
Limbing means removing branches from the trunk. Start from the base and work toward the top. Stand on the uphill side of the trunk. Cut branches on the opposite side of the tree from where you’re standing.
Bucking means cutting the trunk into manageable sections. Cut three-quarters through from the top, then roll the log and complete the cut from the other side. This prevents the saw from getting pinched as the log settles.
Best Time of Year to Cut Down a Tree
Cutting down a tree is best done in late winter or early spring, before new growth starts. The tree has fewer leaves, which makes it lighter and simpler to handle in the fall. Most places also have firmer footing, which makes cleaning up easier.
Late winter is also a good time to look for structural concerns in the trunk and canopy because the branches are barren.
Don’t cut when it’s windy, rainy, or icy. Wood that is wet is heavy, slippery, and hard to predict
Common Mistakes to Avoid When Felling a Tree
These are the mistakes that send people to the emergency room or end up costing thousands in property damage.
- Skipping the escape route. Most chainsaw injuries happen when someone trips while backing away from a falling tree. Clear the path before you make a single cut.
- Cutting through the hinge. The hinge is what guides the fall. Cut through it and the tree can go anywhere.
- Underestimating the fall zone. Trees fall farther than you think. The top of a 30-foot tree hits the ground 30 feet away. Plan accordingly.
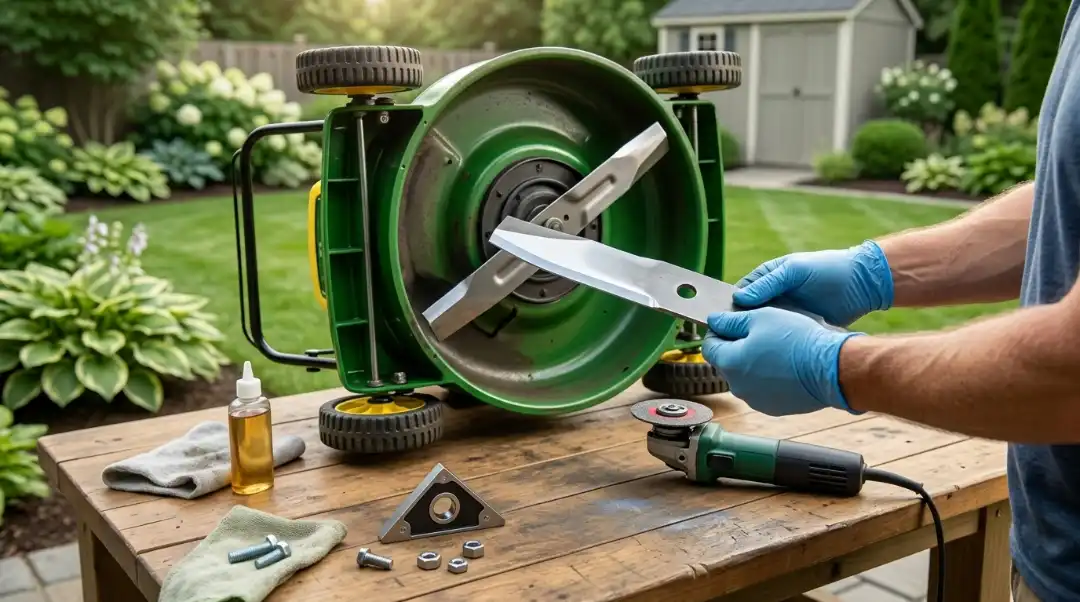
- Using a dull chainsaw. A sharp chain cuts smoothly. A dull one bucks, kicks back, and makes control harder. Check chain tension and sharpness before every use.
- Working alone. Always have someone with you. A lookout standing a few feet behind you, watching the canopy, can tap your shoulder when the tree starts to move. That tap can save your life.
DIY Tree Removal vs. Hiring an Arborist: Cost Comparison
Hiring a professional arborist typically costs between $300 and $2,000, depending on tree size, location, and complexity. DIY removal costs far less but carries significant risk if done incorrectly. For large or hazardous trees, the professional cost is almost always worth it.
| Method | Estimated Cost | Risk Level |
| DIY (small tree) | $50–$150 (equipment) | Low to Medium |
| DIY (large tree) | $150–$400 (equipment) | High |
| Professional arborist | $300–$2,000 | Managed by expert |
| Emergency removal (fallen tree) | $1,000–$5,000+ | N/A |
For professional tree and shrub services in Whittier, Robert’s Complete Care handles everything from single-tree removal to full property clearing. Their certified team assesses risk, manages the fall, and cleans up completely so you don’t have to.
What to Do After the Tree Falls
Remove the Stump
The stump won’t disappear on its own. Your options are:
- Stump grinder rental: $100–$200/day, effective for most stumps
- Chemical stump remover: Slow (months) but cheap
- Hire a professional: $150–$500 depending on size
Leaving a stump invites termites, fungal rot, and tripping hazards.
Store the Firewood Properly
Stack firewood off the ground on a rack to prevent moisture absorption. Keep the pile at least 20 feet from your home to avoid inviting rodents and insects. Cover the top of the stack but leave the sides open for airflow.
Green wood needs at least six months to season before burning. Burning unseasoned wood in a fireplace causes dangerous creosote buildup.
Final Thoughts
It’s really helpful to know how to cut down a tree the right way, but you shouldn’t rush it. It takes longer to plan than to cut. The safety gear is more important than the chainsaw. It’s just as crucial to know when to stop and contact a pro as it is to know how to make the cuts.
Don’t rush, work with a buddy, and never underestimate a tree. From the ground, they look lighter, shorter, and more random than they really are.
Robert’s Complete Care is ready to help if you’re in the Whittier area and the project seems too huge, too unsafe, or just not worth the weekend. Our professional team can safely and quickly remove trees, grind stumps, and clean up the whole property. Contact us today or come by to obtain a free quote, and we’ll take care of the rest.
Frequently Asked Questions
How do I know which direction a tree will fall?
A tree falls in the direction of its natural lean, heaviest branch load, or where the notch cut is made. You can use the ax handle trick to estimate the fall zone before cutting. If the lean is toward a structure, do not attempt DIY removal.
What size tree can I cut down myself?
Trees under 20 feet with a clear, open fall zone are generally manageable for an experienced DIYer. Trees over 20 feet, trees near structures, or trees with visible disease or rot should be handled by a certified arborist. Misjudging this is where most serious injuries happen.
Do I need a permit to cut down a tree?
Permit requirements vary by city, county, and HOA. Many areas require permits for trees above a certain trunk diameter or for protected species. Always check local regulations before chopping down trees on your property. A quick call to your local planning department takes five minutes and can prevent a significant fine.
How long does it take to cut down a tree?
A small tree under 20 feet can take one to two hours for an experienced person. A large tree can take a full day or more, especially when factoring in limbing, bucking, and stump removal. Factor in prep, cleanup, and drying time for firewood.
What should I do if my chainsaw gets pinched?
Never yank the saw. Stop the engine immediately and use a plastic felling wedge to open the cut and free the bar. This is exactly why you insert wedges during the felling cut on large trees. If you can’t free the saw safely, leave it and call a professional.